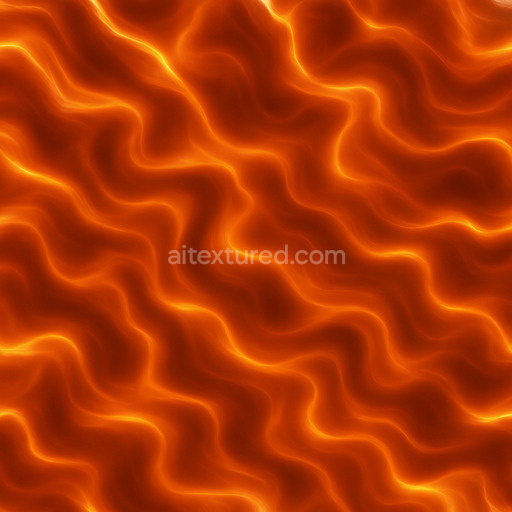
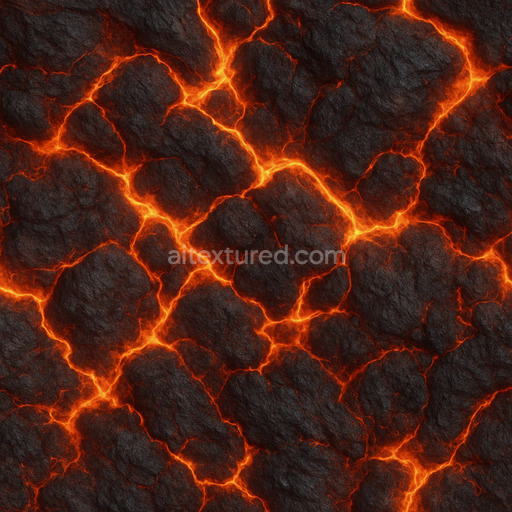
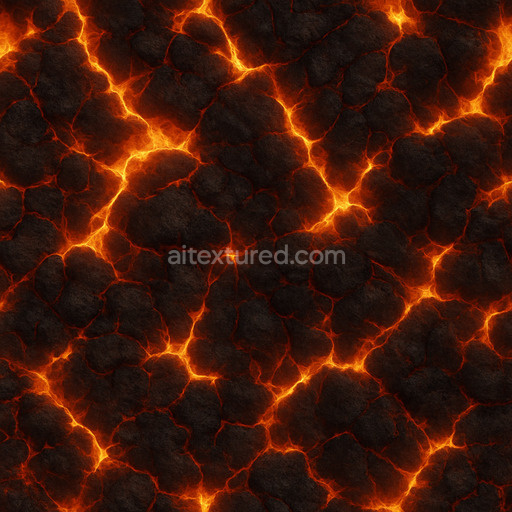
Lush Basalt Flow Texture
Seamless texture (tileable) · PNG, WEBP, PBR ZIP. License: AITextured Free Commercial License (FCL) v1.1. Free personal and commercial use. Raw resale, standalone redistribution, mirroring/scraping, competing asset packs, and AI/ML training are not allowed without written permission. Attribution is not required, but appreciated..

| ID | bright-lava-texture |
|---|---|
| Category | Lava |
| Formats | PNG, WEBP, PBR ZIP |
| Size | 1k (1024x1024px), 2k (2048x2048px), 4k (4096x4096px), 8k (8192x8192px) |
| Color | sRGB |
| Tileable | Yes |
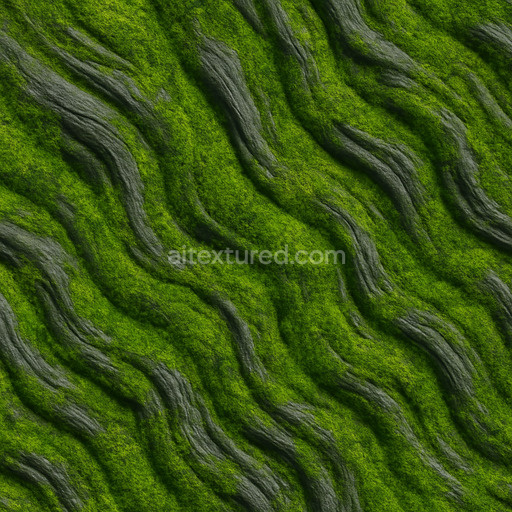
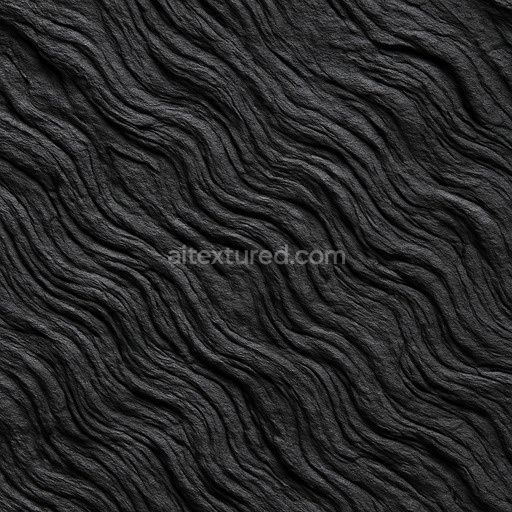
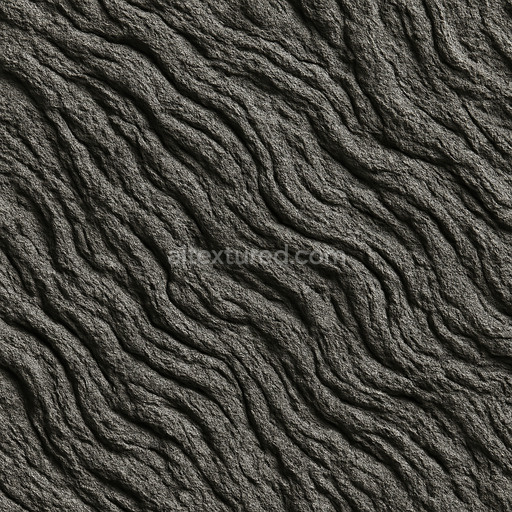
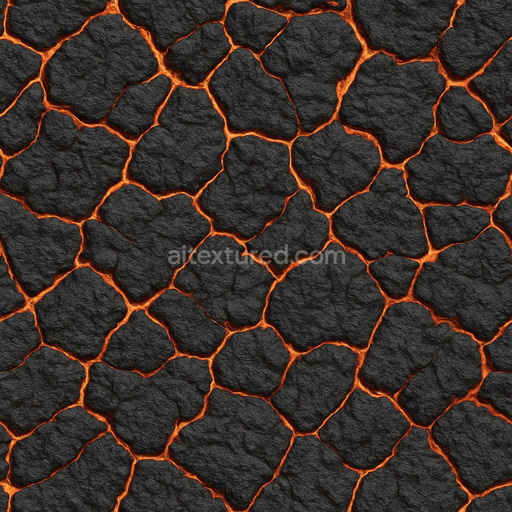
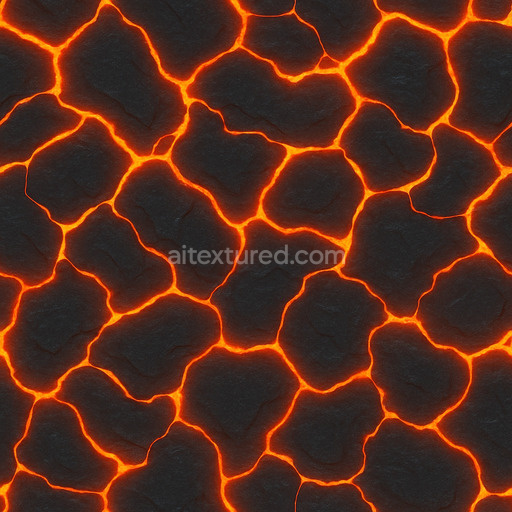
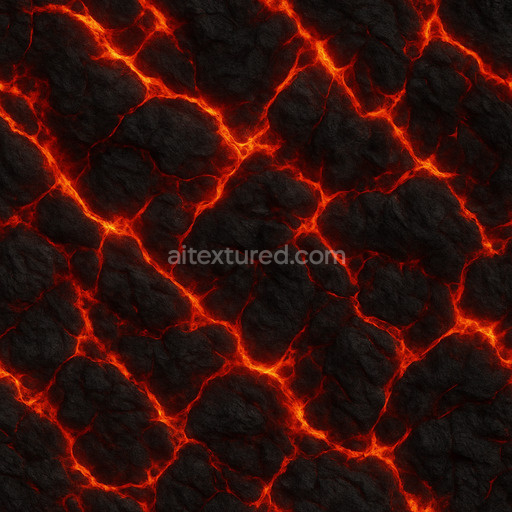
Discover the Bright Lava Texture a meticulously crafted seamless bright lava texture designed to bring vivid volcanic surfaces to your 3D projects with exceptional realism. This tileable bright lava texture captures the intricate mineral composition and organic flow of molten rock featuring a rich base substrate of oxidized silicate minerals fused with iron-rich pigments that create intense glowing reds and deep charcoals. The texture’s surface finish simulates a semi-glossy slightly rough crust formed by rapid cooling with microfractures and porous details that reflect natural weathering and cooling patterns. These materials translate into PBR channels with a richly varied BaseColor emphasizing the fiery hues and subtle blackened veins a Normal map that accurately conveys the uneven cracked lava crust and a Roughness map balancing glossy molten areas with matte cooled rock. The Metallic channel remains minimal to reflect the non-metallic nature of volcanic rock while Ambient Occlusion enhances shadow depth around fissures and crevices. Height and Displacement maps emphasize the rugged three-dimensional relief of cooling lava flows adding tactile realism in close-up renders.
Rendered at up to 8K ultra-high resolution this seamless bright lava texture is optimized for real-time scenes as well as cinematic quality renders ensuring consistent detail when tiled over large surfaces. It is fully compatible and works out-of-the-box with leading 3D platforms such as Blender Unity and Unreal Engine supporting fast iteration loops for artists and developers. The AI-driven creation pipeline prioritizes micro-detail and structural consistency delivering a production-ready asset that maintains visual coherence across multiple scales. For best results match texel density carefully across assets and keep UV layouts uniform to avoid pattern distortion and stretching. Adjusting the Roughness channel can help fine-tune the balance between glowing molten highlights and cooled matte areas while subtle use of Height or parallax mapping can enhance the perceived depth of lava fissures in interactive environments.
This bright lava texture is ideal for level dressing material studies and enhancing visual storytelling in volcanic or fiery environments. Its vivid naturally inspired colorants and surface intricacies make it a versatile addition to your material library enabling faster creative workflows and more believable environmental effects. Whether used in real-time game engines or offline renderers this tileable bright lava texture offers an authentic immersive foundation for any project requiring dynamic volcanic surfaces with consistent high-quality detail and seamless tiling.
The bright lava texture features a detailed PBR texture bright lava texture composition with realistic lava textures and a 3D preview that highlights its PBR appearance and surface intricacies.
Import the texture maps into Blender with sRGB color space for albedo/base color and Non-Color for normal, roughness, metallic, AO, height, and ORM maps. Connect normal maps through a Normal Map node, then adjust UV scale with a Mapping node so the material repeats naturally on your model.
For the full step-by-step setup, see How to Use Seamless Textures in Blender. Browse related material examples in wood, concrete, and metal.
Yes. This texture is designed as a seamless tileable PBR material, so it can repeat across large surfaces without visible borders.
You can download PNG/WEBP versions and use 1K, 2K, 4K and 8K download options when available on the page.
Yes. The download options and engine-mapped ZIP workflow are designed for Blender, Unreal Engine, Unity Standard, URP and HDRP material pipelines.
Yes. The texture is available under the AITextured free commercial license. Review the license page for redistribution and AI-training restrictions.

Generate, preview, and export seamless PBR materials for Blender, Unity, and Unreal Engine—directly in your browser.
AI text-to-texture: type a prompt and get a seamless, tileable base image ready for PBR workflows (great starting point for materials).
Create a full PBR set (Normal, Roughness, AO, Metallic, etc.) from a single image. Seamless and tiling-friendly.
Instant WebGL viewer: inspect materials on a sphere, plane, and cube. Check tiling and lighting in real time.
Re-packages maps per engine: Unreal (BaseColor + ORM), Unity (Mask/MetallicSmoothness), Blender (separate channels).
PNG ↔ JPG ↔ SVG: fast convert, SVG rasterize, embed/trace options, quality & background controls.