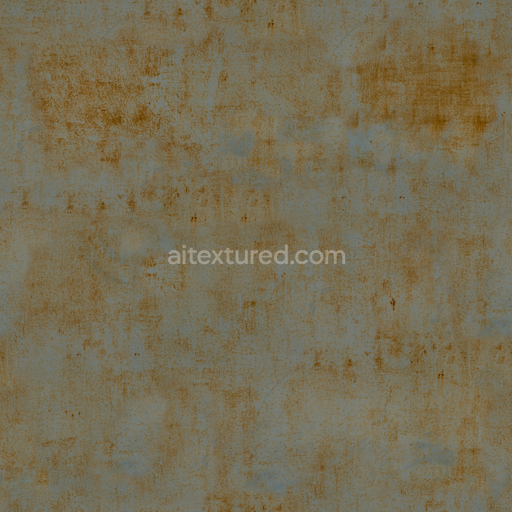
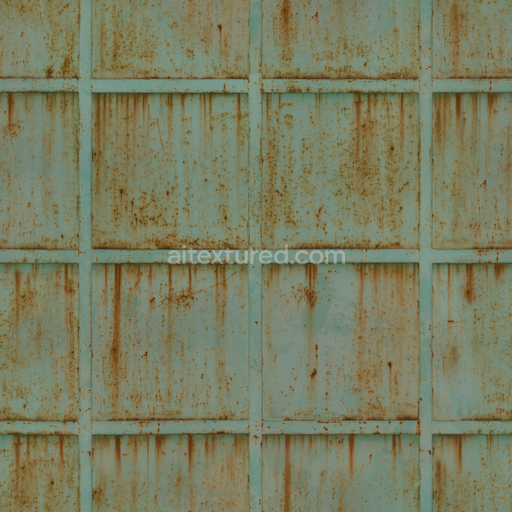
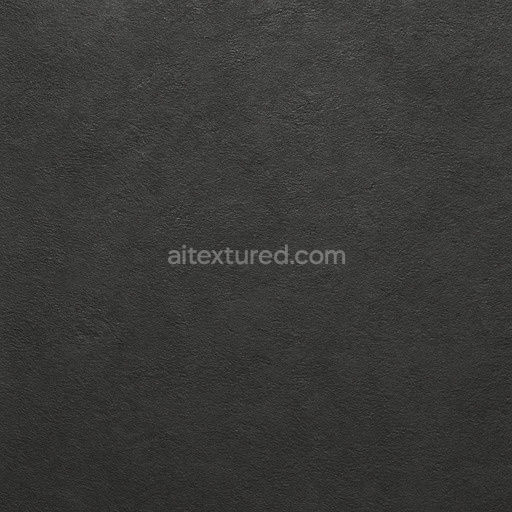
Metal Sheet - Metal Rusty Rust Rusted Corroded Sheet
Seamless texture (tileable) · PNG, WEBP, PBR ZIP. License: AITextured Free Commercial License (FCL) v1.1. Free personal and commercial use. Raw resale, standalone redistribution, mirroring/scraping, competing asset packs, and AI/ML training are not allowed without written permission. Attribution is not required, but appreciated..

| ID | corrugated-metal-sheets-with-cuts-and-scratches-free-pbr |
|---|---|
| Category | Metal |
| Formats | PNG, WEBP, PBR ZIP |
| Size | 1k (1024x1024px), 2k (2048x2048px), 4k (4096x4096px), 8k (8192x8192px) |
| Color | sRGB |
| Tileable | Yes |
This high-quality seamless PBR texture presents an authentic and highly detailed depiction of corrugated metal sheets, distinguished by visible cuts and scratches that emphasize a weathered, industrial character. The base substrate consists of a durable metal alloy, engineered into a ridged, corrugated form that enhances both structural strength and visual interest. Its surface finish reveals a complex interplay of slight oxidation and brushed metallic areas, with natural variations in coloration caused by oxide layers and environmental exposure. These subtle changes in tone and texture reflect the material’s aged nature, showcasing fine abrasions alongside deeper incisions that collectively contribute to a realistic portrayal of worn metal surfaces.
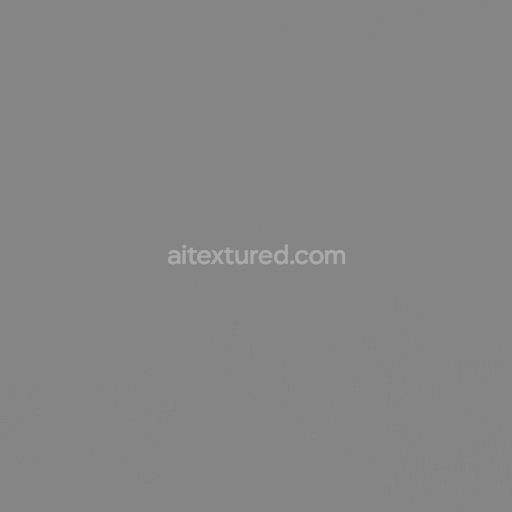
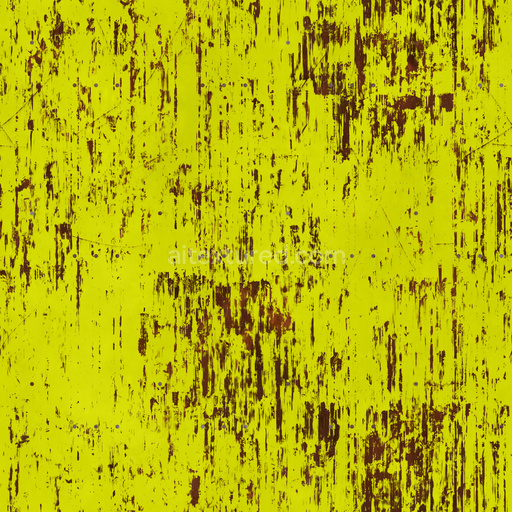
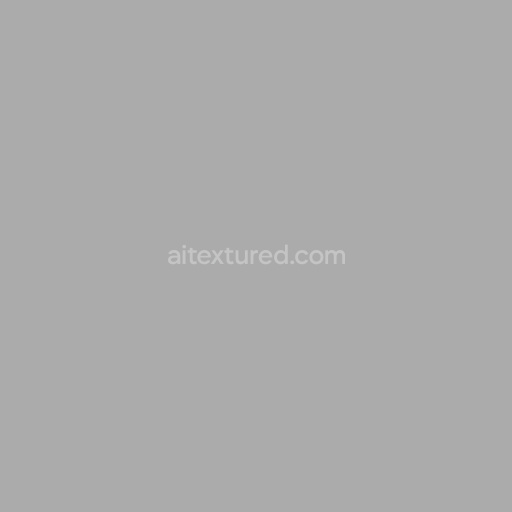
The material composition is primarily ferrous-based, featuring layered oxide films that influence the texture’s color gradients visible in the BaseColor or Albedo channel. The Normal map intricately captures the depth of the corrugations along with surface imperfections such as scratches, dents, and cut edges, adding dimensional realism. Variations in the Roughness channel simulate a nuanced surface where polished and weathered patches coexist, affecting light reflection and glossiness to enhance authenticity. The Metallic channel maintains a high value indicative of the metal’s inherent reflective properties, while Ambient Occlusion enriches the perception of depth by accentuating crevices and edges. Height and Displacement maps further define the ridged profile and damaged areas, enabling enhanced surface detail and realistic parallax effects in 3D renderings.
Rendered at up to 8K resolution, this seamless texture is optimized for seamless integration into a wide range of workflows, including Blender, Unreal Engine, and Unity, ensuring crisp, detailed close-ups without pixelation. Its seamless design allows for flexible tiling across extensive surfaces, making it ideal for large-scale industrial scenes or architectural visualizations. For practical application, adjusting the UV scale to match the real-world dimensions of corrugated metal sheets will ensure accurate proportions, while fine-tuning the Roughness channel can balance the surface’s reflectivity to achieve the desired look—whether a more polished finish or a heavily weathered appearance.
Import the texture maps into Blender with sRGB color space for albedo/base color and Non-Color for normal, roughness, metallic, AO, height, and ORM maps. Connect normal maps through a Normal Map node, then adjust UV scale with a Mapping node so the material repeats naturally on your model.
For the full step-by-step setup, see How to Use Seamless Textures in Blender. Browse related material examples in wood, concrete, and metal.
Yes. This texture is designed as a seamless tileable PBR material, so it can repeat across large surfaces without visible borders.
You can download PNG/WEBP versions and use 1K, 2K, 4K and 8K download options when available on the page.
Yes. The download options and engine-mapped ZIP workflow are designed for Blender, Unreal Engine, Unity Standard, URP and HDRP material pipelines.
Yes. The texture is available under the AITextured free commercial license. Review the license page for redistribution and AI-training restrictions.


Build, preview, and export seamless PBR materials. Generate full map sets from a single image, inspect them in a real-time WebGL viewer, and re-package maps for Unreal, Unity, and Blender—directly in your browser.
AI text-to-texture: type a prompt and get a seamless, tileable base image ready for PBR workflows (great starting point for materials).
Create a full PBR set (Normal, Roughness, AO, Metallic, etc.) from a single image. Seamless and tiling-friendly.
Instant WebGL viewer: inspect materials on a sphere, plane, and cube. Check tiling and lighting in real time.
Re-packages maps per engine: Unreal (BaseColor + ORM), Unity (Mask/MetallicSmoothness), Blender (separate channels).
PNG ↔ JPG ↔ SVG: fast convert, SVG rasterize, embed/trace options, quality & background controls.