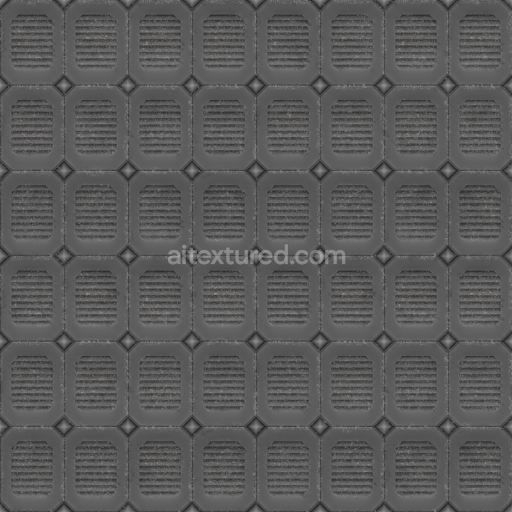
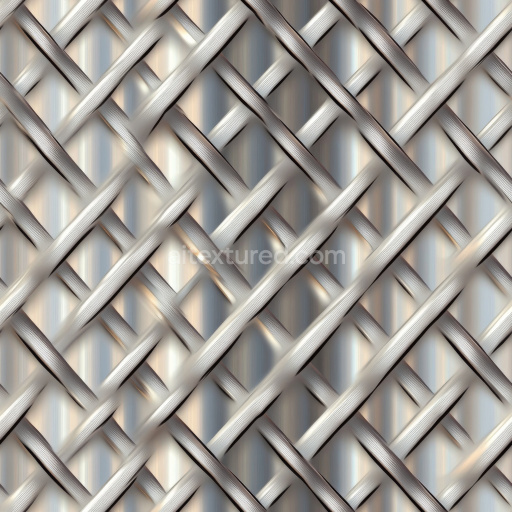
Archviz Floor Grate Grill Metal Sci Scifi - Seamless PBR Texture
Seamless texture (tileable) · PNG, WEBP, PBR ZIP. License: AITextured Free Commercial License (FCL) v1.1. Free personal and commercial use. Raw resale, standalone redistribution, mirroring/scraping, competing asset packs, and AI/ML training are not allowed without written permission. Attribution is not required, but appreciated..

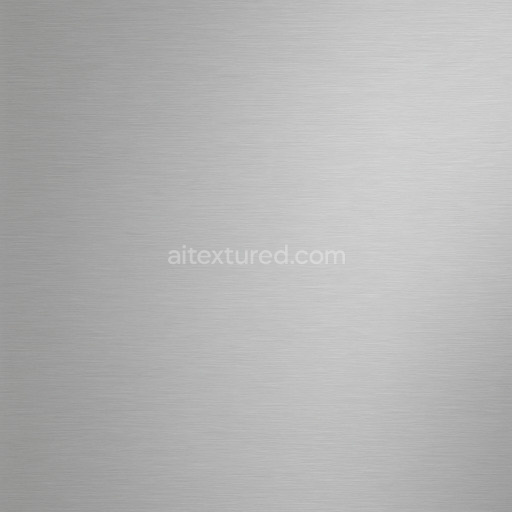
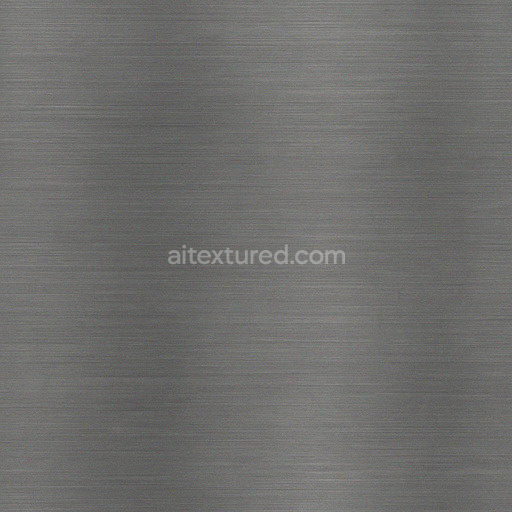
| ID | powder-coated-metal-smooth-satin |
|---|---|
| Category | Metal |
| Formats | PNG, WEBP, PBR ZIP |
| Size | 1k (1024x1024px), 2k (2048x2048px), 4k (4096x4096px), 8k (8192x8192px) |
| Color | sRGB |
| Tileable | Yes |
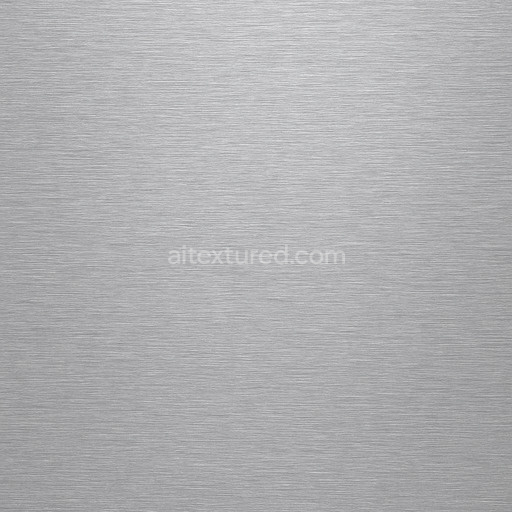
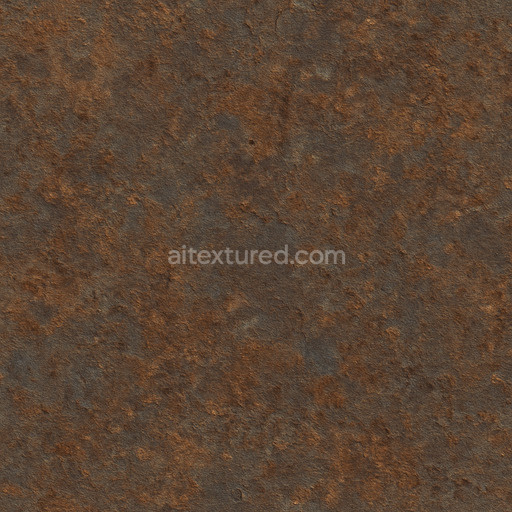
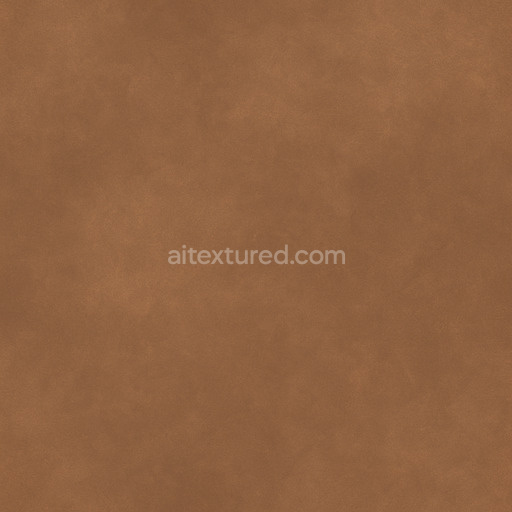
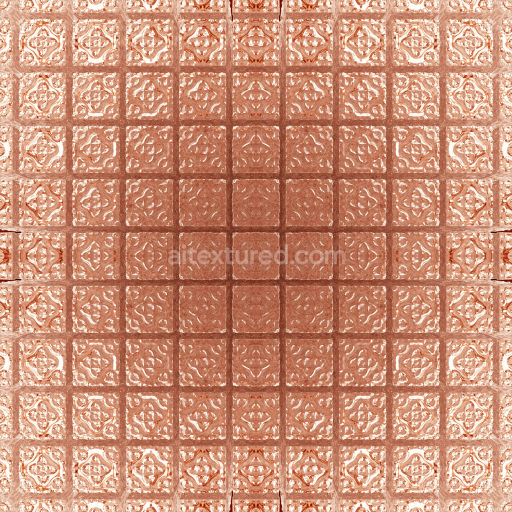
The powder coated metal smooth satin texture is a meticulously crafted material designed specifically for metal surfaces featuring a seamless and tileable finish that enhances both aesthetic appeal and functional realism. This texture simulates a metal substrate that has been treated with a durable powder coating process where finely ground pigment particles are electrostatically applied and then cured under heat to form a smooth satin-like surface. The base metal provides excellent strength and rigidity while the powder coating acts as a protective polymeric binder embedding pigments and fine aggregates to create a consistent low-porosity finish. This results in a surface that is resistant to weathering corrosion and abrasion while maintaining a subtle sheen without excessive gloss. The satin finish is characterized by a balanced reflectivity that is neither fully matte nor highly polished giving it a sophisticated understated look ideal for modern architectural and industrial projects.
In terms of PBR workflow the powder coated metal smooth satin texture offers a comprehensive map set that includes ultra-high-resolution baseColor/albedo maps showcasing the uniform and subtly pigmented coloration typical of powder coatings. The normal map captures delicate surface variations and the faint texture of the cured powder layer enhancing the perception of depth and fine detail. Roughness maps provide precise control over the satin finish’s semi-reflective qualities allowing subtle light diffusion that avoids harsh highlights while preserving clarity. The metallic map accurately represents the underlying metal substrate’s reflective properties while the ambient occlusion map adds realistic shadowing in crevices and around surface imperfections amplifying depth perception. The height/displacement map introduces micro-relief corresponding to the powder’s fine granular texture enhancing realism by simulating slight surface variations and lending tactile authenticity to large UV islands without visible seams.
This tileable powder coated metal smooth satin texture is optimized for seamless repetition on expansive surfaces and complex 3D models making it an excellent choice for environments requiring consistent metal finishes such as architectural visualization concept prototyping and look development pipelines. It supports high-resolution workflows up to 8K ensuring crisp detail retention when zoomed or rendered at close range. Fully compatible with Blender Unreal Engine and Unity it integrates effortlessly into modern 3D pipelines accelerating iteration and maintaining visual fidelity. For optimal results maintaining uniform UV scaling and consistent texel density is recommended to prevent pattern distortion or stretching. Fine-tuning the roughness map can help achieve the desired satin balance controlling how light interacts with the surface—from soft matte reflections to gentle highlights—while subtle adjustments to the height map can enhance perceived depth without compromising seamless tiling. This careful balance of material composition and technical detail makes this PBR material powder coated metal smooth satin a reliable and versatile resource for creating realistic visually appealing metal surfaces in any project.
The seamless powder coated metal smooth satin finish offers realistic metal textures with a detailed 3D preview that accurately represents its PBR appearance.
Import the texture maps into Blender with sRGB color space for albedo/base color and Non-Color for normal, roughness, metallic, AO, height, and ORM maps. Connect normal maps through a Normal Map node, then adjust UV scale with a Mapping node so the material repeats naturally on your model.
For the full step-by-step setup, see How to Use Seamless Textures in Blender. Browse related material examples in wood, concrete, and metal.
Yes. This texture is designed as a seamless tileable PBR material, so it can repeat across large surfaces without visible borders.
You can download PNG/WEBP versions and use 1K, 2K, 4K and 8K download options when available on the page.
Yes. The download options and engine-mapped ZIP workflow are designed for Blender, Unreal Engine, Unity Standard, URP and HDRP material pipelines.
Yes. The texture is available under the AITextured free commercial license. Review the license page for redistribution and AI-training restrictions.

Build, preview, and export seamless PBR materials. Generate full map sets from a single image, inspect them in a real-time WebGL viewer, and re-package maps for Unreal, Unity, and Blender—directly in your browser.
AI text-to-texture: type a prompt and get a seamless, tileable base image ready for PBR workflows (great starting point for materials).
Create a full PBR set (Normal, Roughness, AO, Metallic, etc.) from a single image. Seamless and tiling-friendly.
Instant WebGL viewer: inspect materials on a sphere, plane, and cube. Check tiling and lighting in real time.
Re-packages maps per engine: Unreal (BaseColor + ORM), Unity (Mask/MetallicSmoothness), Blender (separate channels).
PNG ↔ JPG ↔ SVG: fast convert, SVG rasterize, embed/trace options, quality & background controls.