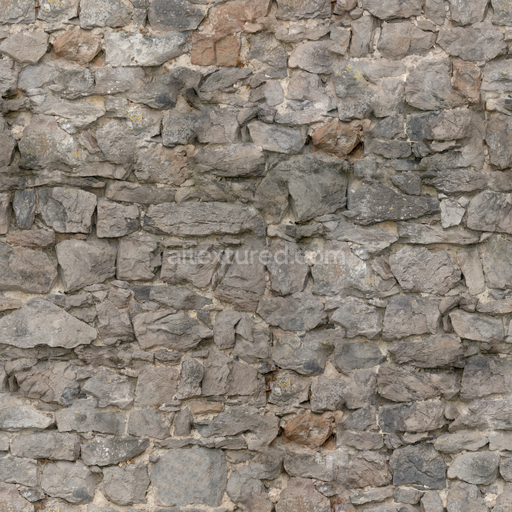
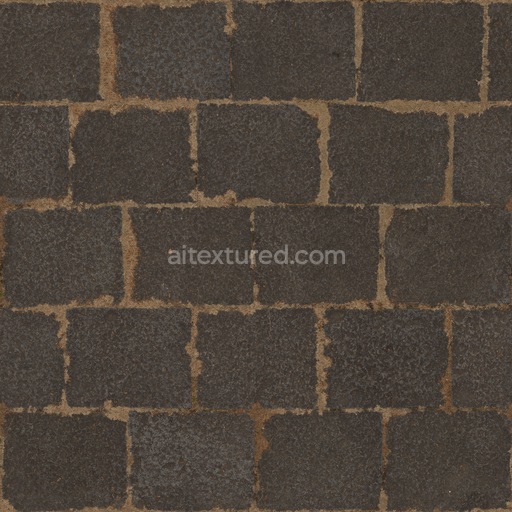
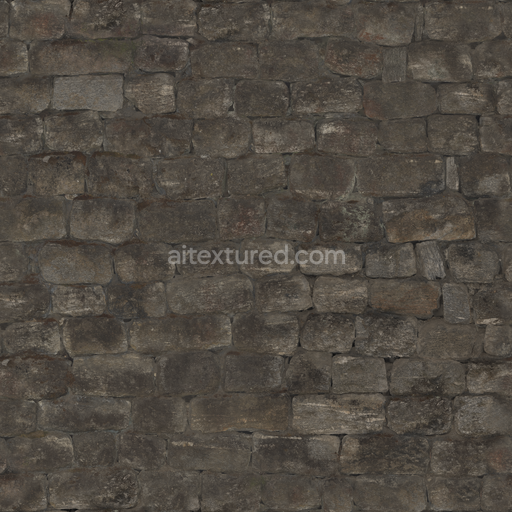
Wall Stacked Stones - Rough Wall Stacked Stacked Stones Castle
Seamless texture (tileable) · PNG, WEBP, PBR ZIP. License: AITextured Free Commercial License (FCL) v1.1. Free personal and commercial use. Raw resale, standalone redistribution, mirroring/scraping, competing asset packs, and AI/ML training are not allowed without written permission. Attribution is not required, but appreciated..

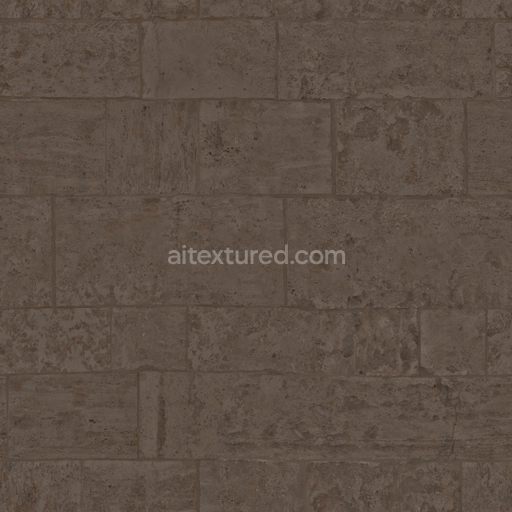
| ID | ancient-sandstone-seamless-texture |
|---|---|
| Category | Rock |
| Formats | PNG, WEBP, PBR ZIP |
| Size | 1k (1024x1024px), 2k (2048x2048px), 4k (4096x4096px), 8k (8192x8192px) |
| Color | sRGB |
| Tileable | Yes |
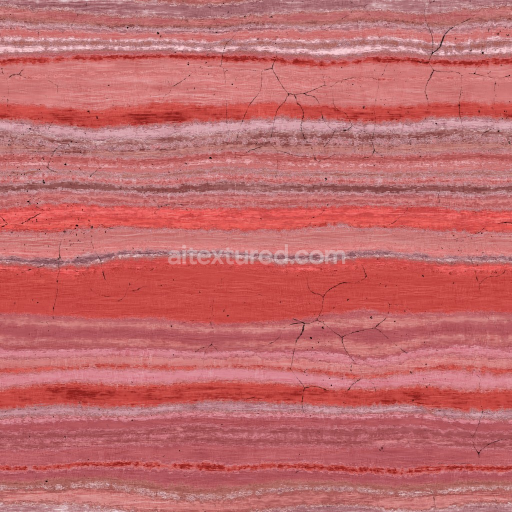
The Ancient Sandstone Seamless Texture captures the timeless essence of weathered sandstone a sedimentary rock composed primarily of sand-sized mineral particles bound together by natural cementing materials such as silica calcium carbonate or iron oxides. This texture reflects the intricate interplay of mineral grains subtle porosity and natural weathering effects that create a tactile organic surface. The base substrate exhibits a warm earthy palette with muted ochres and soft reddish hues enhanced by fine oxide layers and natural pigmentation. Its surface finish is matte and gently roughened mimicking the worn slightly uneven texture of ancient stone exposed to wind and water erosion over centuries. The grain orientation and aggregate distribution are subtly varied avoiding artificial repetition and conveying a realistic stratification typical of genuine sandstone formations.
Technically tuned for physically based rendering (PBR) workflows this tileable ancient sandstone seamless texture includes detailed maps that bring out its material complexity across multiple channels. The BaseColor (Albedo) map captures the natural color variations and pigment depth while the Normal map provides finely detailed surface relief to simulate the stone’s subtle bumps and crevices. The Roughness channel is calibrated to reflect the stone’s matte non-reflective finish with slight variations to emphasize weathered patches. The Metallic channel remains near zero as sandstone is non-metallic maintaining realism. Ambient Occlusion enhances shadowing in deeper crevices adding depth without harsh contrasts and the Height/Displacement map supports enhanced surface breakup for realistic parallax effects or tessellation in real-time engines. All these maps are provided in high resolution up to 8K ensuring exceptional clarity and scalability for large surfaces without visible seams.
This seamless ancient sandstone texture is optimized for rapid integration into popular 3D software and game engines such as Blender Unity and Unreal Engine providing predictable repeatable results suitable for environment art architectural visualization concept prototyping and quick look development. Its consistent tiling and artifact-free detail make it ideal for creating expansive rocky landscapes or detailed interior surfaces where natural stone is featured. A practical tip for best results is to adjust the UV scale carefully to balance the fine grain detail with overall surface size and to slightly increase roughness values in your shader to replicate the diffuse weathered finish without appearing overly polished or artificial.
The generated ancient sandstone seamless texture offers a highly detailed rock texture with a consistent pattern ideal for 3D preview and PBR rendering applications.
Import the texture maps into Blender with sRGB color space for albedo/base color and Non-Color for normal, roughness, metallic, AO, height, and ORM maps. Connect normal maps through a Normal Map node, then adjust UV scale with a Mapping node so the material repeats naturally on your model.
For the full step-by-step setup, see How to Use Seamless Textures in Blender. Browse related material examples in wood, concrete, and metal.
Yes. This texture is designed as a seamless tileable PBR material, so it can repeat across large surfaces without visible borders.
You can download PNG/WEBP versions and use 1K, 2K, 4K and 8K download options when available on the page.
Yes. The download options and engine-mapped ZIP workflow are designed for Blender, Unreal Engine, Unity Standard, URP and HDRP material pipelines.
Yes. The texture is available under the AITextured free commercial license. Review the license page for redistribution and AI-training restrictions.


Generate, preview, and export seamless PBR materials for Blender, Unity, and Unreal Engine—directly in your browser.
AI text-to-texture: type a prompt and get a seamless, tileable base image ready for PBR workflows (great starting point for materials).
Create a full PBR set (Normal, Roughness, AO, Metallic, etc.) from a single image. Seamless and tiling-friendly.
Instant WebGL viewer: inspect materials on a sphere, plane, and cube. Check tiling and lighting in real time.
Re-packages maps per engine: Unreal (BaseColor + ORM), Unity (Mask/MetallicSmoothness), Blender (separate channels).
PNG ↔ JPG ↔ SVG: fast convert, SVG rasterize, embed/trace options, quality & background controls.