
Bubble Clusters Foam Liquid Droplets Oil Slick Iridescence Pearlescent
Seamless texture (tileable) · PNG, WEBP, PBR ZIP. License: AITextured Free Commercial License (FCL) v1.1. Free personal and commercial use. Raw resale, standalone redistribution, mirroring/scraping, competing asset packs, and AI/ML training are not allowed without written permission. Attribution is not required, but appreciated..
| ID | seamless-3d-texture-pbr-8k-digital-noise-pixelated-static-interference-glitch-art-distortion-pixel-noise |
|---|---|
| Category | Abstract |
| Formats | PNG, WEBP, PBR ZIP |
| Size | 1k (1024x1024px), 2k (2048x2048px), 4k (4096x4096px), 8k (8192x8192px) |
| Color | sRGB |
| Tileable | Yes |
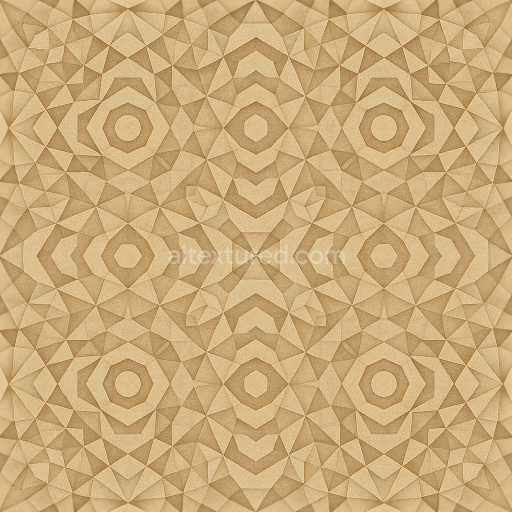
This seamless 3D texture is crafted to emulate a complex digital noise surface with pixelated static interference and glitch art distortion patterns. At its core, the material suggests a synthetic polymer substrate, akin to a matte plastic or resin panel, embedded with microscopic digital artifacts that mimic pixel noise and chaotic grain structures. The form is essentially a flat plane interrupted by irregular, fractal-like pixel clusters and static lines, creating an abstract, non-repetitive pattern that tiles flawlessly. Its geometry is minimal, relying on subtle height variations and noise-based displacement to convey depth and surface irregularities without obvious geometric repetition.
The texture composition involves a base layer representing the polymer or resin panel, which acts as the substrate, providing uniform support and consistent porosity near zero, ensuring a smooth yet detailed surface. The digital noise and glitch effects correspond to aggregates of pixelated interference patterns, visualized as micro-grain clusters and static bands. These act like embedded particles or fibers within the substrate, contributing to the overall roughness and micro-surface complexity. Surface finish is matte to semi-matte, with a finely diffused reflection characteristic of non-metallic synthetic materials. Colorants are primarily neutral grayscale tones, with occasional high-contrast black and white pixels, simulating digital signal noise and color channel distortions typical to glitch art aesthetics.
Within the PBR framework, the BaseColor (Albedo) channel captures the intricate grayscale and monochrome pixel noise, delivering high-fidelity detail that emphasizes contrast between static interference lines and background grain. The Normal map translates subtle height variations and pixel edges into surface relief, enhancing the tactile illusion of digital distortion. Roughness is moderately high but varies locally to mimic the irregular surface finish, with smoother patches representing less noisy areas and rougher zones where pixel clusters accumulate. Metallic values remain near zero, consistent with the non-metallic polymer base. Ambient Occlusion accentuates crevices and pixel edges, deepening the perception of layered digital static, while the Height/Displacement map enables nuanced parallax effects that simulate pixel depth and interference waves.
Rendered at an ultra-high 8K resolution, this texture is optimized for use in Blender, Unreal Engine, and Unity, ensuring exceptional clarity even on large-scale digital canvases or close-up renders. Its seamless tiling capability maintains continuous visual disruption without visible borders, essential for immersive digital environments or futuristic UI backdrops. For practical application, adjusting the UV scale to smaller increments enhances the pixelated effect, creating denser noise patterns. Additionally, tuning the roughness channel allows fine control over surface reflectivity, balancing matte and semi-glossy finishes to suit different lighting conditions. Combining height and normal maps can further refine the glitch distortion’s depth perception, enriching visual complexity in real-time projects or high-resolution renders.
Import the texture maps into Blender with sRGB color space for albedo/base color and Non-Color for normal, roughness, metallic, AO, height, and ORM maps. Connect normal maps through a Normal Map node, then adjust UV scale with a Mapping node so the material repeats naturally on your model.
For the full step-by-step setup, see How to Use Seamless Textures in Blender. Browse related material examples in wood, concrete, and metal.
Yes. This texture is designed as a seamless tileable PBR material, so it can repeat across large surfaces without visible borders.
You can download PNG/WEBP versions and use 1K, 2K, 4K and 8K download options when available on the page.
Yes. The download options and engine-mapped ZIP workflow are designed for Blender, Unreal Engine, Unity Standard, URP and HDRP material pipelines.
Yes. The texture is available under the AITextured free commercial license. Review the license page for redistribution and AI-training restrictions.


Generate, preview, and export seamless PBR materials for Blender, Unity, and Unreal Engine—directly in your browser.
AI text-to-texture: type a prompt and get a seamless, tileable base image ready for PBR workflows (great starting point for materials).
Create a full PBR set (Normal, Roughness, AO, Metallic, etc.) from a single image. Seamless and tiling-friendly.
Instant WebGL viewer: inspect materials on a sphere, plane, and cube. Check tiling and lighting in real time.
Re-packages maps per engine: Unreal (BaseColor + ORM), Unity (Mask/MetallicSmoothness), Blender (separate channels).
PNG ↔ JPG ↔ SVG: fast convert, SVG rasterize, embed/trace options, quality & background controls.