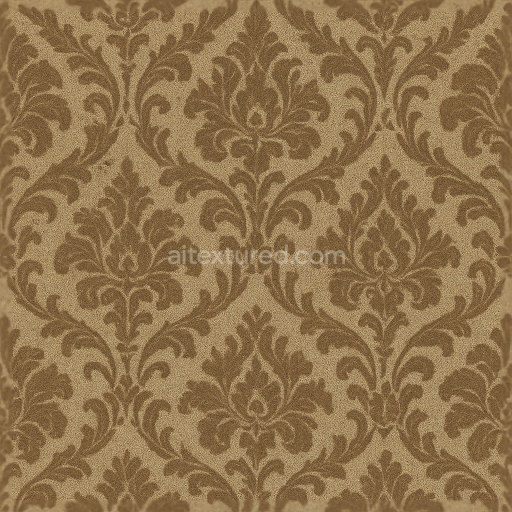
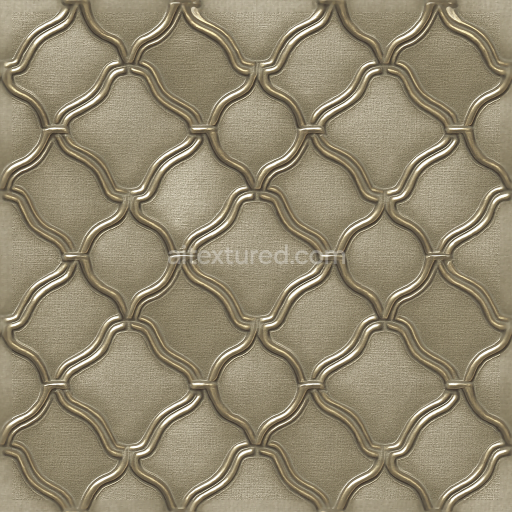
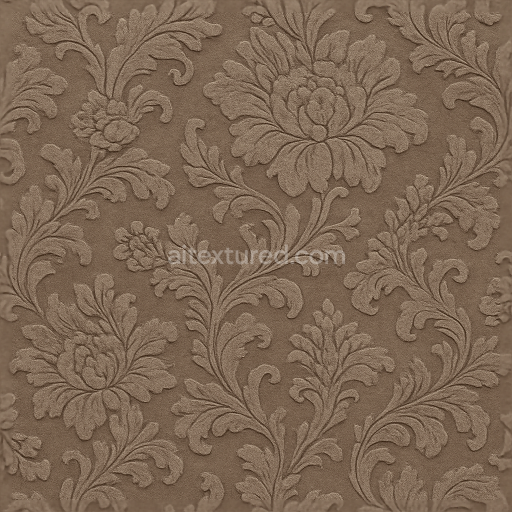
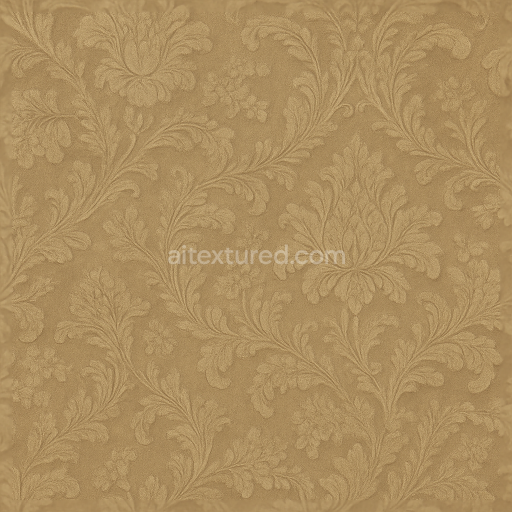
Vintage Damask Floral Wallpaper With Flocked Raised Velvet And Textured Linen Weave
Seamless texture (tileable) · PNG, WEBP, PBR ZIP. License: AITextured Free Commercial License (FCL) v1.1. Free personal and commercial use. Raw resale, standalone redistribution, mirroring/scraping, competing asset packs, and AI/ML training are not allowed without written permission. Attribution is not required, but appreciated..

| ID | seamless-3d-texture-pbr-8k-embossed-brocade-wallpaper-with-satin-finish |
|---|---|
| Category | Wallpaper |
| Formats | PNG, WEBP, PBR ZIP |
| Size | 1k (1024x1024px), 2k (2048x2048px), 4k (4096x4096px), 8k (8192x8192px) |
| Color | sRGB |
| Tileable | Yes |
This seamless 3D texture represents a richly detailed brocade wallpaper crafted to simulate an embossed fabric pattern with a luxurious satin finish. The base material is a finely woven textile substrate typically cotton or silk blend onto which ornate floral and ornamental designs are raised through embossing. This embossing effect creates a pronounced geometric relief giving the wallpaper depth and a tactile quality reminiscent of traditional brocade fabrics. The pattern is continuous and seamless ensuring flawless repetition across any surface without visible breaks or mismatches.
From a material composition perspective the wallpaper’s substrate acts as a sturdy slightly fibrous canvas bound with adhesives that maintain the embossed shapes while providing durability. The raised areas correspond to thicker fibers or resin-enhanced aggregates that build up the relief while the recessed background remains smooth and tightly woven. The satin finish is achieved by applying a subtle glazing layer that imparts a soft diffused sheen. This finish reduces harsh reflections but allows light to gently catch the embossed details enhancing the visual complexity of the texture. Colorants are carefully integrated at the pigment stage to replicate the deep muted tones typical of classic brocade with slight variations in hue to simulate natural dyeing irregularities.
The texture maps included fully support Physically Based Rendering workflows designed in 8K resolution to capture every intricate detail. The BaseColor (Albedo) map defines the rich nuanced coloration of the fabric and embroidery. The Normal map encodes the fine embossing relief emphasizing the raised floral motifs and subtle fabric grain. Roughness values vary across the satin finish with smoother glossier areas on raised patterns and more matte properties on the background weave. The Metallic channel remains neutral reflecting the non-metallic nature of the textile. Ambient Occlusion enhances shadowing in recessed areas while Height (Displacement) maps provide additional geometric depth for parallax effects in real-time engines. This texture is optimized for seamless application in Blender Unreal Engine and Unity environments.
For practical use it is recommended to carefully adjust the UV scale to maintain the wallpaper’s detailed pattern integrity without pixelation or overly large repeats. When tuning roughness a subtle balance should be struck to preserve the satin sheen without introducing unnatural gloss. Additionally blending the height and normal maps can enhance the embossed effect in real-time rendering providing a more convincing tactile appearance without excessive geometry. This texture is well suited for upscale interior visualizations period room recreations or any project requiring a sophisticated textured wall covering that conveys both material authenticity and decorative richness.
Import the texture maps into Blender with sRGB color space for albedo/base color and Non-Color for normal, roughness, metallic, AO, height, and ORM maps. Connect normal maps through a Normal Map node, then adjust UV scale with a Mapping node so the material repeats naturally on your model.
For the full step-by-step setup, see How to Use Seamless Textures in Blender. Browse related material examples in wood, concrete, and metal.
Yes. This texture is designed as a seamless tileable PBR material, so it can repeat across large surfaces without visible borders.
You can download PNG/WEBP versions and use 1K, 2K, 4K and 8K download options when available on the page.
Yes. The download options and engine-mapped ZIP workflow are designed for Blender, Unreal Engine, Unity Standard, URP and HDRP material pipelines.
Yes. The texture is available under the AITextured free commercial license. Review the license page for redistribution and AI-training restrictions.


Generate, preview, and export seamless PBR materials for Blender, Unity, and Unreal Engine—directly in your browser.
AI text-to-texture: type a prompt and get a seamless, tileable base image ready for PBR workflows (great starting point for materials).
Create a full PBR set (Normal, Roughness, AO, Metallic, etc.) from a single image. Seamless and tiling-friendly.
Instant WebGL viewer: inspect materials on a sphere, plane, and cube. Check tiling and lighting in real time.
Re-packages maps per engine: Unreal (BaseColor + ORM), Unity (Mask/MetallicSmoothness), Blender (separate channels).
PNG ↔ JPG ↔ SVG: fast convert, SVG rasterize, embed/trace options, quality & background controls.