
Wallpaper With Floral Satin Jacquard Embossed Textile Surface
Seamless texture (tileable) · PNG, WEBP, PBR ZIP. License: AITextured Free Commercial License (FCL) v1.1. Free personal and commercial use. Raw resale, standalone redistribution, mirroring/scraping, competing asset packs, and AI/ML training are not allowed without written permission. Attribution is not required, but appreciated..

| ID | seamless-3d-texture-pbr-8k-wallpaper-with-tropical-botanical-ivy-vine-leafy-canvas-texture |
|---|---|
| Category | Wallpaper |
| Formats | PNG, WEBP, PBR ZIP |
| Size | 1k (1024x1024px), 2k (2048x2048px), 4k (4096x4096px), 8k (8192x8192px) |
| Color | sRGB |
| Tileable | Yes |
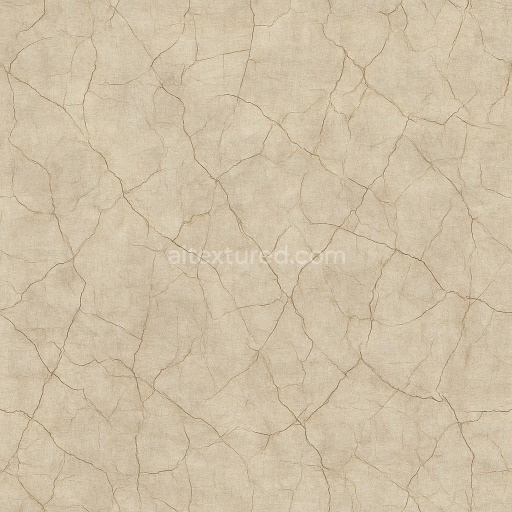
This seamless 3D texture PBR wallpaper captures a richly detailed tropical botanical motif featuring intertwining ivy and vine leaf patterns rendered on a finely woven canvas substrate. The base material emulates natural textile fibers densely interlaced to create a subtle yet distinctive woven geometry. This fabric-like form offers a tactile impression of layered threads with slight variations in thickness and orientation contributing to a realistic cloth appearance. The underlying weave is complemented by botanical elements that appear gently embossed or slightly raised achieved through precise height and normal mapping enhancing the sense of depth and dimensionality in the design.
The composition simulates a high-quality canvas fabric treated with matte pigments and natural binders providing a muted non-reflective surface finish that minimizes glare while maintaining color vibrancy. The base substrate is modeled as a tightly woven cotton or linen blend incorporating fine textile fibers visible in the texture’s normal and ambient occlusion maps. Pigments mimic natural botanical greens ranging from deep ivy tones to lighter vine leaves applied using PBR base color (albedo) channels with subtle variations for organic realism. The roughness map controls the matte finish ensuring soft light diffusion without glossiness while the metallic channel remains near zero reflecting the non-metallic character of fabric and plant matter.
The texture’s porosity is indicated by slight micro-variations in the height/displacement map suggesting natural fabric irregularities and gentle surface weathering consistent with indoor use. Ambient occlusion enhances shadowing within the weave and leaf overlaps reinforcing spatial depth and emphasizing the intricacy of the botanical pattern. This texture is optimized at an 8K resolution ensuring exceptional clarity and detail for close-up renders. It integrates seamlessly with modern 3D software workflows such as Blender Unreal Engine and Unity supporting all relevant PBR channels for physically accurate material representation.
For practical application it is advisable to carefully adjust the UV scale to balance the visibility of the fine woven details with the overall botanical pattern size avoiding pixelation or excessive repetition. Additionally fine-tuning the roughness values can help tailor the matte finish to specific lighting environments while blending the height and normal maps can enhance the perceived depth without causing unwanted surface artifacts. This approach ensures the wallpaper texture maintains a naturalistic and elegant presence in both interior visualizations and interactive scenes.
Import the texture maps into Blender with sRGB color space for albedo/base color and Non-Color for normal, roughness, metallic, AO, height, and ORM maps. Connect normal maps through a Normal Map node, then adjust UV scale with a Mapping node so the material repeats naturally on your model.
For the full step-by-step setup, see How to Use Seamless Textures in Blender. Browse related material examples in wood, concrete, and metal.
Yes. This texture is designed as a seamless tileable PBR material, so it can repeat across large surfaces without visible borders.
You can download PNG/WEBP versions and use 1K, 2K, 4K and 8K download options when available on the page.
Yes. The download options and engine-mapped ZIP workflow are designed for Blender, Unreal Engine, Unity Standard, URP and HDRP material pipelines.
Yes. The texture is available under the AITextured free commercial license. Review the license page for redistribution and AI-training restrictions.


Generate, preview, and export seamless PBR materials for Blender, Unity, and Unreal Engine—directly in your browser.
AI text-to-texture: type a prompt and get a seamless, tileable base image ready for PBR workflows (great starting point for materials).
Create a full PBR set (Normal, Roughness, AO, Metallic, etc.) from a single image. Seamless and tiling-friendly.
Instant WebGL viewer: inspect materials on a sphere, plane, and cube. Check tiling and lighting in real time.
Re-packages maps per engine: Unreal (BaseColor + ORM), Unity (Mask/MetallicSmoothness), Blender (separate channels).
PNG ↔ JPG ↔ SVG: fast convert, SVG rasterize, embed/trace options, quality & background controls.