The Clean Granite Texture Seamless high resolution up to 8ktexture offers a meticulously crafted representation of natural granite stone, ideal for use across diverse digital projects such as architectural visualization, game environments, product mockups, and interior staging. This tileable clean granite texture seamless high resolution up to 8k is designed to capture the intricate mineral composition typical of granite—a durable igneous rock primarily composed of quartz, feldspar, and mica. Its grain structure exhibits a balanced mix of coarse aggregates and fine grains, with subtle porosity and natural weathering effects that contribute to an authentic surface finish. The texture’s appearance reflects a polished yet slightly matte stone surface, accentuated by nuanced colorants including specks of gray, white, and muted earth tones, which translate into a realistic BaseColor/Albedo channel with fine color variation and depth.
In terms of PBR channels, this ai texture clean granite texture seamless high resolution up to 8k excels in delivering a physically accurate material portrayal. The Normal map captures the granular relief and subtle fissures within the granite’s crystalline structure, enhancing the tactile sense of the stone’s surface. Roughness is carefully tuned to reflect the semi-polished finish typical of granite, balancing light diffusion and subtle specular highlights without appearing overly glossy. The Metallic channel remains near zero, consistent with the non-metallic nature of natural stone, while the Ambient Occlusion map adds depth by emphasizing crevices and grain boundaries. Height or Displacement maps in this seamless clean granite texture high resolution up to 8ktexture gently simulate the micro-elevations and depressions that give granite its characteristic ruggedness, contributing to realistic parallax effects when properly utilized.
This tileable clean granite texture seamless high resolution up to 8k is optimized for seamless integration into industry-standard platforms such as Blender, Unreal Engine, and Unity, requiring minimal setup to achieve high-quality results. The ultra-high resolution of up to 8k ensures that the texture scales elegantly across large surfaces without visible seams or repetitive artifacts, preserving clarity and stability even in close-up renders. For best results, it is recommended to carefully match UV scale across assets to maintain consistent texel density and avoid pattern stretching. Adjusting the roughness parameter slightly can also help tailor the stone’s surface response to different lighting conditions, enhancing realism in your 3D scenes and interactive environments.
This seamless clean granite texture offers seamless high resolution up to 8k with detailed stone textures and an accurate 3D preview for realistic PBR material representation.
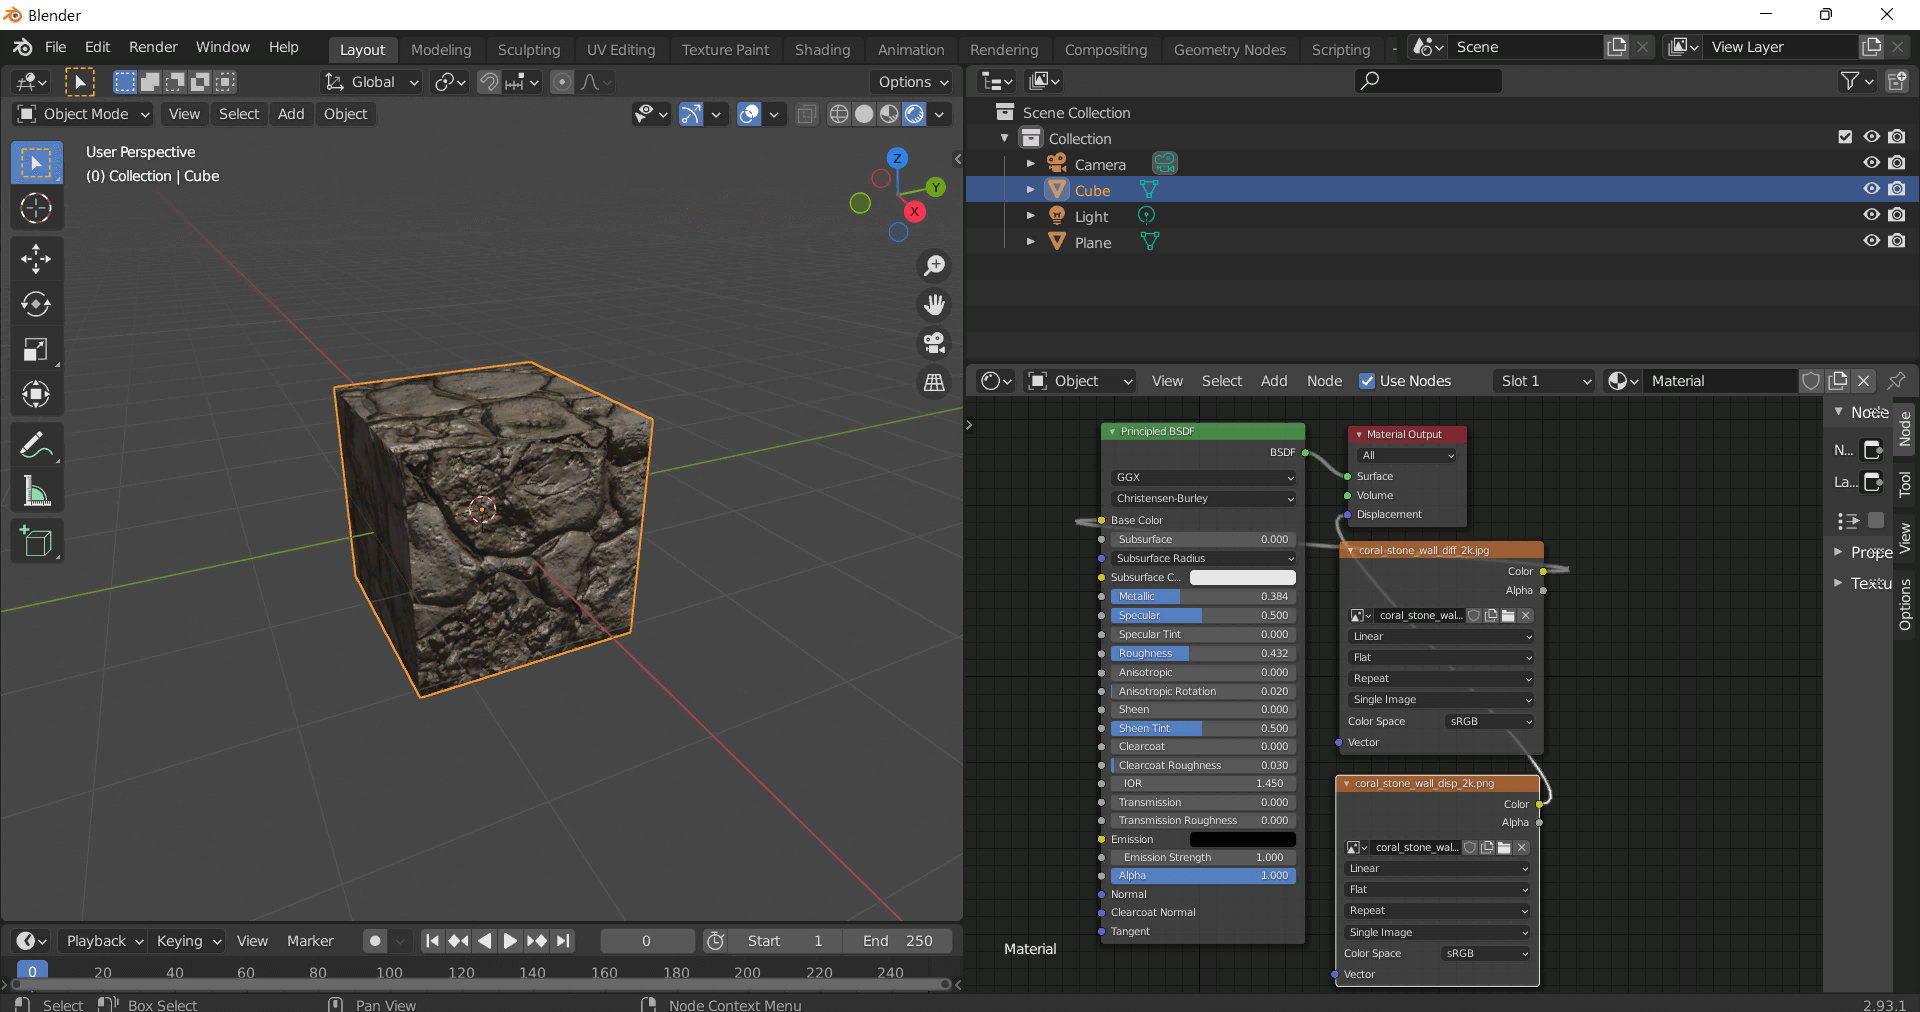
How to Use These Seamless PBR Textures in Blender
This guide shows how to connect a full PBR texture set to Principled BSDF in Blender (Cycles or Eevee). Works with any of our seamless textures free download, including PBR PNG materials for Blender / Unreal / Unity.
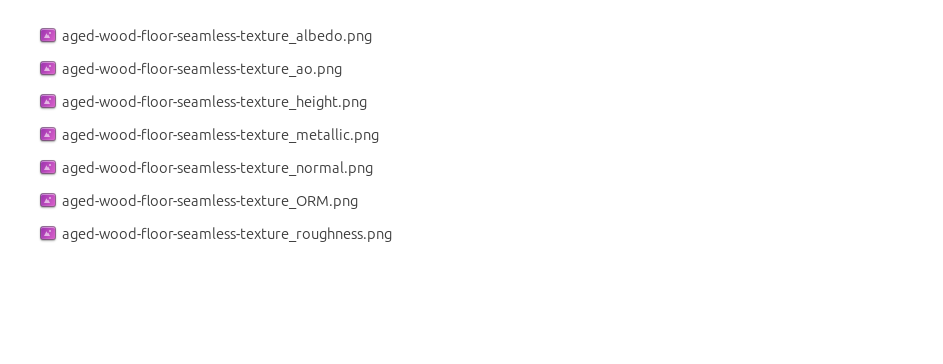
What’s inside the download
*_albedo.png — Base Color (sRGB)*_normal.png — Normal map (Non-Color)*_roughness.png — Roughness (Non-Color)*_metallic.png — Metallic (Non-Color)*_ao.png — Ambient Occlusion (Non-Color)*_height.png — Height / Displacement (Non-Color)*_ORM.png — Packed map (R=AO, G=Roughness, B=Metallic, Non-Color)
Quick start (Node Wrangler, 30 seconds)
- Enable the addon: Edit → Preferences → Add-ons → Node Wrangler.
- Create a material and select the Principled BSDF node.
- Press Ctrl + Shift + T and select the maps
albedo, normal, roughness, metallic (skip height and ORM for now) → Open.
The addon wires Base Color, Normal (with a Normal Map node), Roughness, and Metallic automatically.
- Add AO and Height using the “Manual wiring” steps below (5 and 6).
Manual wiring (full control)
- Create a material (Material Properties → New) and open the Shader Editor.
- Add an Image Texture node for each map. Set Color Space:
- Albedo → sRGB
- AO, Roughness, Metallic, Normal, Height, ORM → Non-Color
- Connect to Principled BSDF:
albedo → Base Colorroughness → Roughnessmetallic → Metallic (for wood this often stays near 0)normal → Normal Map node (Type: Tangent Space) → Normal of Principled.
If details look “inverted”, enable Invert Y on the Normal Map node.
- Ambient Occlusion (AO):
- Add a MixRGB (or Mix Color) node in mode Multiply.
- Input A =
albedo, Input B = ao, Factor = 1.0.
- Output of Mix → Base Color of Principled (replaces the direct albedo connection).
- Height / Displacement:
Cycles — true displacement
- Material Properties → Settings → Displacement: Displacement and Bump.
- Add a Displacement node: connect
height → Height, set Midlevel = 0.5, Scale = 0.02–0.08 (tune to taste).
- Output of Displacement → Material Output → Displacement.
- Add geometry density (e.g., Subdivision Surface) so displacement has polygons to work with.
Eevee (or lightweight Cycles) — bump only
- Add a Bump node:
height → Height.
- Set Strength = 0.2–0.5, Distance = 0.05–0.1, and connect Normal output to Principled’s Normal.
Using the packed ORM texture (optional)
Instead of separate AO/Roughness/Metallic maps you can use the single *_ORM.png:
- Add one Image Texture (Non-Color) → Separate RGB (or Separate Color).
- R (red) → AO (use it in the Multiply node with albedo as above).
- G (green) → Roughness of Principled.
- B (blue) → Metallic of Principled.
UVs & seamless tiling
- These textures are seamless. If your mesh has no UVs, go to UV Editing → Smart UV Project.
- For scale/repeat, add Texture Coordinate (UV) → Mapping and plug it into all texture nodes.
Increase Mapping → Scale (e.g., 2/2/2) to tile more densely.
Recommended starter values
- Normal Map Strength: 0.5–1.0
- Bump Strength: ~0.3
- Displacement Scale (Cycles): ~0.03
Common pitfalls
- Wrong Color Space (normals/roughness/etc. must be Non-Color).
- “Inverted” details → enable Invert Y on the Normal Map node.
- Over-strong relief → lower Displacement Scale or Bump Strength.
Example: Download Wood Textures and instantly apply parquet or rustic planks inside Blender for architectural visualization.
To add the downloaded texture, go to Add — Texture — Image Texture.
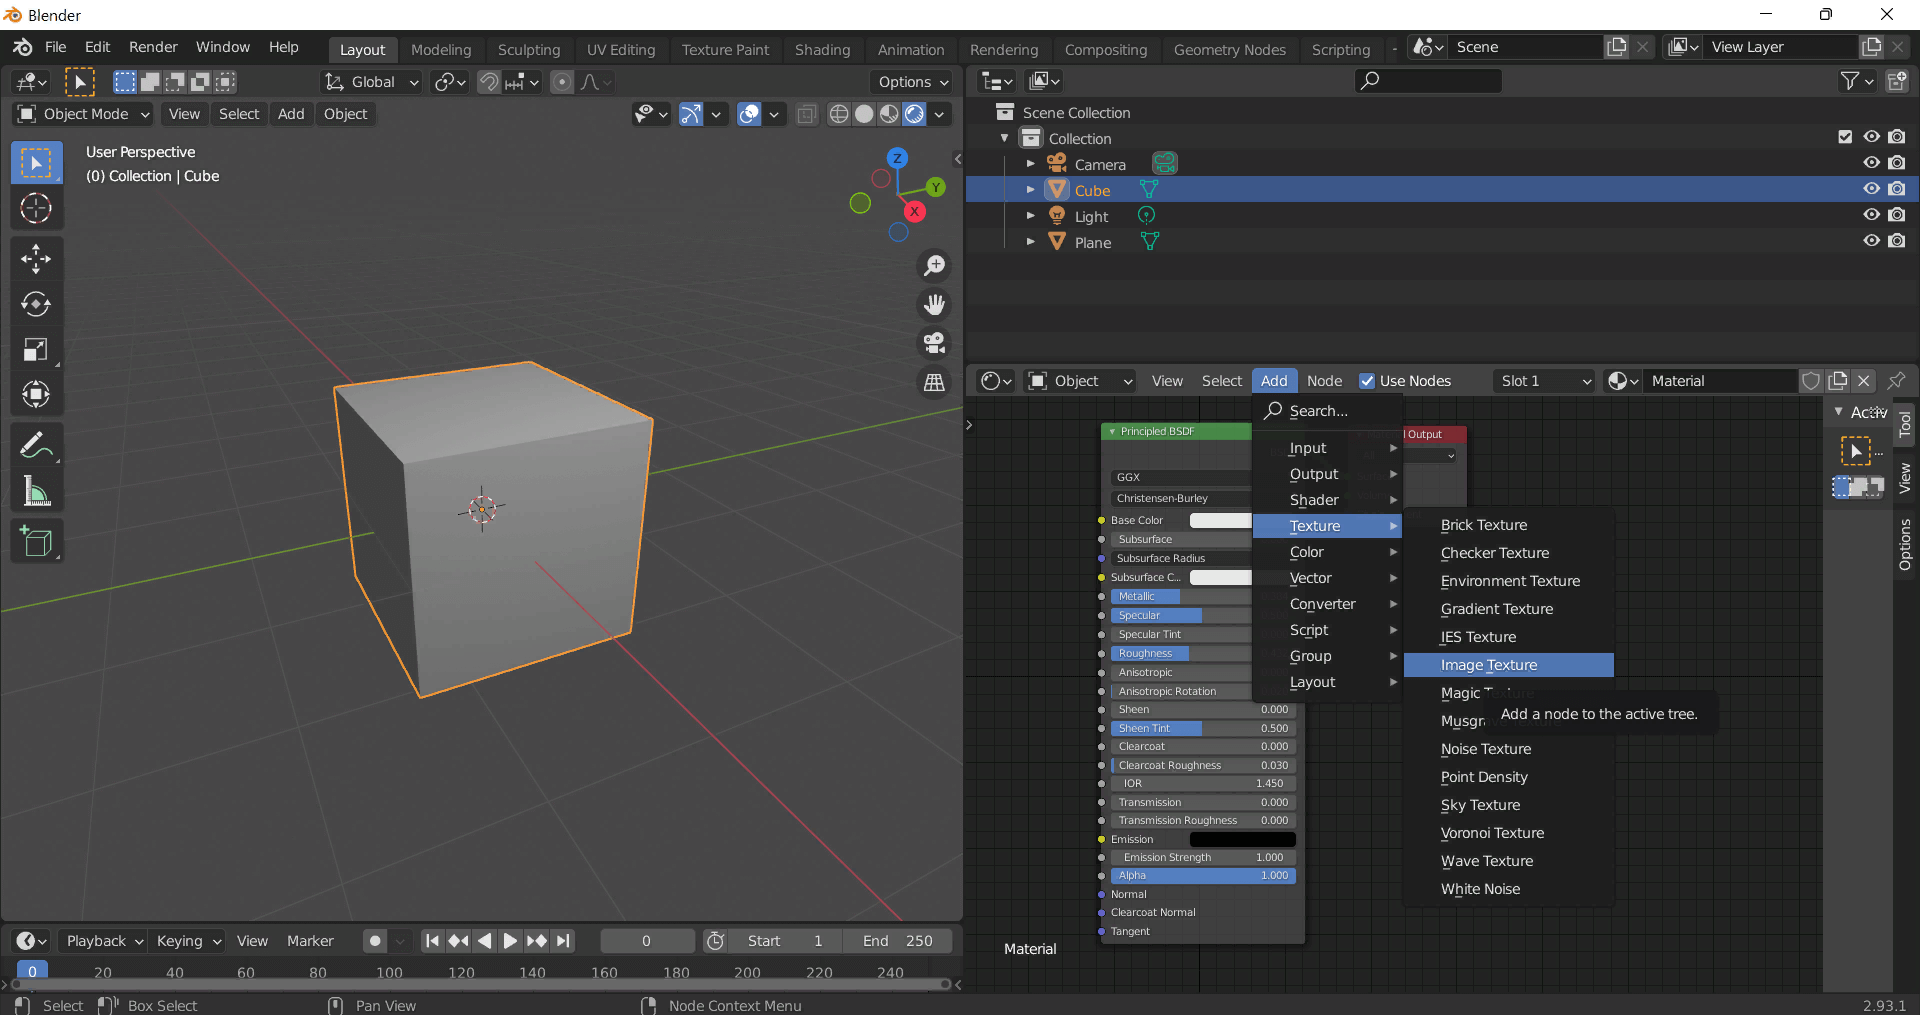
Add a node and click the Open button.
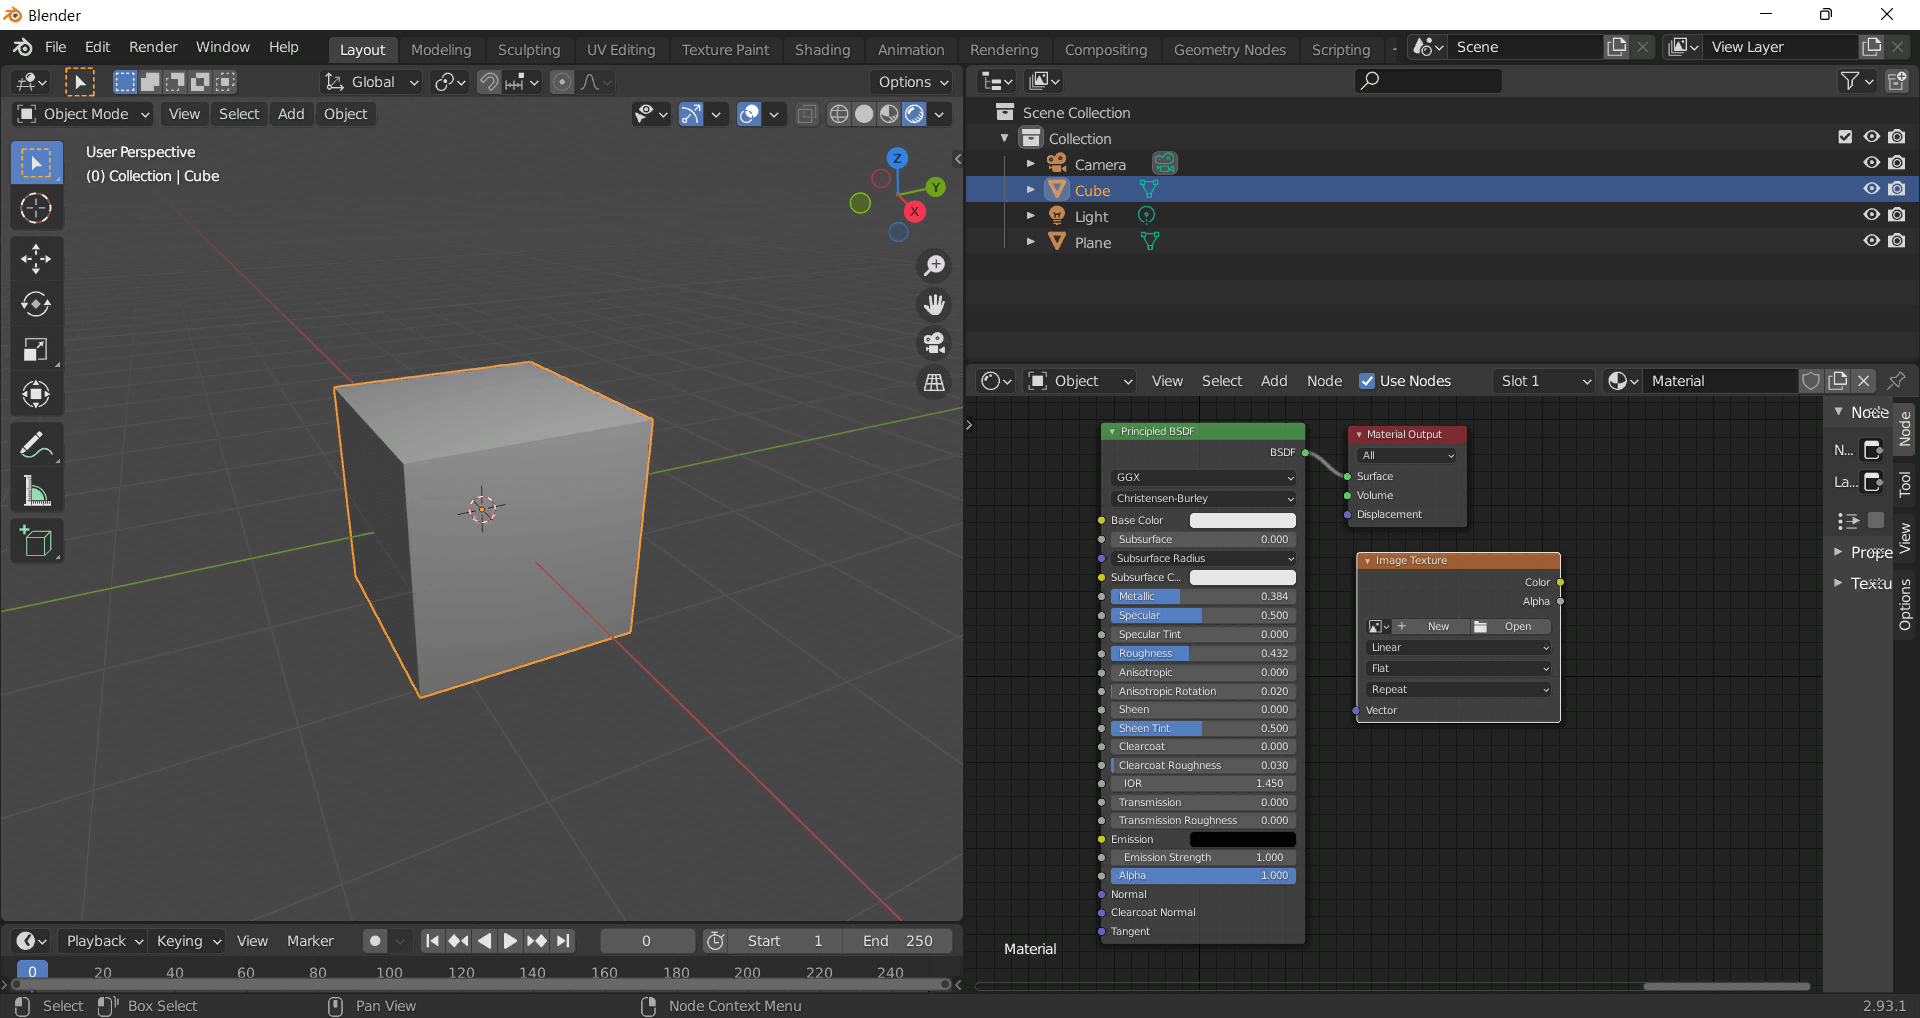
Select the required texture on your hard drive and connect Color to Base Color.