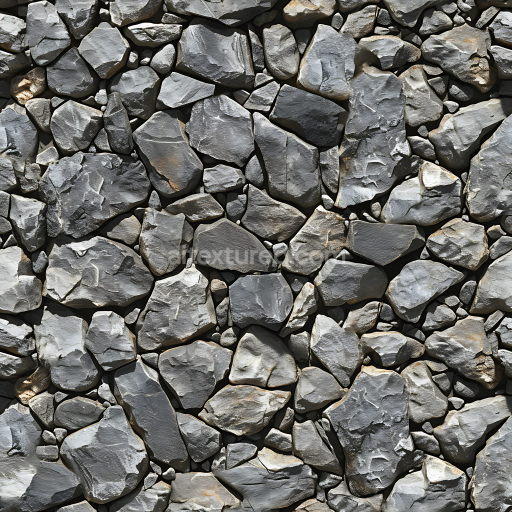
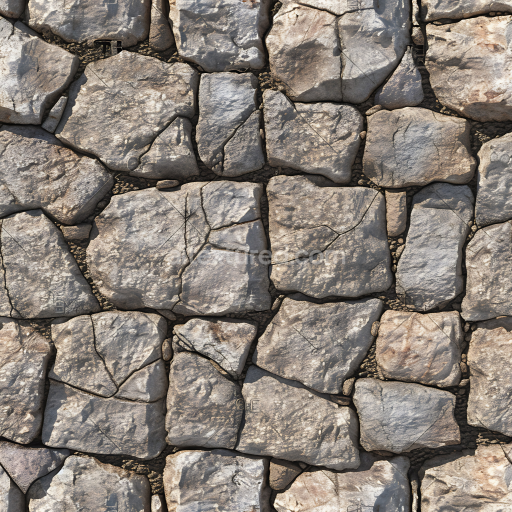
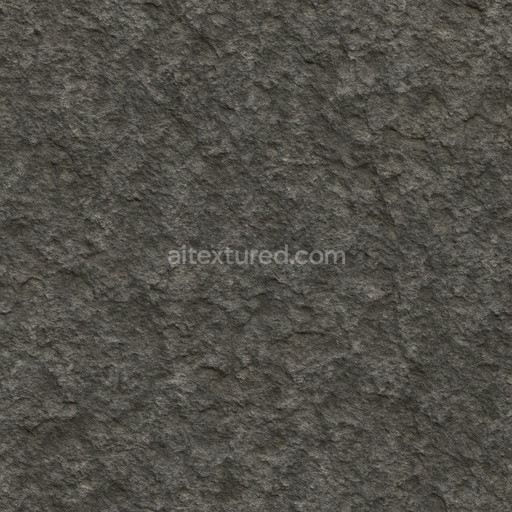
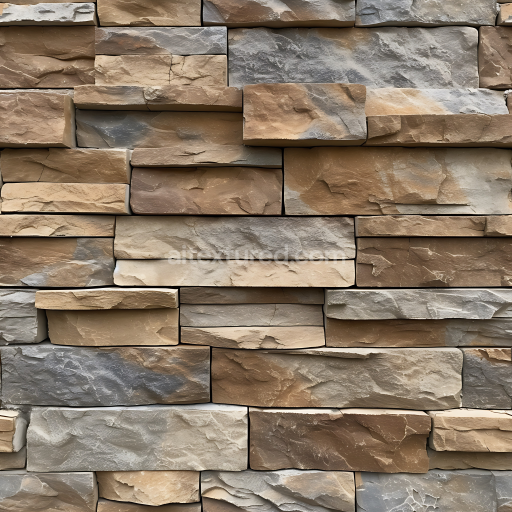
Rough Rocky Ground Stone Wall Seamless Texture with Varied Gray Stones
Seamless texture (tileable) · PNG, WEBP, PBR ZIP. License: AITextured Free Commercial License (FCL) v1.1. Free personal and commercial use. Raw resale, standalone redistribution, mirroring/scraping, competing asset packs, and AI/ML training are not allowed without written permission. Attribution is not required, but appreciated..

| ID | seamless-3d-texture-pbr-8k-pebble-stone-surface-for-natural-rocky-floor-and-wall-designs |
|---|---|
| Category | Stone |
| Formats | PNG, WEBP, PBR ZIP |
| Size | 1k (1024x1024px), 2k (2048x2048px), 4k (4096x4096px), 8k (8192x8192px) |
| Color | sRGB |
| Tileable | Yes |
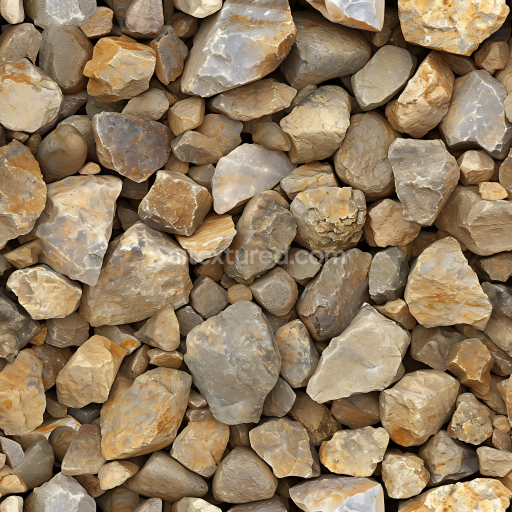
This seamless 3D texture showcases a highly detailed pebble stone surface rendered in 8K PBR resolution designed specifically for natural rocky floors and stone wall applications. The material composition mimics a compacted river rock substrate where smooth rounded pebbles of varying sizes are naturally embedded within a fine-grained stone dust matrix. The substrate primarily composed of mineral aggregates such as quartz and feldspar is bound together by a weathered silicate cement that provides structural cohesion without excessive glossiness. This results in a matte to satin finish characteristic of outdoors stone environments highlighting subtle variations in roughness and porosity across the surface.
The geometric form of the texture is irregular yet harmonious resembling a naturally arranged pebble mosaic pattern with gentle undulations that capture the organic randomness of river beds or stone-paved courtyards. Each stone grain exhibits intricate surface details including micro-cracks fissures and smooth edges worn by erosion which contribute to the tactile realism. The subtle presence of stone dust in the crevices enhances ambient occlusion effects deepening shadowed areas and emphasizing the depth and separation between individual stones. Color variation is achieved through natural earth tones—muted grays browns and occasional hints of sandstone hues—applied via the BaseColor (Albedo) map to simulate mineral diversity and weathering.
The PBR texture maps are carefully crafted to deliver a physically accurate representation. The Normal map captures the fine surface irregularities and pebble contours allowing realistic light interaction and shading in 3D engines. Roughness maps reflect the contrast between the smoother edges of the river rocks and the coarser stone dust substrate avoiding any metallic reflections as this is a purely non-metallic stone surface. The Ambient Occlusion map enhances crevice shadows while the Height (Displacement) map adds real geometric depth to the stone cracks and pebble elevations ideal for parallax or tessellation techniques. The metallic channel is uniformly set to zero consistent with natural stone materials. This texture is fully compatible and optimized for use in Blender Unreal Engine and Unity ensuring seamless integration into various 3D workflows.
For practical application it is recommended to adjust the UV scale carefully to maintain the natural size and density of the pebbles relative to the scene context. Fine-tuning the roughness channel can help simulate different weathering conditions—from freshly laid stone floors with a slightly polished look to older more weathered surfaces with higher roughness and dust accumulation. When using height or parallax mapping blending it moderately with the normal map will prevent excessive geometric distortion while preserving the tactile feel of the stone cracks and pebble edges enhancing realism without sacrificing performance.
Import the texture maps into Blender with sRGB color space for albedo/base color and Non-Color for normal, roughness, metallic, AO, height, and ORM maps. Connect normal maps through a Normal Map node, then adjust UV scale with a Mapping node so the material repeats naturally on your model.
For the full step-by-step setup, see How to Use Seamless Textures in Blender. Browse related material examples in wood, concrete, and metal.
Yes. This texture is designed as a seamless tileable PBR material, so it can repeat across large surfaces without visible borders.
You can download PNG/WEBP versions and use 1K, 2K, 4K and 8K download options when available on the page.
Yes. The download options and engine-mapped ZIP workflow are designed for Blender, Unreal Engine, Unity Standard, URP and HDRP material pipelines.
Yes. The texture is available under the AITextured free commercial license. Review the license page for redistribution and AI-training restrictions.
Build, preview, and export seamless PBR materials. Generate full map sets from a single image, inspect them in a real-time WebGL viewer, and re-package maps for Unreal, Unity, and Blender—directly in your browser.
AI text-to-texture: type a prompt and get a seamless, tileable base image ready for PBR workflows (great starting point for materials).
Create a full PBR set (Normal, Roughness, AO, Metallic, etc.) from a single image. Seamless and tiling-friendly.
Instant WebGL viewer: inspect materials on a sphere, plane, and cube. Check tiling and lighting in real time.
Re-packages maps per engine: Unreal (BaseColor + ORM), Unity (Mask/MetallicSmoothness), Blender (separate channels).
PNG ↔ JPG ↔ SVG: fast convert, SVG rasterize, embed/trace options, quality & background controls.