Square Tiled Wall - Patterned Brick Albedo Normal Roughness
Seamless texture (tileable) · PNG, WEBP, PBR ZIP. License: AITextured Free Commercial License (FCL) v1.1. Free personal and commercial use. Raw resale, standalone redistribution, mirroring/scraping, competing asset packs, and AI/ML training are not allowed without written permission. Attribution is not required, but appreciated..

| ID | synthetic-red-brick-texture-seamless |
|---|---|
| Category | Brick |
| Formats | PNG, WEBP, PBR ZIP |
| Size | 1k (1024x1024px), 2k (2048x2048px), 4k (4096x4096px), 8k (8192x8192px) |
| Color | sRGB |
| Tileable | Yes |
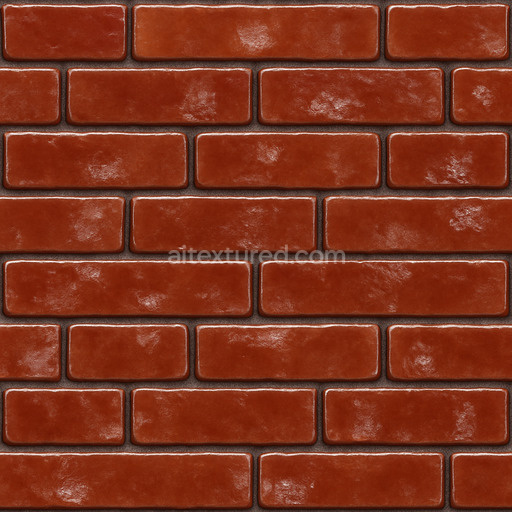
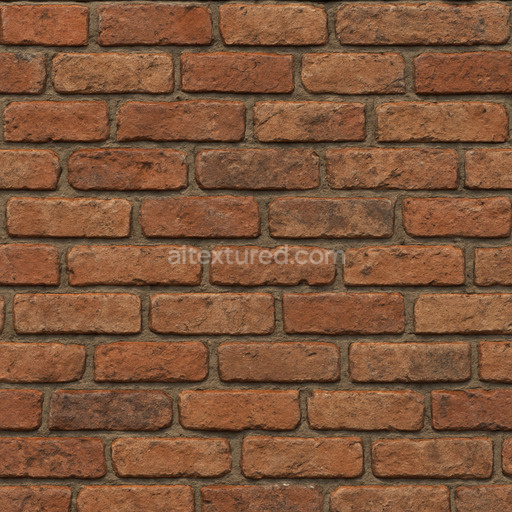
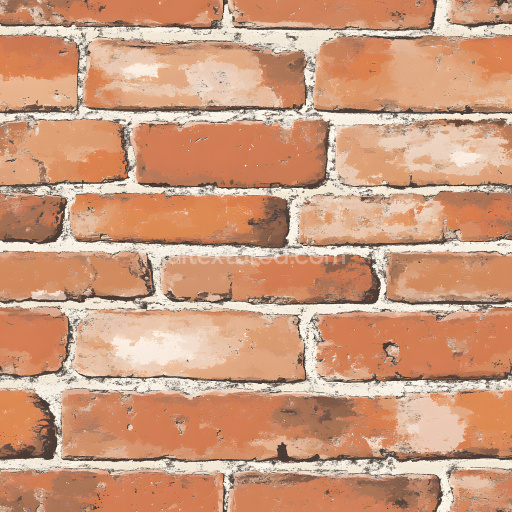
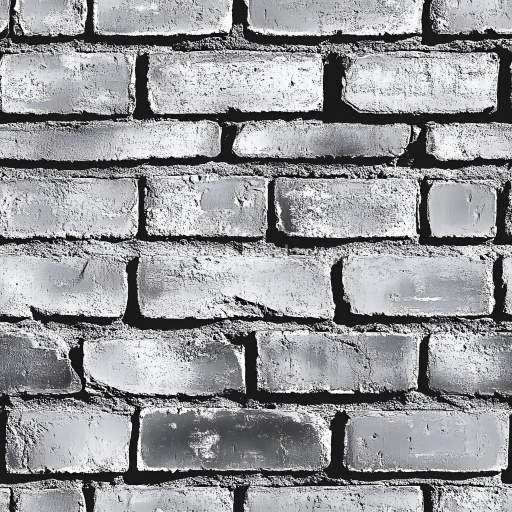
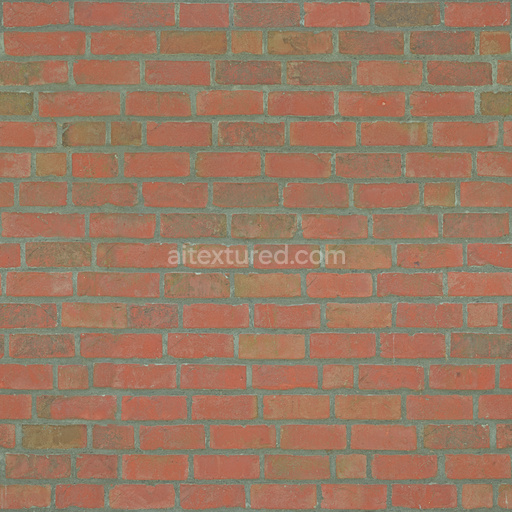
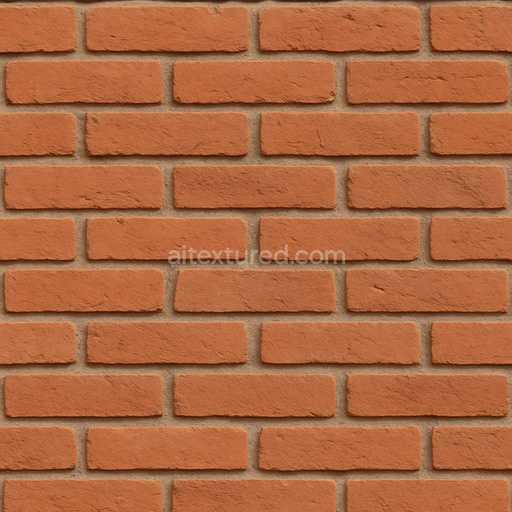
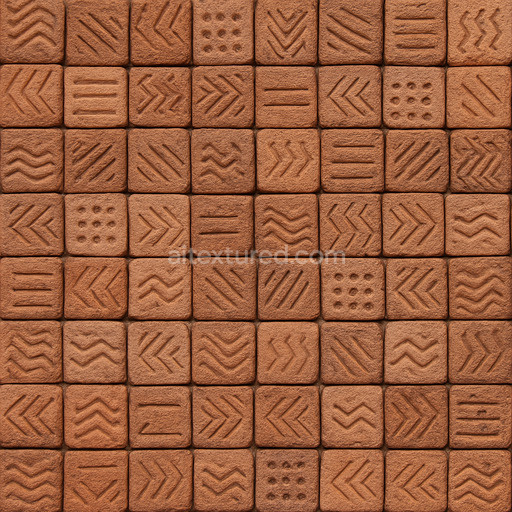
The Synthetic Red Brick Texture Seamless high resolution up to 8K is a meticulously crafted generated material designed to replicate the intricate qualities of traditional red brick masonry. This texture simulates the composite nature of synthetic bricks typically made from engineered ceramic or polymer blends that combine mineral aggregates with specialized binders to achieve enhanced durability and weather resistance. The surface finish reflects a subtly rough slightly porous exterior characteristic of fired brick featuring natural pigment variations from iron oxide-based red colorants that give the material its signature warm hue. Fine micro-cracks and grain orientation are captured with precision emphasizing the structural consistency and natural wear one expects from authentic brickwork exposed to environmental aging. These detailed attributes translate seamlessly into PBR workflows: the BaseColor/Albedo channel showcases the vibrant red tones and subtle color shifts while the Normal map presents convincing micro-relief for realistic light interaction. The Roughness channel balances matte and semi-rough finishes mimicking the brick’s tactile surface and the Metallic channel remains minimal to reflect the non-metallic nature of brick. Ambient Occlusion enhances shadow depth in crevices and the Height/Displacement map accurately conveys the brick’s dimensionality and mortar gaps for enhanced realism.
Rendered at a high resolution up to 8K this tileable synthetic red brick texture seamless high resolution up to 8K ensures crisp detail preservation across expansive surfaces without any visible seams or repetition artifacts. Its design caters to diverse workflows in architectural visualization game environments and product mockups supporting seamless integration into popular engines such as Blender Unity and Unreal Engine with minimal configuration. The texture’s scalability means it performs exceptionally well on large-scale surfaces maintaining structural integrity and micro-detail fidelity even under close inspection. By leveraging this PBR material synthetic red brick texture seamless high resolution up to 8K creators can accelerate their project timelines while achieving photorealistic brick textures tailored for both personal and commercial use.
To maximize the visual impact and maintain consistency across your 3D assets it is recommended to carefully match texel density and maintain uniform UV scaling when applying this tileable synthetic red brick texture seamless high resolution up to 8k. Adjusting roughness values subtly within your material settings can help fine-tune the surface reflectivity to suit different lighting conditions or weathering effects ensuring the brick’s surface appears authentic whether in bright daylight or shaded interiors. This texture’s seamless nature and production-ready quality make it an ideal choice for enhancing realism in architectural renders detailed game levels and interior staging offering a convincing high-fidelity brick texture solution that elevates any 3D scene with minimal effort.
Import the texture maps into Blender with sRGB color space for albedo/base color and Non-Color for normal, roughness, metallic, AO, height, and ORM maps. Connect normal maps through a Normal Map node, then adjust UV scale with a Mapping node so the material repeats naturally on your model.
For the full step-by-step setup, see How to Use Seamless Textures in Blender. Browse related material examples in wood, concrete, and metal.
Yes. This texture is designed as a seamless tileable PBR material, so it can repeat across large surfaces without visible borders.
You can download PNG/WEBP versions and use 1K, 2K, 4K and 8K download options when available on the page.
Yes. The download options and engine-mapped ZIP workflow are designed for Blender, Unreal Engine, Unity Standard, URP and HDRP material pipelines.
Yes. The texture is available under the AITextured free commercial license. Review the license page for redistribution and AI-training restrictions.


Generate, preview, and export seamless PBR materials for Blender, Unity, and Unreal Engine—directly in your browser.
AI text-to-texture: type a prompt and get a seamless, tileable base image ready for PBR workflows (great starting point for materials).
Create a full PBR set (Normal, Roughness, AO, Metallic, etc.) from a single image. Seamless and tiling-friendly.
Instant WebGL viewer: inspect materials on a sphere, plane, and cube. Check tiling and lighting in real time.
Re-packages maps per engine: Unreal (BaseColor + ORM), Unity (Mask/MetallicSmoothness), Blender (separate channels).
PNG ↔ JPG ↔ SVG: fast convert, SVG rasterize, embed/trace options, quality & background controls.