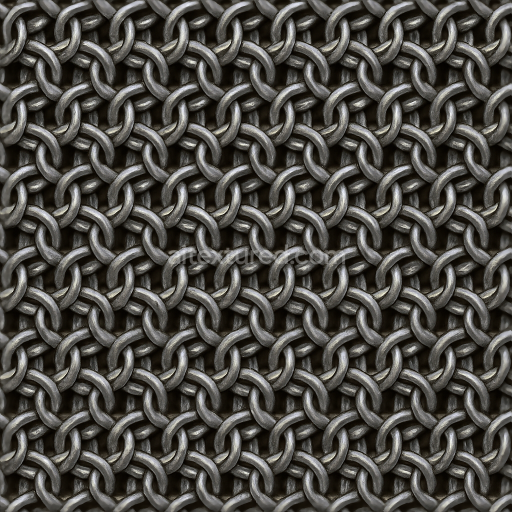
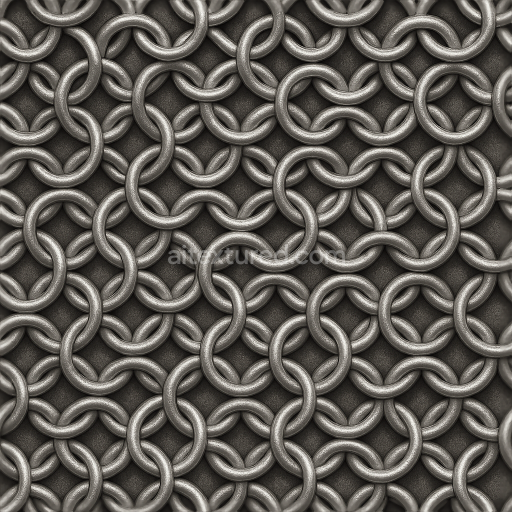
8K PBR Chainmail With Steel Rings And Tight Weave
Seamless texture (tileable) · PNG, WEBP, PBR ZIP. License: AITextured Free Commercial License (FCL) v1.1. Free personal and commercial use. Raw resale, standalone redistribution, mirroring/scraping, competing asset packs, and AI/ML training are not allowed without written permission. Attribution is not required, but appreciated..

| ID | seamless-3d-texture-pbr-8k-of-chainmail-glove-fabric-with-riveted-rings |
|---|---|
| Category | Chainmail |
| Formats | PNG, WEBP, PBR ZIP |
| Size | 1k (1024x1024px), 2k (2048x2048px), 4k (4096x4096px), 8k (8192x8192px) |
| Color | sRGB |
| Tileable | Yes |
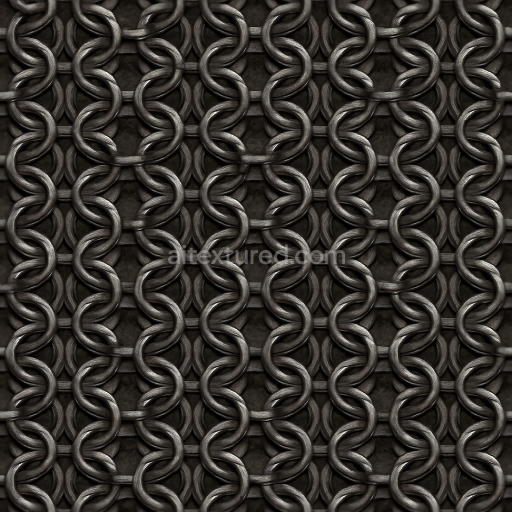
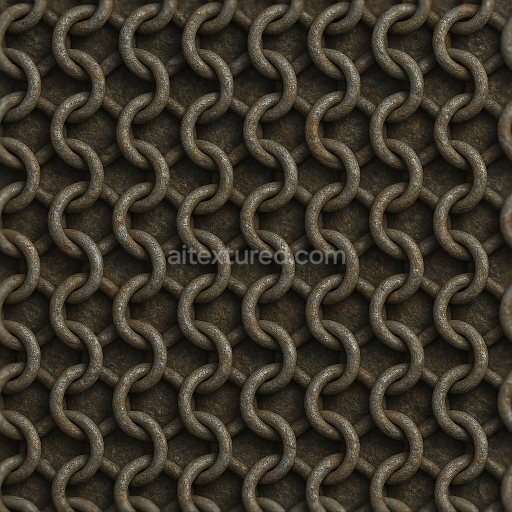
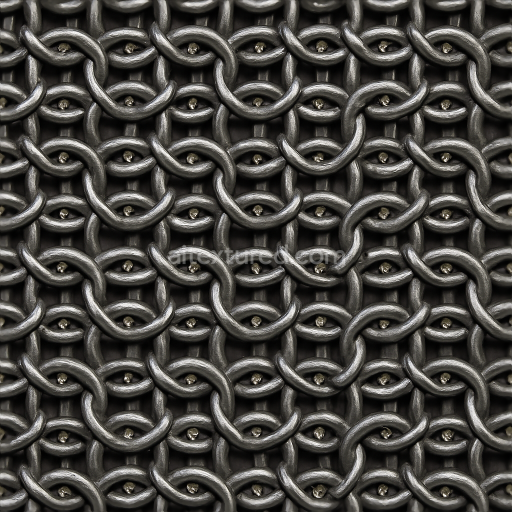
This seamless 3D texture features an exceptionally detailed chainmail glove fabric constructed from interlinked riveted rings designed to replicate the intricate armor weave characteristic of medieval and fantasy protective gear. The base material is metallic steel forged and riveted to enhance both strength and flexibility in the glove’s surface. Each riveted joint is clearly defined emphasizing the craftsmanship behind this durable metal fabric. The texture’s surface finish exhibits a subtle metallic sheen with carefully simulated scuff marks and abrasion reflecting realistic wear and tear from prolonged use. These surface imperfections add authenticity showing slight oxidation and micro scratches that contribute to the overall aged and functional appearance of the armor weave.
Rendered at an impressive 8K resolution this PBR texture excels in high-fidelity detail making it ideal for close-up shots in 3D models where fine detail is crucial. The BaseColor (Albedo) channel captures the natural steel tones with subtle variations caused by wear and environmental exposure. The Normal map enhances the perception of depth across the riveted rings and fabric surface emphasizing the complex interlocking geometry of the glove. Roughness values are tuned to reflect the polished yet worn metallic surface—smooth in areas of frequent contact and rougher where abrasion has dulled the finish. The Metallic channel confirms the fully metallic nature of the rings while the Ambient Occlusion map adds soft shadows within the weave enhancing the sense of volume and realism. Height/Displacement maps provide accurate relief for enhanced parallax effects in compatible engines.
This texture is optimized and fully compatible with popular 3D software such as Unreal Engine Blender and Unity ensuring seamless integration into your workflow. It is ideal for projects requiring realistic representations of chainmail gloves from historical reenactments to fantasy character armor. For best results adjusting the UV scale can help maintain the texture’s intricate pattern without distortion while fine-tuning roughness can simulate varying degrees of metal polish or grime depending on your scene’s environmental context. Incorporating this texture will bring both functional metal protection and artisanal detail to your 3D models perfectly balancing craftsmanship with the rugged durability expected of chainmail glove armor.
Import the texture maps into Blender with sRGB color space for albedo/base color and Non-Color for normal, roughness, metallic, AO, height, and ORM maps. Connect normal maps through a Normal Map node, then adjust UV scale with a Mapping node so the material repeats naturally on your model.
For the full step-by-step setup, see How to Use Seamless Textures in Blender. Browse related material examples in wood, concrete, and metal.
Yes. This texture is designed as a seamless tileable PBR material, so it can repeat across large surfaces without visible borders.
You can download PNG/WEBP versions and use 1K, 2K, 4K and 8K download options when available on the page.
Yes. The download options and engine-mapped ZIP workflow are designed for Blender, Unreal Engine, Unity Standard, URP and HDRP material pipelines.
Yes. The texture is available under the AITextured free commercial license. Review the license page for redistribution and AI-training restrictions.
Build, preview, and export seamless PBR materials. Generate full map sets from a single image, inspect them in a real-time WebGL viewer, and re-package maps for Unreal, Unity, and Blender—directly in your browser.
AI text-to-texture: type a prompt and get a seamless, tileable base image ready for PBR workflows (great starting point for materials).
Create a full PBR set (Normal, Roughness, AO, Metallic, etc.) from a single image. Seamless and tiling-friendly.
Instant WebGL viewer: inspect materials on a sphere, plane, and cube. Check tiling and lighting in real time.
Re-packages maps per engine: Unreal (BaseColor + ORM), Unity (Mask/MetallicSmoothness), Blender (separate channels).
PNG ↔ JPG ↔ SVG: fast convert, SVG rasterize, embed/trace options, quality & background controls.