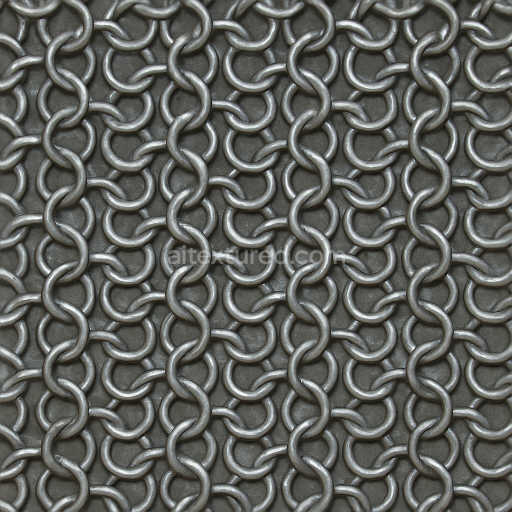
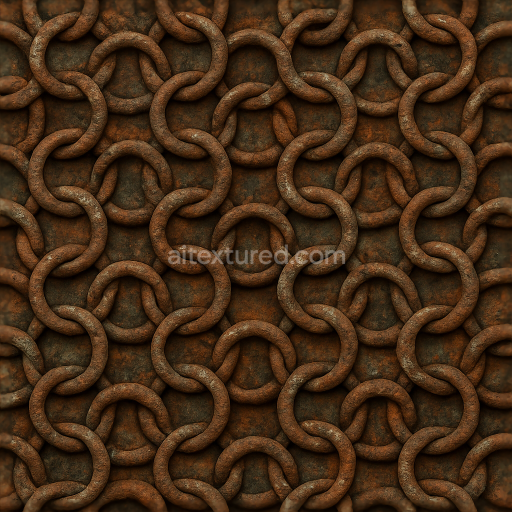
8K PBR Chainmail With Flat Rings And Metallic Shine Surface
Seamless texture (tileable) · PNG, WEBP, PBR ZIP. License: AITextured Free Commercial License (FCL) v1.1. Free personal and commercial use. Raw resale, standalone redistribution, mirroring/scraping, competing asset packs, and AI/ML training are not allowed without written permission. Attribution is not required, but appreciated..

| ID | seamless-3d-texture-pbr-8k-of-dark-iron-chainmail-with-four-in-one-weave |
|---|---|
| Category | Chainmail |
| Formats | PNG, WEBP, PBR ZIP |
| Size | 1k (1024x1024px), 2k (2048x2048px), 4k (4096x4096px), 8k (8192x8192px) |
| Color | sRGB |
| Tileable | Yes |
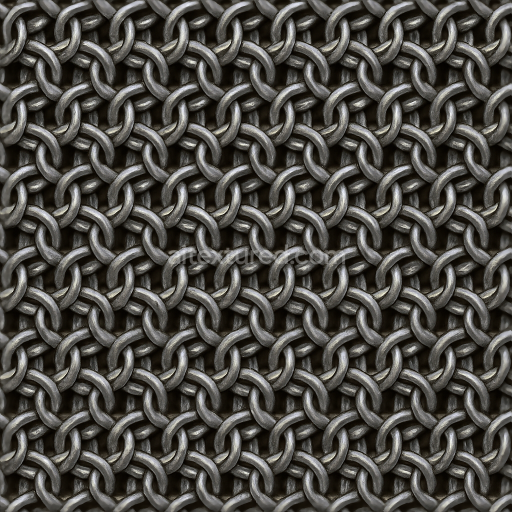
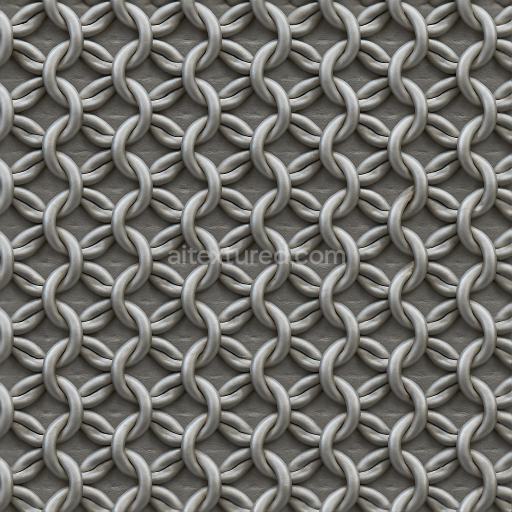
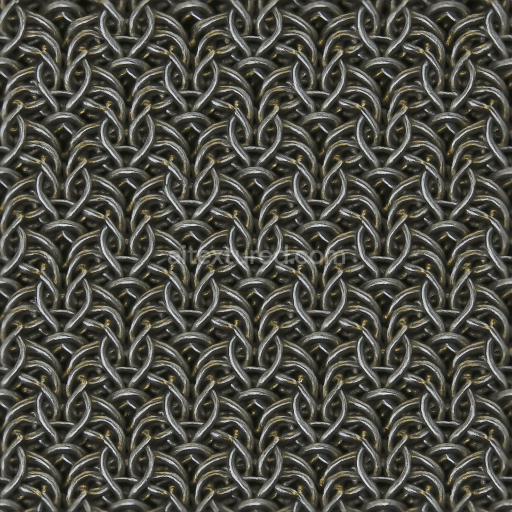
This seamless 8K PBR 3D texture showcases a meticulously crafted dark iron chainmail surface featuring the classic four in one weave pattern. The base material is forged iron known for its dense metallic composition and robust durability which in this texture is represented by tightly interlinked rings forming a traditional mail armor mesh. The dark iron substrate exhibits a matte finish with subtle metallic sheen achieved through a finely balanced roughness and metallic channel setup that reflects light realistically without overpowering glare. The overlapping ring joints are clearly visible reinforcing the authentic historically inspired design and emphasizing the intricate craftsmanship of the weave.
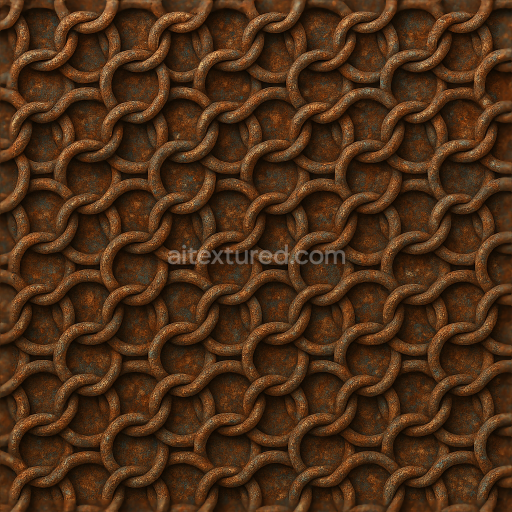
The texture’s material composition translates perfectly into PBR workflows: the BaseColor/Albedo channel captures the deep muted tones of oxidized iron with faint hints of natural wear and slight discoloration from aging while the Normal map defines the complex interlacing of rings and their raised edges adding pronounced depth and tactile detail. The Roughness map is calibrated to provide a soft diffused reflection characteristic of untreated dark iron avoiding overly polished surfaces yet delivering subtle highlights that enhance realism. The Metallic channel confirms the fully metallic nature of the chainmail ensuring accurate light interaction while the Ambient Occlusion layer enhances shadowed crevices between rings contributing to a convincing mesh depth. Height and Displacement maps further support realistic surface relief enabling enhanced parallax effects in supported engines.
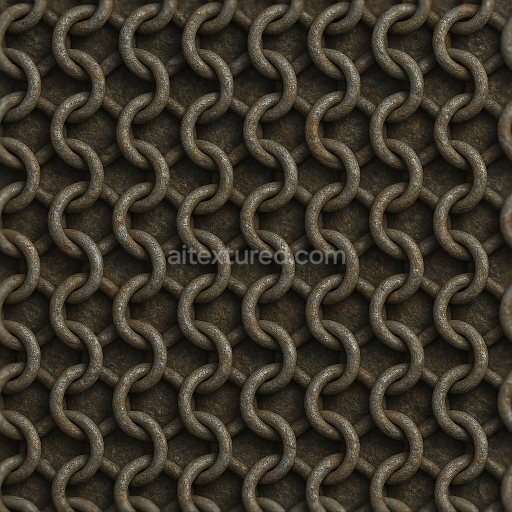
Designed at an ultra-high 8K resolution this texture is optimized for demanding 3D applications and is fully compatible with Blender Unreal Engine and Unity workflows. The large texture size ensures exceptional detail even on close-up renders making it ideal for projects requiring photorealistic armor materials with an authentic medieval aesthetic. For best results it is recommended to adjust the UV scale to maintain the natural size of the chainmail rings and to fine-tune the roughness map slightly for different lighting environments—lower roughness values can simulate a more worn or lightly polished iron surface while higher values preserve the subdued matte appearance.
This dark iron four in one chainmail seamless texture provides a robust historically accurate metal surface ideal for game assets visual effects and 3D visualization projects. Its photorealistic detail and carefully balanced PBR channels deliver a convincing durable mail armor look with a subtle metallic sheen offering artists and developers a reliable and versatile material for creating authentic medieval armor and related designs.
Import the texture maps into Blender with sRGB color space for albedo/base color and Non-Color for normal, roughness, metallic, AO, height, and ORM maps. Connect normal maps through a Normal Map node, then adjust UV scale with a Mapping node so the material repeats naturally on your model.
For the full step-by-step setup, see How to Use Seamless Textures in Blender. Browse related material examples in wood, concrete, and metal.
Yes. This texture is designed as a seamless tileable PBR material, so it can repeat across large surfaces without visible borders.
You can download PNG/WEBP versions and use 1K, 2K, 4K and 8K download options when available on the page.
Yes. The download options and engine-mapped ZIP workflow are designed for Blender, Unreal Engine, Unity Standard, URP and HDRP material pipelines.
Yes. The texture is available under the AITextured free commercial license. Review the license page for redistribution and AI-training restrictions.
Build, preview, and export seamless PBR materials. Generate full map sets from a single image, inspect them in a real-time WebGL viewer, and re-package maps for Unreal, Unity, and Blender—directly in your browser.
AI text-to-texture: type a prompt and get a seamless, tileable base image ready for PBR workflows (great starting point for materials).
Create a full PBR set (Normal, Roughness, AO, Metallic, etc.) from a single image. Seamless and tiling-friendly.
Instant WebGL viewer: inspect materials on a sphere, plane, and cube. Check tiling and lighting in real time.
Re-packages maps per engine: Unreal (BaseColor + ORM), Unity (Mask/MetallicSmoothness), Blender (separate channels).
PNG ↔ JPG ↔ SVG: fast convert, SVG rasterize, embed/trace options, quality & background controls.