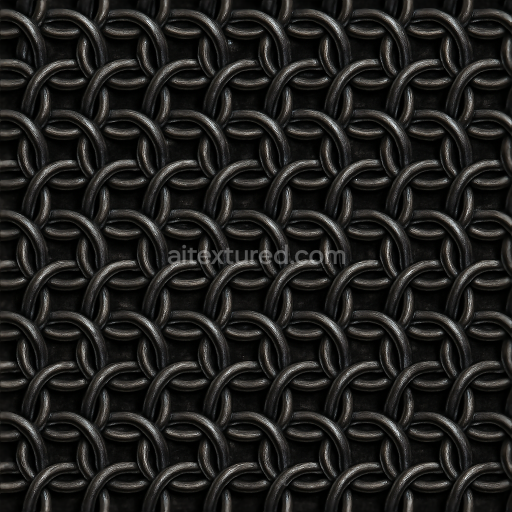
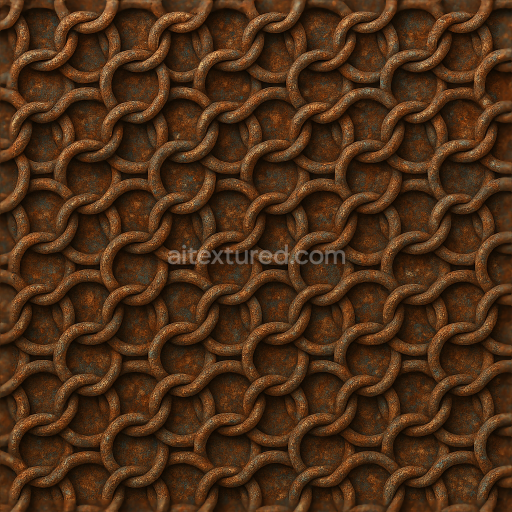
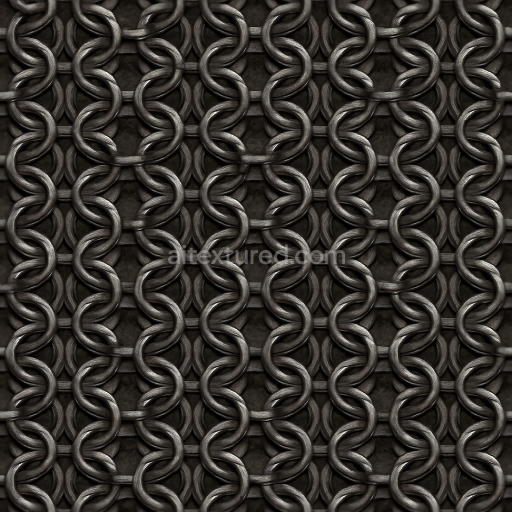
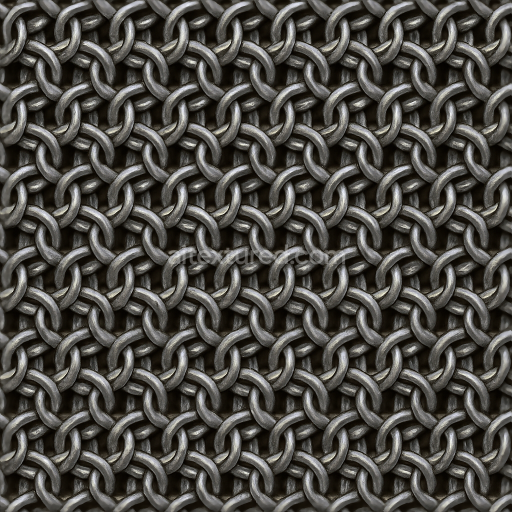
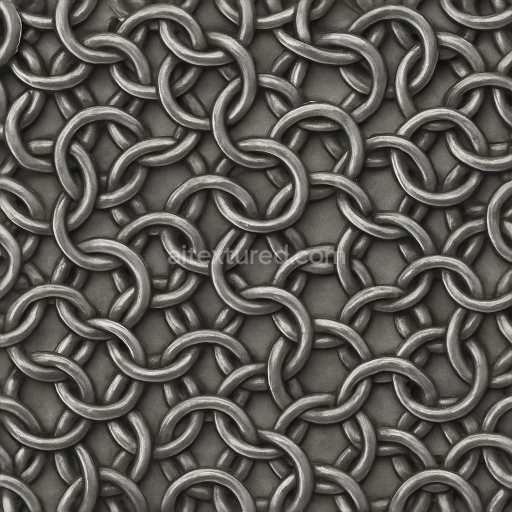
8K PBR Chainmail With Blackened Steel And Interlinked Loops
Seamless texture (tileable) · PNG, WEBP, PBR ZIP. License: AITextured Free Commercial License (FCL) v1.1. Free personal and commercial use. Raw resale, standalone redistribution, mirroring/scraping, competing asset packs, and AI/ML training are not allowed without written permission. Attribution is not required, but appreciated..

| ID | seamless-3d-texture-pbr-8k-of-flexible-mail-mesh-with-brushed-steel-finish |
|---|---|
| Category | Chainmail |
| Formats | PNG, WEBP, PBR ZIP |
| Size | 1k (1024x1024px), 2k (2048x2048px), 4k (4096x4096px), 8k (8192x8192px) |
| Color | sRGB |
| Tileable | Yes |
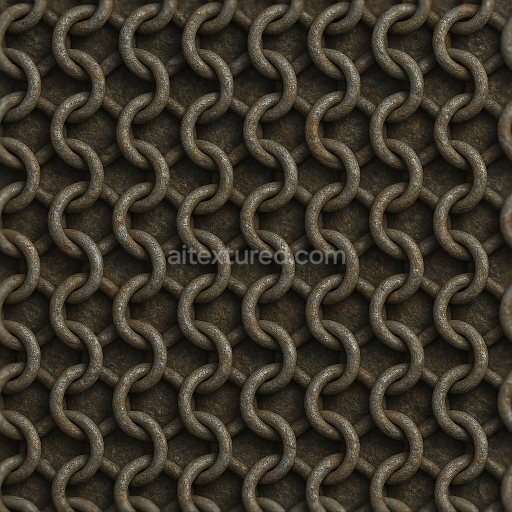
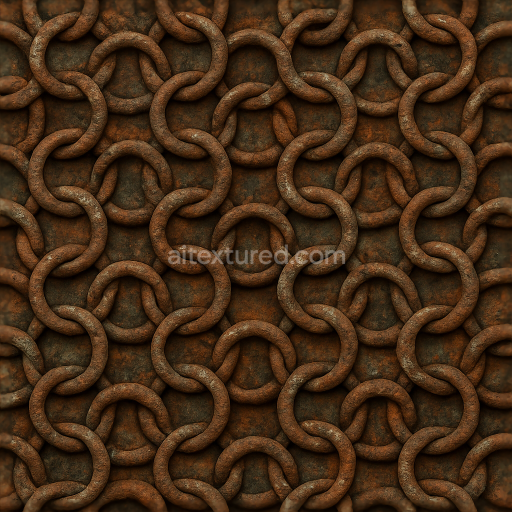
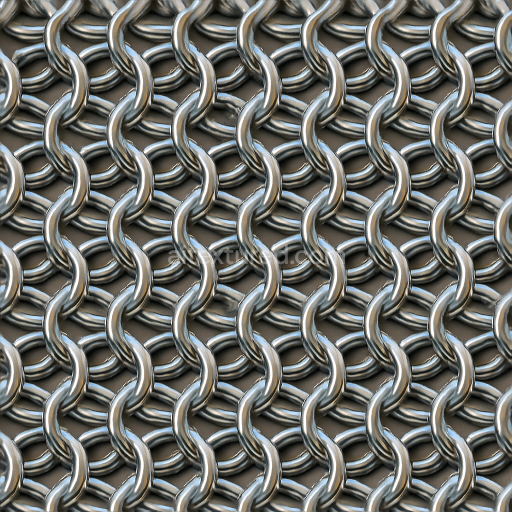
This seamless 8K resolution PBR texture showcases a meticulously crafted flexible armor mail mesh composed of interlinked steel rings each exhibiting a finely brushed steel finish. The base material is high-grade metal with the surface texture revealing a tight weave pattern characteristic of authentic chainmail armor. The brushed steel surface treatment produces a matte appearance with subtle reflectivity achieved through micro-abrasion that diffuses light softly while preserving the metallic luster. This interplay of diffuse and specular properties is accurately captured across the BaseColor and Metallic channels while the Normal and Height maps emphasize the intricate ring overlaps and weave depth enhancing the sense of flexibility and stretch in the mesh structure. The Roughness map balances smooth and coarse areas to replicate the nuanced tactile quality of brushed steel and the Ambient Occlusion channel adds realistic shadowing within the interstices of the mesh grounding the material in believable lighting environments.
The texture’s composition highlights fine metal craftsmanship where each steel ring acts as a tightly woven fiber-like element within the mesh allowing natural deformation and flexing typical of chainmail armor. This flexible architecture is reflected in the height and normal data which simulate the subtle undulations and layered overlaps essential for realistic armor surface rendering. The brushed steel finish combined with the seamless tileability enables the texture to maintain visual continuity across large 3D surfaces without noticeable repetition or seams. This makes it ideal for use on high-resolution 3D models in both medieval and fantasy contexts where authentic-looking armor with a modern slightly industrial aesthetic is desired.
This 3D texture is optimized for compatibility with popular real-time engines and rendering software such as Unreal Engine Blender and Unity ensuring ease of integration into diverse workflows. When applying the texture adjusting the UV scale to maintain the fine detail of the mesh rings is recommended as well as fine-tuning the roughness to control the balance between matte and reflective qualities depending on lighting conditions. Utilizing parallax or displacement mapping with the height channel can further enhance the perception of depth and flexibility in the chainmail structure especially in close-up renders. Overall this flexible mail mesh texture provides a versatile photorealistic material solution for any project requiring seamless high-fidelity metal armor surfaces with a brushed steel finish.
Import the texture maps into Blender with sRGB color space for albedo/base color and Non-Color for normal, roughness, metallic, AO, height, and ORM maps. Connect normal maps through a Normal Map node, then adjust UV scale with a Mapping node so the material repeats naturally on your model.
For the full step-by-step setup, see How to Use Seamless Textures in Blender. Browse related material examples in wood, concrete, and metal.
Yes. This texture is designed as a seamless tileable PBR material, so it can repeat across large surfaces without visible borders.
You can download PNG/WEBP versions and use 1K, 2K, 4K and 8K download options when available on the page.
Yes. The download options and engine-mapped ZIP workflow are designed for Blender, Unreal Engine, Unity Standard, URP and HDRP material pipelines.
Yes. The texture is available under the AITextured free commercial license. Review the license page for redistribution and AI-training restrictions.
Build, preview, and export seamless PBR materials. Generate full map sets from a single image, inspect them in a real-time WebGL viewer, and re-package maps for Unreal, Unity, and Blender—directly in your browser.
AI text-to-texture: type a prompt and get a seamless, tileable base image ready for PBR workflows (great starting point for materials).
Create a full PBR set (Normal, Roughness, AO, Metallic, etc.) from a single image. Seamless and tiling-friendly.
Instant WebGL viewer: inspect materials on a sphere, plane, and cube. Check tiling and lighting in real time.
Re-packages maps per engine: Unreal (BaseColor + ORM), Unity (Mask/MetallicSmoothness), Blender (separate channels).
PNG ↔ JPG ↔ SVG: fast convert, SVG rasterize, embed/trace options, quality & background controls.