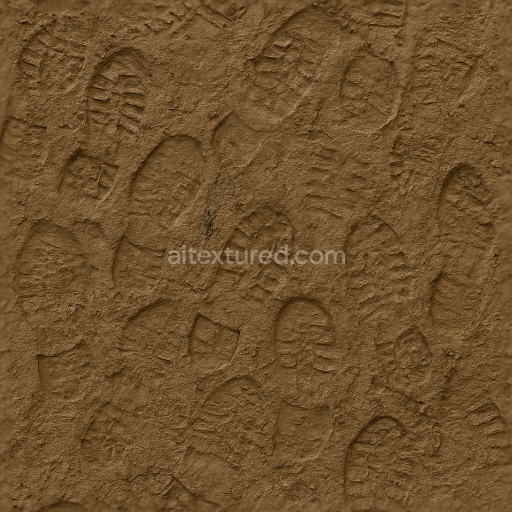
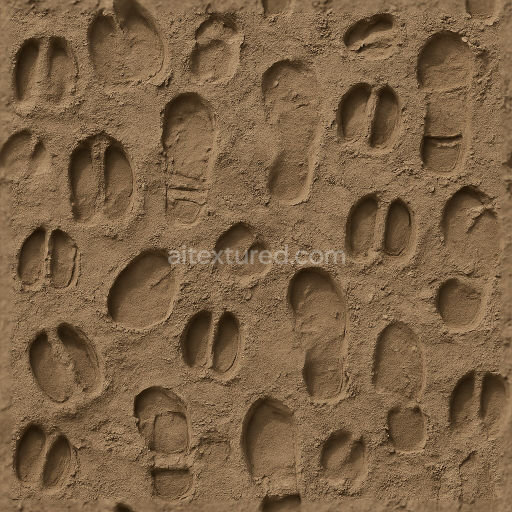
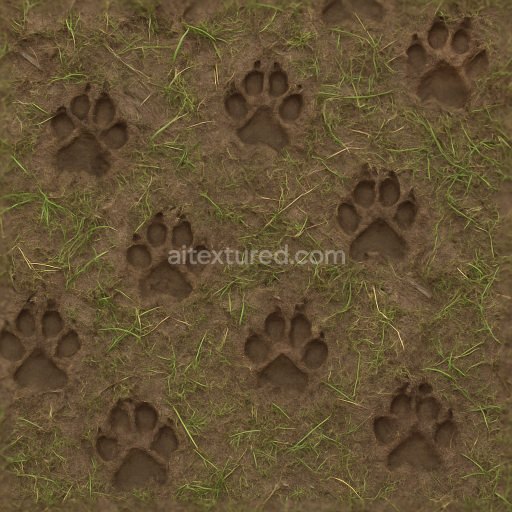
Muddy Footprints On Wet Soil Surface
Seamless texture (tileable) · PNG, WEBP, PBR ZIP. License: AITextured Free Commercial License (FCL) v1.1. Free personal and commercial use. Raw resale, standalone redistribution, mirroring/scraping, competing asset packs, and AI/ML training are not allowed without written permission. Attribution is not required, but appreciated..

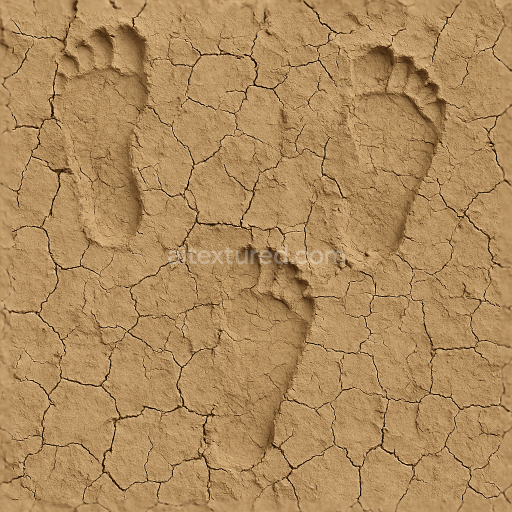
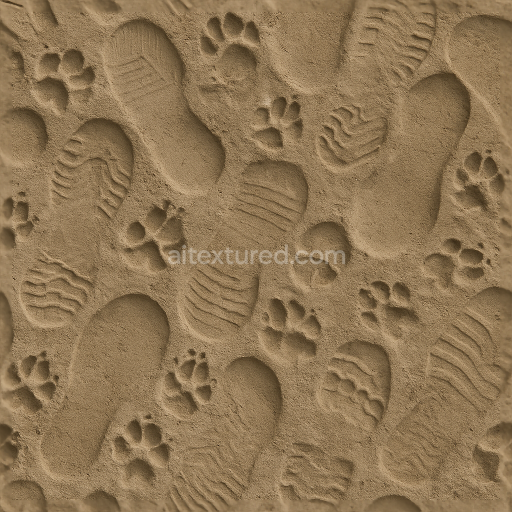
| ID | seamless-3d-texture-pbr-8k-of-barefoot-marks-on-sandy-riverbank-sand-surface |
|---|---|
| Category | Footprints |
| Formats | PNG, WEBP, PBR ZIP |
| Size | 1k (1024x1024px), 2k (2048x2048px), 4k (4096x4096px), 8k (8192x8192px) |
| Color | sRGB |
| Tileable | Yes |
This photorealistic seamless 3D texture captures the intricate details of barefoot marks imprinted on natural riverbank sand rendered at an impressive 8k resolution for exceptional clarity and realism. The base substrate consists of fine mineral grains typical of sandy riverbanks exhibiting a loose granular composition with natural yellow sand tones enhanced by subtle pigments and iron oxide layers that give warmth and authenticity to the surface. The sand’s porosity and slight moisture retention influence the footprint impressions which reveal medium-depth sandy footprints with sharply defined toe foot arch and heel details. These features are accentuated by variations in grain orientation and mild erosion effects reflecting natural weathering and sediment displacement caused by water flow and foot traffic.
In terms of material composition the sand behaves as an organic-mineral blend where loosely bound quartz and feldspar particles create a textured yet smooth base. The absence of any artificial binders or adhesives ensures a natural roughness and friability which is effectively conveyed through the PBR channels. The BaseColor (Albedo) channel displays soft yellow and tan hues consistent with riverbank sand while the Normal map intricately models the footprint’s depth and grain structure enhancing tactile realism. The Roughness channel balances between smooth slightly damp areas within the footprint and the coarser drier surrounding sand providing a nuanced surface finish. The Metallic channel remains near zero as expected for this non-metallic organic surface whereas Ambient Occlusion emphasizes subtle shadowing within the footprint crevices. The Height/Displacement map accurately simulates the natural indentations and erosion enabling realistic parallax effects in real-time engines.
This seamless texture is fully optimized and ready for integration into Blender Unreal Engine and Unity projects making it ideal for river or beach environment scenes requiring authentic barefoot trail details. For best results it is recommended to adjust the UV scale carefully to match the intended scene scale ensuring footprint proportions remain natural. Additionally fine-tuning the roughness parameter can help simulate varying moisture levels on the sand surface enhancing the tactile impression of damp versus dry areas. Overall this 8k PBR texture offers a lifelike versatile solution for detailed environmental design perfect for adding depth and realism to sandy riverbank surfaces with barefoot marks.
Import the texture maps into Blender with sRGB color space for albedo/base color and Non-Color for normal, roughness, metallic, AO, height, and ORM maps. Connect normal maps through a Normal Map node, then adjust UV scale with a Mapping node so the material repeats naturally on your model.
For the full step-by-step setup, see How to Use Seamless Textures in Blender. Browse related material examples in wood, concrete, and metal.
Yes. This texture is designed as a seamless tileable PBR material, so it can repeat across large surfaces without visible borders.
You can download PNG/WEBP versions and use 1K, 2K, 4K and 8K download options when available on the page.
Yes. The download options and engine-mapped ZIP workflow are designed for Blender, Unreal Engine, Unity Standard, URP and HDRP material pipelines.
Yes. The texture is available under the AITextured free commercial license. Review the license page for redistribution and AI-training restrictions.
Generate, preview, and export seamless PBR materials for Blender, Unity, and Unreal Engine—directly in your browser.
AI text-to-texture: type a prompt and get a seamless, tileable base image ready for PBR workflows (great starting point for materials).
Create a full PBR set (Normal, Roughness, AO, Metallic, etc.) from a single image. Seamless and tiling-friendly.
Instant WebGL viewer: inspect materials on a sphere, plane, and cube. Check tiling and lighting in real time.
Re-packages maps per engine: Unreal (BaseColor + ORM), Unity (Mask/MetallicSmoothness), Blender (separate channels).
PNG ↔ JPG ↔ SVG: fast convert, SVG rasterize, embed/trace options, quality & background controls.