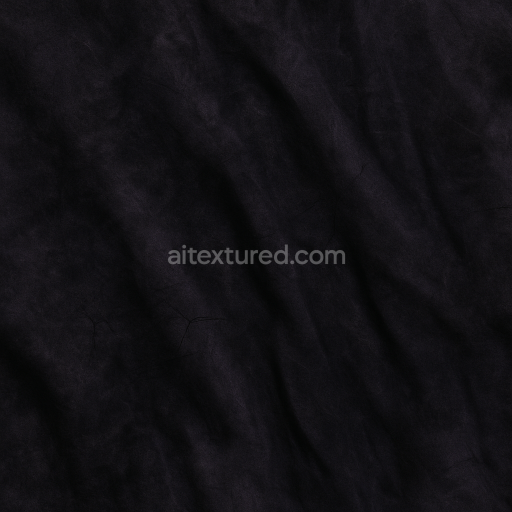
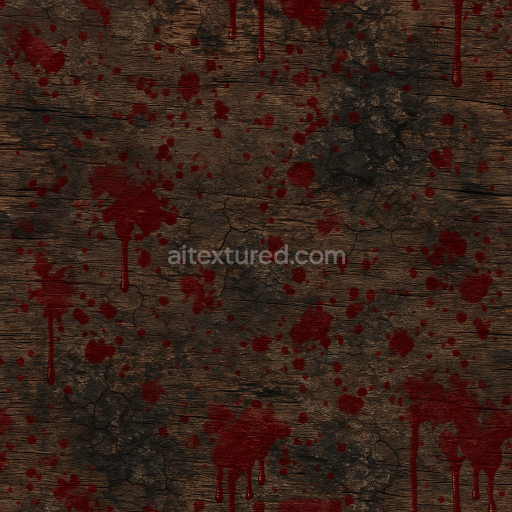
Witch Hat Fabric With Dark Purple And Black Velvet For Halloween
Seamless texture (tileable) · PNG, WEBP, PBR ZIP. License: AITextured Free Commercial License (FCL) v1.1. Free personal and commercial use. Raw resale, standalone redistribution, mirroring/scraping, competing asset packs, and AI/ML training are not allowed without written permission. Attribution is not required, but appreciated..

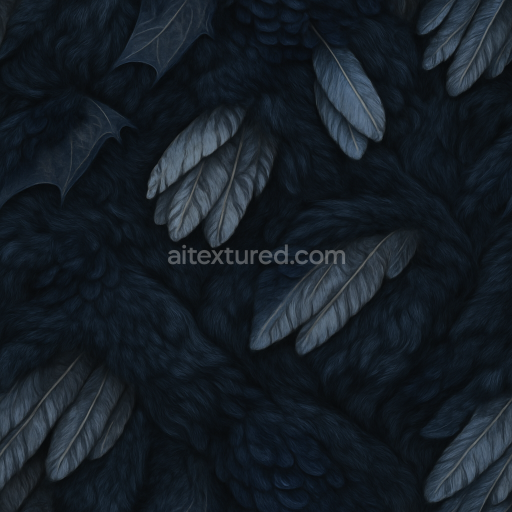
| ID | seamless-3d-texture-pbr-8k-bat-wings-surface-with-creepy-crawlies-details |
|---|---|
| Category | Halloween |
| Formats | PNG, WEBP, PBR ZIP |
| Size | 1k (1024x1024px), 2k (2048x2048px), 4k (4096x4096px), 8k (8192x8192px) |
| Color | sRGB |
| Tileable | Yes |
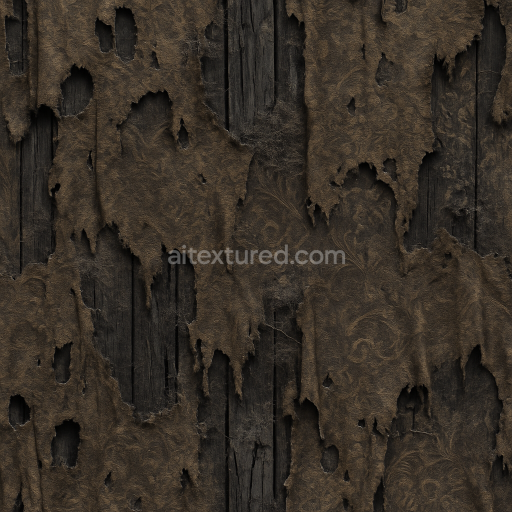
This seamless 3D texture presents an ultra-high-resolution 8K surface of bat wings meticulously designed with photorealistic PBR materials to capture every intricate detail. The base substrate simulates an organic leathery membrane characteristic of natural bat wings composed of fine fibrous tissues interwoven with subtle veins and delicate bat fur accents. These elements combine to create a complex composition where the membrane’s translucent qualities contrast with the dark shadow black tones of the underlying structure. The texture’s surface finish balances a slightly rough yet supple feel enhanced by weathering effects and scattered creepy crawlies that add an eerie Halloween-inspired atmosphere. Pigments and natural dyes are implied in the BaseColor/Albedo channel delivering muted browns and deep blacks that reinforce the texture’s dark fantasy aesthetic.
In terms of PBR channel mapping the Normal map expertly defines the fine membrane fibers wrinkles and tiny fur strands providing depth and tactile realism without disrupting seamless tiling. The Roughness channel carefully modulates surface reflectivity—showcasing the leathery parts with matte softness while adding slight gloss to the crawlies and fur highlights enhancing their visual prominence. The Metallic channel remains subtle or near zero reflecting the organic non-metallic nature of the material. Ambient Occlusion enriches shadowed crevices between veins and folds increasing perceived depth and complexity. Height/Displacement maps emphasize the raised veins and subtle surface undulations ideal for parallax effects or displacement in real-time engines reinforcing the texture’s eerie and lifelike wing surface.
Crafted for seamless tiling and neutral lighting conditions this 8K bat wings texture integrates smoothly into diverse digital scenes including Unreal Engine Blender and Unity projects. It is perfectly suited for dark fantasy assets flying creature models or Halloween-themed environments requiring photorealistic creepy wing surfaces. When applying this texture adjusting the UV scale to emphasize membrane details without stretching the fur accents is recommended along with fine-tuning roughness levels to match specific lighting scenarios. This ensures optimal visual fidelity and enhances the unsettling shadow black spookiness that defines the material’s character.
Import the texture maps into Blender with sRGB color space for albedo/base color and Non-Color for normal, roughness, metallic, AO, height, and ORM maps. Connect normal maps through a Normal Map node, then adjust UV scale with a Mapping node so the material repeats naturally on your model.
For the full step-by-step setup, see How to Use Seamless Textures in Blender. Browse related material examples in wood, concrete, and metal.
Yes. This texture is designed as a seamless tileable PBR material, so it can repeat across large surfaces without visible borders.
You can download PNG/WEBP versions and use 1K, 2K, 4K and 8K download options when available on the page.
Yes. The download options and engine-mapped ZIP workflow are designed for Blender, Unreal Engine, Unity Standard, URP and HDRP material pipelines.
Yes. The texture is available under the AITextured free commercial license. Review the license page for redistribution and AI-training restrictions.
Build, preview, and export seamless PBR materials. Generate full map sets from a single image, inspect them in a real-time WebGL viewer, and re-package maps for Unreal, Unity, and Blender—directly in your browser.
AI text-to-texture: type a prompt and get a seamless, tileable base image ready for PBR workflows (great starting point for materials).
Create a full PBR set (Normal, Roughness, AO, Metallic, etc.) from a single image. Seamless and tiling-friendly.
Instant WebGL viewer: inspect materials on a sphere, plane, and cube. Check tiling and lighting in real time.
Re-packages maps per engine: Unreal (BaseColor + ORM), Unity (Mask/MetallicSmoothness), Blender (separate channels).
PNG ↔ JPG ↔ SVG: fast convert, SVG rasterize, embed/trace options, quality & background controls.