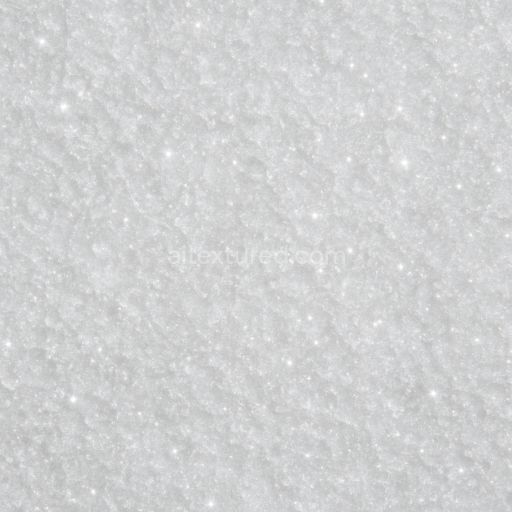
Silver Frost Icy Crystals Winter Surface
Seamless texture (tileable) · PNG, WEBP, PBR ZIP. License: AITextured Free Commercial License (FCL) v1.1. Free personal and commercial use. Raw resale, standalone redistribution, mirroring/scraping, competing asset packs, and AI/ML training are not allowed without written permission. Attribution is not required, but appreciated..

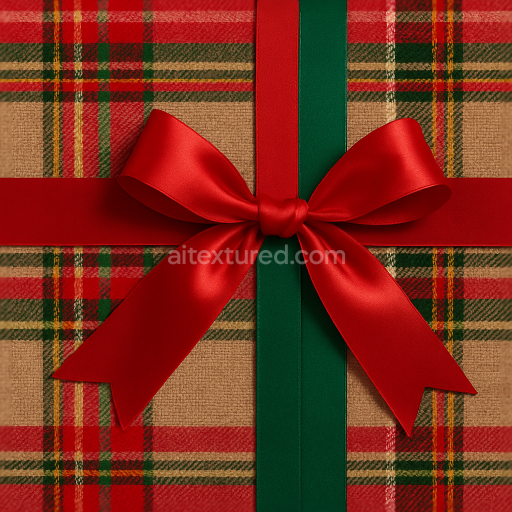
| ID | seamless-3d-texture-pbr-8k-berry-wreath-evergreen-wreath-snowy-wreath-sleigh-wood |
|---|---|
| Category | Merry christmas |
| Formats | PNG, WEBP, PBR ZIP |
| Size | 1k (1024x1024px), 2k (2048x2048px), 4k (4096x4096px), 8k (8192x8192px) |
| Color | sRGB |
| Tileable | Yes |
This seamless 3D texture masterfully combines the intricate forms of a berry wreath evergreen foliage and snowy accents with the rugged natural grain of sleigh wood producing a richly detailed surface ideal for Christmas-themed projects. The primary material foundation consists of intertwined pine and birch bark elements forming the wreath structure enhanced by clusters of vibrant red berries and snow-dusted evergreen needles. These organic components are composed of fibrous wood substrates bound together with natural twine wrapping creating a woven circular pattern characteristic of traditional holiday wreaths. The wood surfaces exhibit subtle weathering and gentle porosity reflecting natural bark textures with fine cracks and layered grain while the snow introduces a soft irregular overlay with a lightly roughened crystalline surface.
Rendered in physically based rendering (PBR) at an impressive 8K resolution this texture delivers exceptional detail across all material channels. The BaseColor (Albedo) map captures the warm earthy tones of dark sleigh wood with reddish undertones the deep greens of the evergreen needles and the bright scarlet of the berries balanced by the cold white highlights of snow. The Normal map emphasizes the complex topography of bark ridges twine fibers and berry surfaces enhancing the realistic depth and tactile quality. Roughness values vary naturally across the texture to simulate the contrast between the smooth polished wood patches and the matte porous bark and snow-covered regions while the Metallic channel remains minimal as the materials are predominantly organic. Ambient Occlusion subtly enhances the shadowed crevices within the wreath’s woven structure and the Height/Displacement map provides fine relief details that enable effective parallax effects or displacement in 3D environments.
Designed for seamless tiling this texture integrates flawlessly over large surfaces without visible repetition making it highly versatile for use in Blender Unreal Engine and Unity workflows. Its geometric form is primarily circular and woven reflecting the natural assembly of wreath components with layering that supports realistic depth perception and shadow interplay in real-time rendering engines or offline renders. The surface finish balances between matte bark and semi-glossy wood with snow adding a subtle diffuse scattering effect that further enhances realism under varied lighting conditions.
For optimal results it is advisable to adjust the UV scale to maintain the natural size of individual berries and twine fibers ensuring the texture’s fine details are preserved without distortion. Additionally fine-tuning the roughness channel can help to emphasize the contrast between the slick wood surfaces and the powdery snow while blending the Height and Normal maps can create more convincing parallax effects particularly on wreath edges and berry clusters. This careful manipulation ensures the texture’s rich material complexity translates effectively in diverse 3D scenes from close-up visualizations to background environmental assets.
Import the texture maps into Blender with sRGB color space for albedo/base color and Non-Color for normal, roughness, metallic, AO, height, and ORM maps. Connect normal maps through a Normal Map node, then adjust UV scale with a Mapping node so the material repeats naturally on your model.
For the full step-by-step setup, see How to Use Seamless Textures in Blender. Browse related material examples in wood, concrete, and metal.
Yes. This texture is designed as a seamless tileable PBR material, so it can repeat across large surfaces without visible borders.
You can download PNG/WEBP versions and use 1K, 2K, 4K and 8K download options when available on the page.
Yes. The download options and engine-mapped ZIP workflow are designed for Blender, Unreal Engine, Unity Standard, URP and HDRP material pipelines.
Yes. The texture is available under the AITextured free commercial license. Review the license page for redistribution and AI-training restrictions.


Build, preview, and export seamless PBR materials. Generate full map sets from a single image, inspect them in a real-time WebGL viewer, and re-package maps for Unreal, Unity, and Blender—directly in your browser.
AI text-to-texture: type a prompt and get a seamless, tileable base image ready for PBR workflows (great starting point for materials).
Create a full PBR set (Normal, Roughness, AO, Metallic, etc.) from a single image. Seamless and tiling-friendly.
Instant WebGL viewer: inspect materials on a sphere, plane, and cube. Check tiling and lighting in real time.
Re-packages maps per engine: Unreal (BaseColor + ORM), Unity (Mask/MetallicSmoothness), Blender (separate channels).
PNG ↔ JPG ↔ SVG: fast convert, SVG rasterize, embed/trace options, quality & background controls.