
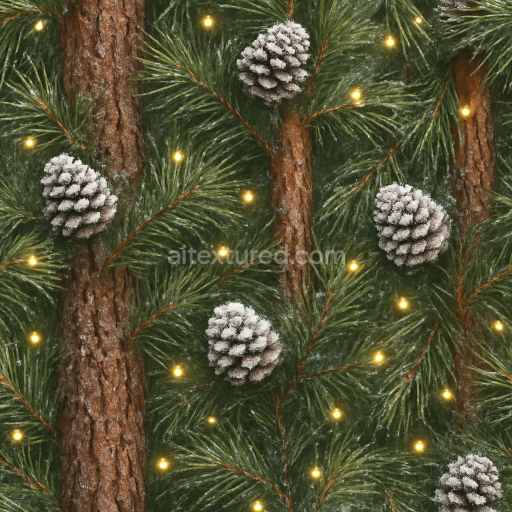
Christmas Tree Pine Needles Fir Branches Snowy Branches
Seamless texture (tileable) · PNG, WEBP, PBR ZIP. License: AITextured Free Commercial License (FCL) v1.1. Free personal and commercial use. Raw resale, standalone redistribution, mirroring/scraping, competing asset packs, and AI/ML training are not allowed without written permission. Attribution is not required, but appreciated..

| ID | seamless-8k-pbr-3d-texture-of-tinsel-strands-sparkling-festive-surface |
|---|---|
| Category | Merry christmas |
| Formats | PNG, WEBP, PBR ZIP |
| Size | 1k (1024x1024px), 2k (2048x2048px), 4k (4096x4096px), 8k (8192x8192px) |
| Color | sRGB |
| Tileable | Yes |
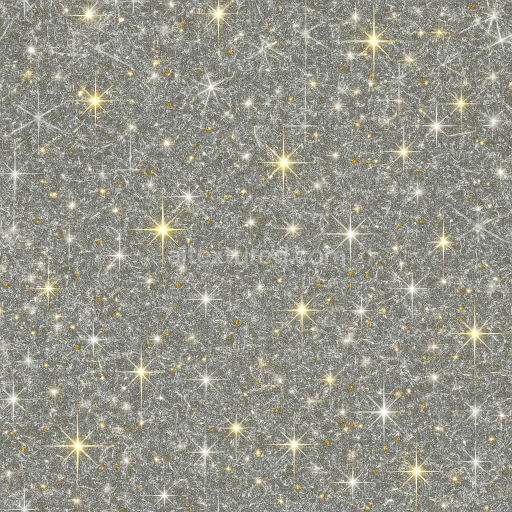
This seamless 8k PBR 3d texture portrays photorealistic tinsel strands composed primarily of fine metallic fibers woven with subtle polymer binders to ensure flexibility and durability. The base substrate mimics thin metal ribbons typically aluminum or steel coated with reflective pigments and glitter particles that create a vibrant sparkling festive surface. Variations in strand thickness and glitter density are naturally captured highlighting the intricate interplay between smooth metallic sheens and textured glitter aggregates. The surface finish is a combination of polished and lightly brushed effects resulting in a dynamic shimmer that reflects light with a soft yet pronounced glow perfectly replicating holiday tinsel’s festive charm. Minor surface porosity and slight weathering are subtly integrated into the texture’s normal and height maps enhancing the realism of the material’s tactile quality without compromising its reflective properties.
In terms of PBR channel mapping the BaseColor/Albedo channel features nuanced metallic hues with interspersed glitter pigments that vary from silvery to golden tones. The Normal map emphasizes the delicate strand orientation and slight surface undulations to simulate the layered tinsel fibers. Roughness values are finely tuned to balance the polished metal shine with the matte glitter particles while the Metallic channel strongly supports the metal-like reflectivity of the strands. Ambient Occlusion adds realistic depth between overlapping fibers enhancing shadow play without harsh contrasts. The Height/Displacement map captures the subtle elevation differences between individual strands and glitter clusters adding depth crucial for close-up renders. This texture’s 8k resolution ensures exceptional clarity and detail making it ideal for high-fidelity 3D Christmas decorations and festive scene embellishments.
Designed with compatibility in mind this seamless tinsel strands PBR 3d texture is fully ready for use in Blender Unreal Engine and Unity supporting advanced shader workflows and real-time rendering. To optimize visual impact it is recommended to adjust the UV scale carefully to maintain natural proportion of the tinsel strands and control roughness settings to suit lighting conditions preserving the sparkle effect without introducing unwanted glossiness. Rendering under flat neutral lighting conditions helps retain the authentic reflective shimmer and festive glow while minimizing harsh shadows that could detract from the texture’s delicate details. This combination of material accuracy technical precision and high resolution makes it an excellent resource for artists and developers seeking to add realistic holiday-themed metallic surfaces to their projects.
Import the texture maps into Blender with sRGB color space for albedo/base color and Non-Color for normal, roughness, metallic, AO, height, and ORM maps. Connect normal maps through a Normal Map node, then adjust UV scale with a Mapping node so the material repeats naturally on your model.
For the full step-by-step setup, see How to Use Seamless Textures in Blender. Browse related material examples in wood, concrete, and metal.
Yes. This texture is designed as a seamless tileable PBR material, so it can repeat across large surfaces without visible borders.
You can download PNG/WEBP versions and use 1K, 2K, 4K and 8K download options when available on the page.
Yes. The download options and engine-mapped ZIP workflow are designed for Blender, Unreal Engine, Unity Standard, URP and HDRP material pipelines.
Yes. The texture is available under the AITextured free commercial license. Review the license page for redistribution and AI-training restrictions.


Build, preview, and export seamless PBR materials. Generate full map sets from a single image, inspect them in a real-time WebGL viewer, and re-package maps for Unreal, Unity, and Blender—directly in your browser.
AI text-to-texture: type a prompt and get a seamless, tileable base image ready for PBR workflows (great starting point for materials).
Create a full PBR set (Normal, Roughness, AO, Metallic, etc.) from a single image. Seamless and tiling-friendly.
Instant WebGL viewer: inspect materials on a sphere, plane, and cube. Check tiling and lighting in real time.
Re-packages maps per engine: Unreal (BaseColor + ORM), Unity (Mask/MetallicSmoothness), Blender (separate channels).
PNG ↔ JPG ↔ SVG: fast convert, SVG rasterize, embed/trace options, quality & background controls.