
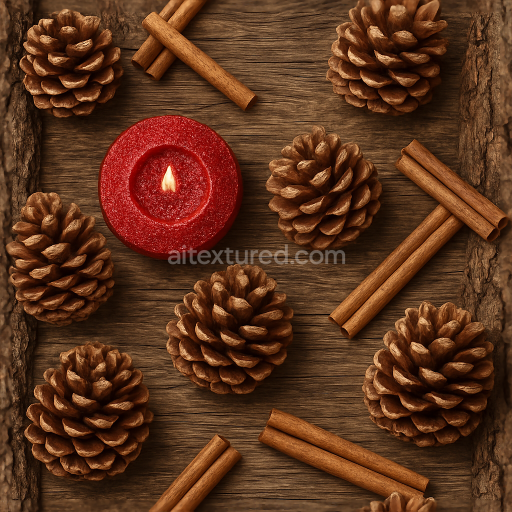
Pine Cones Christmas Wreath Red Ribbon Gold Ribbon
Seamless texture (tileable) · PNG, WEBP, PBR ZIP. License: AITextured Free Commercial License (FCL) v1.1. Free personal and commercial use. Raw resale, standalone redistribution, mirroring/scraping, competing asset packs, and AI/ML training are not allowed without written permission. Attribution is not required, but appreciated..

| ID | seamless-3d-texture-pbr-8k-christmas-garland-red-plaid-green-plaid-snow-covered-pine-frost-crystals |
|---|---|
| Category | Merry christmas |
| Formats | PNG, WEBP, PBR ZIP |
| Size | 1k (1024x1024px), 2k (2048x2048px), 4k (4096x4096px), 8k (8192x8192px) |
| Color | sRGB |
| Tileable | Yes |
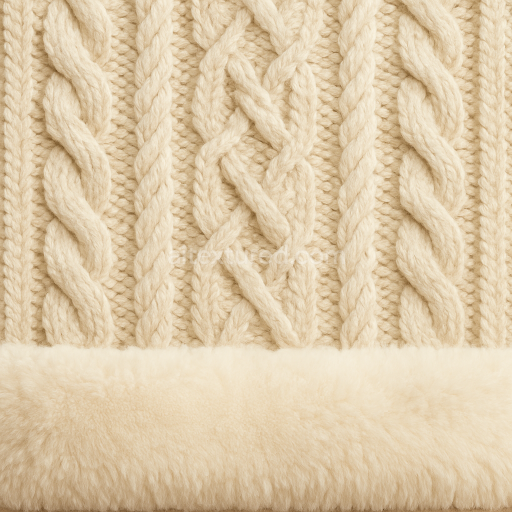
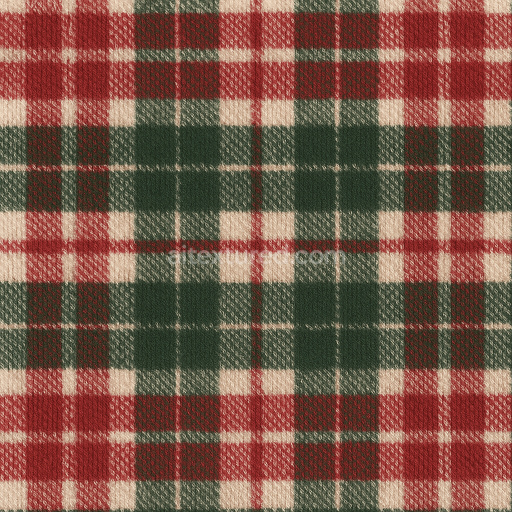
This seamless 3D PBR texture presents a richly detailed Christmas garland composed primarily of natural pine needles interwoven with red and green plaid fabric ribbons. The base material consists of densely packed pine branch substrates featuring fine elongated needles with subtle curvature and natural vein patterns. These organic elements exhibit a slightly rough fibrous surface finish typical of coniferous foliage enhanced by a delicate layer of frost crystals that add crystalline texture and light refraction. The plaid ribbons are woven textiles with a soft fibrous surface showing tightly knit yarns dyed in traditional red and green patterns. The fabric’s weave structure is clearly visible adding geometric complexity that contrasts with the irregular pine needles. Snow deposits form a powdery porous coating softening edges and introducing micro-variation in surface roughness and height detail.
In terms of material composition the pine needles act as the primary substrate with a natural cellulose fiber network bound loosely by resinous compounds inherent to the pine. The frost crystals simulate thin ice formations with low diffuse reflectance but high specular highlights mimicking tiny frozen water droplets adhered to the foliage. The plaid ribbons are composed of cotton or wool fibers dyed with organic pigments to achieve the vibrant red and green hues. These textile fibers exhibit moderate porosity and matte finishes with minor specular response due to fiber surface irregularities. The snow layer is modeled as a fine aggregate of ice granules exhibiting high roughness and subtle translucency contributing to ambient occlusion and height variations.
Mapped to physically based rendering channels the BaseColor (Albedo) captures the vivid reds and greens of the plaid alongside the deep natural greens of the pine needles and the soft white of snow. The Normal map emphasizes the intricate weave of the fabric the sharp needle tips and the crystalline frost formations providing pronounced relief and depth. Roughness values vary spatially with smoother slightly glossy frost crystals moderately rough pine needles and a matte fibrous textile surface. The Metallic channel remains near zero reflecting the non-metallic nature of the organic and fabric materials. Ambient Occlusion enhances shadowing within the dense foliage and fabric folds while the Height/Displacement map provides measurable relief for the needles ribbon textures and snow accumulations allowing for realistic parallax effects.
Rendered at an 8K resolution this texture ensures exceptional clarity and detail when applied to 3D models making it suitable for high-end visualization in Blender Unreal Engine and Unity. The seamless tileability allows for continuous artifact-free coverage over large surfaces ideal for digital holiday decorations or immersive virtual environments. For practical use adjusting the UV scale to match the model’s dimensions is recommended to maintain realistic proportions of the plaid pattern and pine needles. Additionally fine-tuning the roughness to balance between soft fabric matte and crisp frost gloss enhances visual realism. Combining displacement with normal mapping will yield a convincing three-dimensional appearance without excessive computational cost.
Import the texture maps into Blender with sRGB color space for albedo/base color and Non-Color for normal, roughness, metallic, AO, height, and ORM maps. Connect normal maps through a Normal Map node, then adjust UV scale with a Mapping node so the material repeats naturally on your model.
For the full step-by-step setup, see How to Use Seamless Textures in Blender. Browse related material examples in wood, concrete, and metal.
Yes. This texture is designed as a seamless tileable PBR material, so it can repeat across large surfaces without visible borders.
You can download PNG/WEBP versions and use 1K, 2K, 4K and 8K download options when available on the page.
Yes. The download options and engine-mapped ZIP workflow are designed for Blender, Unreal Engine, Unity Standard, URP and HDRP material pipelines.
Yes. The texture is available under the AITextured free commercial license. Review the license page for redistribution and AI-training restrictions.


Build, preview, and export seamless PBR materials. Generate full map sets from a single image, inspect them in a real-time WebGL viewer, and re-package maps for Unreal, Unity, and Blender—directly in your browser.
AI text-to-texture: type a prompt and get a seamless, tileable base image ready for PBR workflows (great starting point for materials).
Create a full PBR set (Normal, Roughness, AO, Metallic, etc.) from a single image. Seamless and tiling-friendly.
Instant WebGL viewer: inspect materials on a sphere, plane, and cube. Check tiling and lighting in real time.
Re-packages maps per engine: Unreal (BaseColor + ORM), Unity (Mask/MetallicSmoothness), Blender (separate channels).
PNG ↔ JPG ↔ SVG: fast convert, SVG rasterize, embed/trace options, quality & background controls.