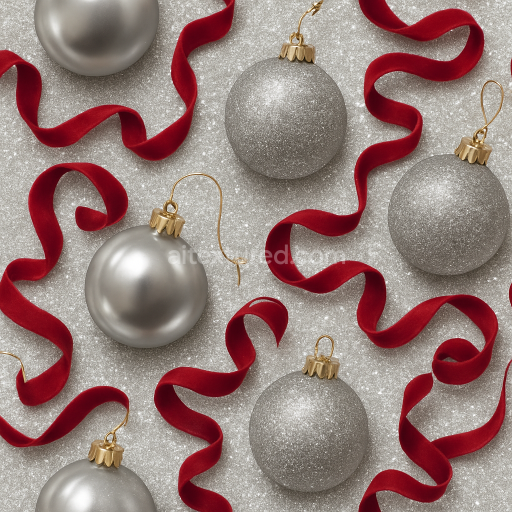
Ornament Shine Metallic Sheen Festive Decor
Seamless texture (tileable) · PNG, WEBP, PBR ZIP. License: AITextured Free Commercial License (FCL) v1.1. Free personal and commercial use. Raw resale, standalone redistribution, mirroring/scraping, competing asset packs, and AI/ML training are not allowed without written permission. Attribution is not required, but appreciated..

| ID | seamless-3d-texture-pbr-8k-gold-glitter-silver-glitter-sparkling-lights-christmas-lights-glow |
|---|---|
| Category | Merry christmas |
| Formats | PNG, WEBP, PBR ZIP |
| Size | 1k (1024x1024px), 2k (2048x2048px), 4k (4096x4096px), 8k (8192x8192px) |
| Color | sRGB |
| Tileable | Yes |
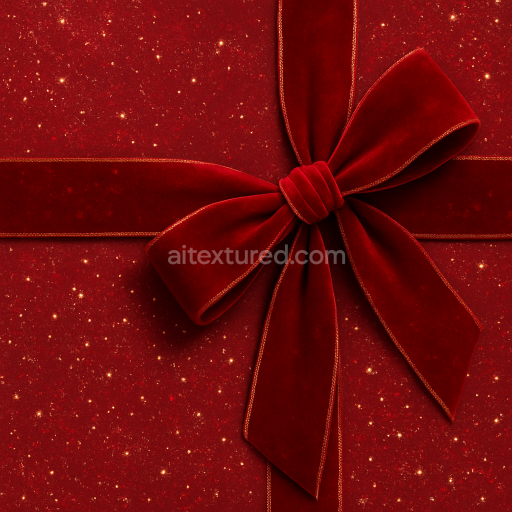
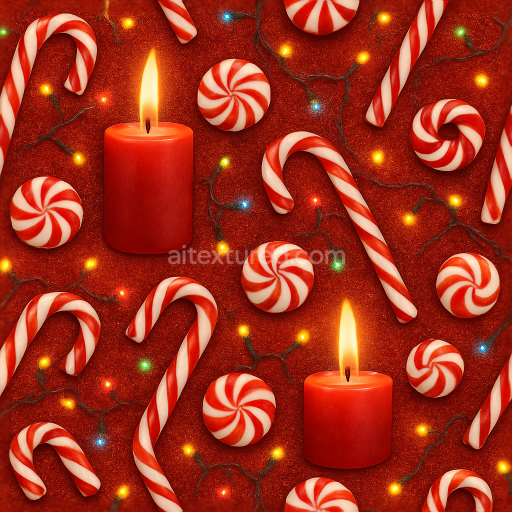
This seamless 3D texture presents a finely detailed material that combines gold and silver glitter particles embedded within a smooth slightly reflective substrate evoking the festive ambiance of Christmas lights glowing softly in the background. The base material can be understood as a thin flexible polymer layer—similar to a translucent resin or lacquer—infused with metallic glitter flakes. These flakes vary in size and orientation creating a multi-dimensional sparkling effect. The geometric form is essentially a continuous irregular grain pattern where the glitter particles are evenly but randomly dispersed ensuring the texture tiles seamlessly without visible repetition or abrupt transitions. The overall surface finish is polished with subtle micro-roughness allowing light to catch the glitter and produce dynamic highlights while maintaining a believable tactile quality.
From a materials composition perspective the substrate acts as a binder that holds the gold and silver metallic flakes in place providing adhesion and durability. The glitter aggregates consist of fine metallic pigments with a reflective coating responsible for the vivid shimmer seen in the BaseColor (Albedo) channel. The Normal map encodes the slight elevation differences caused by the glitter particles’ uneven surfaces and the subtle undulations of the polymer base enhancing the three-dimensional feel of the texture. Roughness values are carefully balanced to simulate the partially glossy yet textured surface—glitter areas exhibit lower roughness to reflect light sharply while the polymer matrix shows slightly higher roughness to diffuse reflections softly. The Metallic channel highlights the gold and silver flakes’ reflective qualities contributing to realistic metal reflections under varied lighting conditions.
Additional PBR channels include Ambient Occlusion which adds depth to crevices between glitter particles reinforcing the sense of volume and shadow play and Height/Displacement maps that emphasize micro-reliefs on the surface allowing for convincing parallax or tessellation effects in rendering engines. The texture’s 8K resolution guarantees exceptional detail fidelity capturing the intricate interplay of light and material at close inspection ideal for high-definition renders. It is optimized for seamless use in Blender Unreal Engine and Unity ensuring compatibility across popular 3D workflows and game development pipelines.
For practical implementation it is advisable to adjust the UV scale carefully to avoid over-repetition of the glitter pattern which can reduce realism. Additionally tuning the Roughness map to balance between sharp glitter highlights and softer surrounding reflections can enhance material authenticity. When using the Height map blending it subtly with the Normal map can prevent overly exaggerated reliefs while maintaining the delicate texture of the glitter surface. This texture is well-suited for holiday-themed 3D models virtual decorations or festive product visualizations requiring photorealistic gold and silver sparkle effects combined with a warm glowing Christmas light ambiance.
Import the texture maps into Blender with sRGB color space for albedo/base color and Non-Color for normal, roughness, metallic, AO, height, and ORM maps. Connect normal maps through a Normal Map node, then adjust UV scale with a Mapping node so the material repeats naturally on your model.
For the full step-by-step setup, see How to Use Seamless Textures in Blender. Browse related material examples in wood, concrete, and metal.
Yes. This texture is designed as a seamless tileable PBR material, so it can repeat across large surfaces without visible borders.
You can download PNG/WEBP versions and use 1K, 2K, 4K and 8K download options when available on the page.
Yes. The download options and engine-mapped ZIP workflow are designed for Blender, Unreal Engine, Unity Standard, URP and HDRP material pipelines.
Yes. The texture is available under the AITextured free commercial license. Review the license page for redistribution and AI-training restrictions.


Build, preview, and export seamless PBR materials. Generate full map sets from a single image, inspect them in a real-time WebGL viewer, and re-package maps for Unreal, Unity, and Blender—directly in your browser.
AI text-to-texture: type a prompt and get a seamless, tileable base image ready for PBR workflows (great starting point for materials).
Create a full PBR set (Normal, Roughness, AO, Metallic, etc.) from a single image. Seamless and tiling-friendly.
Instant WebGL viewer: inspect materials on a sphere, plane, and cube. Check tiling and lighting in real time.
Re-packages maps per engine: Unreal (BaseColor + ORM), Unity (Mask/MetallicSmoothness), Blender (separate channels).
PNG ↔ JPG ↔ SVG: fast convert, SVG rasterize, embed/trace options, quality & background controls.