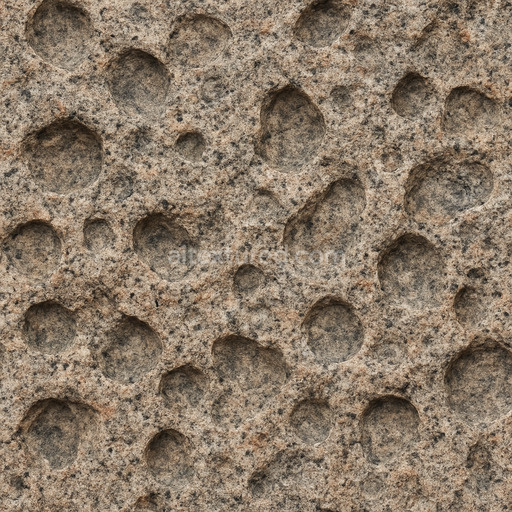
The Eroded Granite Seamless Texture is a meticulously AI-generated tileable eroded granite seamless texture crafted to enhance your rock textures collection with exceptional realism and versatility. This texture captures the natural complexity of granite rock, featuring a durable mineral base composed primarily of quartz, feldspar, and mica crystals tightly bound together by natural geological adhesives. The surface reveals weathered erosion patterns, subtle porosity, and mineral grain orientation that evoke the slow natural wear granite undergoes over millennia. These characteristics translate into a visually rich and tactile surface finish that balances rough, chipped areas with smoother, polished patches, all highlighted by nuanced colorants such as iron oxide layers and natural pigment variations within the stone matrix. The result is a seamless eroded granite seamless texture that scales elegantly across large surfaces without visible seams or repetitive artifacts, ideal for realistic material studies and environment dressing.
In terms of physically based rendering (PBR) channels, this tileable eroded granite seamless texture provides a high-resolution BaseColor/Albedo map that accurately reproduces the subtle interplay of colors found in weathered granite, including muted earthy tones and occasional rusty streaks from oxidation. The Normal map captures the fine grain orientation and surface undulations created by erosion, enhancing the sense of depth and tactile roughness. The Roughness channel controls the varying surface reflectivity, simulating the contrast between polished and matte areas typical of granite rock. The Metallic channel remains neutral, reflecting granite’s non-metallic nature, while the Ambient Occlusion map enriches shadow details in crevices and fissures. The Height/Displacement map further accentuates surface irregularities, allowing for convincing parallax effects and realistic surface relief when applied in real-time scenes or cinematic renders.
Designed to accelerate rock workflows, this eroded granite seamless texture delivers up to 8K resolution, ensuring crisp detail even on large surfaces. It is optimized for seamless tiling and works out-of-the-box in major platforms like Blender, Unity, and Unreal Engine, supporting smooth iteration loops for artists and developers alike. To achieve the best visual results, it is recommended to maintain consistent texel density across all related assets and carefully tune UV scaling to prevent pattern stretching. Additionally, adjusting roughness values can help tailor the surface reflectivity to match specific lighting conditions or artistic goals. By integrating this AI texture eroded granite seamless texture into your material library, you gain a powerful asset that brings authentic granite rock surfaces to your 3D projects with minimal setup and maximum flexibility.
How to Use These Seamless PBR Textures in Blender
This guide shows how to connect a full PBR texture set to Principled BSDF in Blender (Cycles or Eevee). Works with any of our seamless textures free download, including PBR PNG materials for Blender / Unreal / Unity.
What’s inside the download
*_albedo.png — Base Color (sRGB)*_normal.png — Normal map (Non-Color)*_roughness.png — Roughness (Non-Color)*_metallic.png — Metallic (Non-Color)*_ao.png — Ambient Occlusion (Non-Color)*_height.png — Height / Displacement (Non-Color)*_ORM.png — Packed map (R=AO, G=Roughness, B=Metallic, Non-Color)

Quick start (Node Wrangler, 30 seconds)
- Enable the addon: Edit → Preferences → Add-ons → Node Wrangler.
- Create a material and select the Principled BSDF node.
- Press Ctrl + Shift + T and select the maps
albedo, normal, roughness, metallic (skip height and ORM for now) → Open.
The addon wires Base Color, Normal (with a Normal Map node), Roughness, and Metallic automatically.
- Add AO and Height using the “Manual wiring” steps below (5 and 6).
Manual wiring (full control)
- Create a material (Material Properties → New) and open the Shader Editor.
- Add an Image Texture node for each map. Set Color Space:
- Albedo → sRGB
- AO, Roughness, Metallic, Normal, Height, ORM → Non-Color
- Connect to Principled BSDF:
albedo → Base Colorroughness → Roughnessmetallic → Metallic (for wood this often stays near 0)normal → Normal Map node (Type: Tangent Space) → Normal of Principled.
If details look “inverted”, enable Invert Y on the Normal Map node.
- Ambient Occlusion (AO):
- Add a MixRGB (or Mix Color) node in mode Multiply.
- Input A =
albedo, Input B = ao, Factor = 1.0.
- Output of Mix → Base Color of Principled (replaces the direct albedo connection).
- Height / Displacement:
Cycles — true displacement
- Material Properties → Settings → Displacement: Displacement and Bump.
- Add a Displacement node: connect
height → Height, set Midlevel = 0.5, Scale = 0.02–0.08 (tune to taste).
- Output of Displacement → Material Output → Displacement.
- Add geometry density (e.g., Subdivision Surface) so displacement has polygons to work with.
Eevee (or lightweight Cycles) — bump only
- Add a Bump node:
height → Height.
- Set Strength = 0.2–0.5, Distance = 0.05–0.1, and connect Normal output to Principled’s Normal.
Using the packed ORM texture (optional)
Instead of separate AO/Roughness/Metallic maps you can use the single *_ORM.png:
- Add one Image Texture (Non-Color) → Separate RGB (or Separate Color).
- R (red) → AO (use it in the Multiply node with albedo as above).
- G (green) → Roughness of Principled.
- B (blue) → Metallic of Principled.
UVs & seamless tiling
- These textures are seamless. If your mesh has no UVs, go to UV Editing → Smart UV Project.
- For scale/repeat, add Texture Coordinate (UV) → Mapping and plug it into all texture nodes.
Increase Mapping → Scale (e.g., 2/2/2) to tile more densely.
Recommended starter values
- Normal Map Strength: 0.5–1.0
- Bump Strength: ~0.3
- Displacement Scale (Cycles): ~0.03
Common pitfalls
- Wrong Color Space (normals/roughness/etc. must be Non-Color).
- “Inverted” details → enable Invert Y on the Normal Map node.
- Over-strong relief → lower Displacement Scale or Bump Strength.
Example: Download Wood Textures and instantly apply parquet or rustic planks inside Blender for architectural visualization.
To add the downloaded texture, go to Add — Texture — Image Texture.

Add a node and click the Open button.

Select the required texture on your hard drive and connect Color to Base Color.


