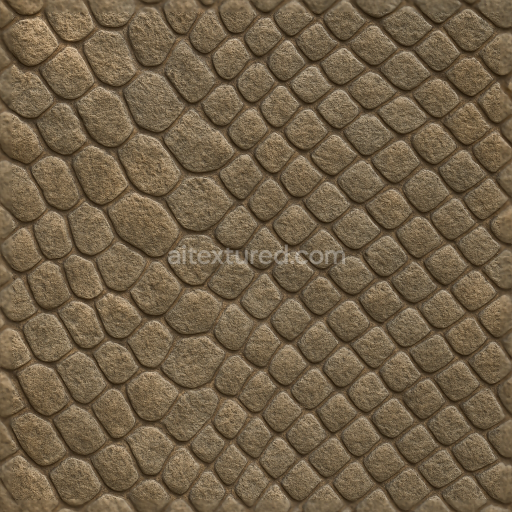
Scaly Skin Rough Hide Reptile Skin Scaled Reptile Snake Scales
Seamless texture (tileable) · PNG, WEBP, PBR ZIP. License: AITextured Free Commercial License (FCL) v1.1. Free personal and commercial use. Raw resale, standalone redistribution, mirroring/scraping, competing asset packs, and AI/ML training are not allowed without written permission. Attribution is not required, but appreciated..

| ID | seamless-3d-texture-pbr-8k-spotted-fur-dense-fur-mammal-skin-fur-undercoat-whiskers-tail-fur |
|---|---|
| Category | Animal skin |
| Formats | PNG, WEBP, PBR ZIP |
| Size | 1k (1024x1024px), 2k (2048x2048px), 4k (4096x4096px), 8k (8192x8192px) |
| Color | sRGB |
| Tileable | Yes |
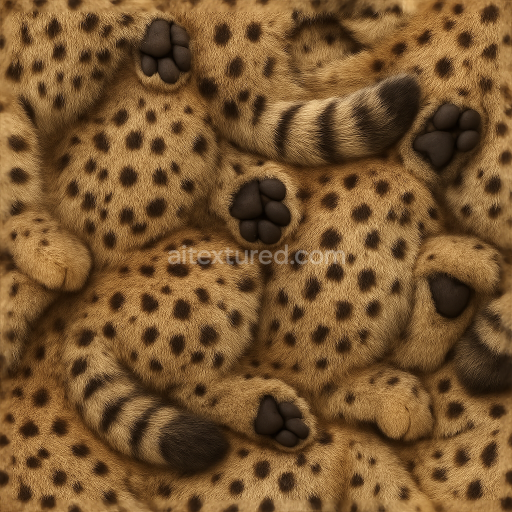
This seamless 3D PBR texture depicts dense spotted fur characteristic of mammalian skin, featuring a complex layering of fine fur undercoat with prominent whiskers and tail fur details. The base material mimics natural animal skin as a flexible, slightly elastic substrate covered with layered keratin fibers forming the fur. The fur fibers vary in length and thickness, creating a rich geometric pattern of overlapping strands with distinct spotted pigmentation. The underlying skin exhibits subtle micro-roughness and fine wrinkles, contributing to the realistic tactile feel of the surface. The texture’s seamless tiling capability allows the pattern to repeat smoothly without visible discontinuities, suitable for extensive surface coverage in 3D environments.
From a material composition standpoint, the texture simulates a complex biological composite: the substrate resembles a soft, porous epidermal layer with low metallic content and moderate subsurface scattering implied through the PBR channels. The fur itself represents dense aggregations of keratinous fibers with slight variations in orientation and density, producing natural anisotropic roughness. Pigmentation is rendered through the BaseColor (Albedo) channel, showing warm earthy tones interspersed with darker spotted markings. The Normal map captures the fine geometric details of individual hairs, skin pores, and whisker bases, enhancing surface depth and tactile variation. Roughness values are calibrated to reflect the matte yet slightly oily finish typical of healthy mammal fur, avoiding overly shiny or flat appearances.
Additional PBR channels include Ambient Occlusion, which accentuates the natural crevices between fur clusters and whisker roots, offering realistic shadowing in rendered scenes. The Height/Displacement map provides subtle relief to simulate the layering of dense fur over the skin substrate, enhancing volumetric perception when used with parallax or tessellation effects. The Metallic channel remains near zero to maintain an organic, non-metallic appearance. This texture is optimized at an 8K resolution, delivering exceptional detail and fidelity for close-up renders and high-definition animation projects.
Designed for compatibility with Blender, Unreal Engine, and Unity, this texture integrates seamlessly into modern PBR workflows. For optimal results, it is advisable to adjust the UV scale to match the target animal model’s proportions, ensuring that the spotted pattern maintains natural size and density. Additionally, fine-tuning the Roughness map can help simulate different fur conditions, from dry and fluffy to slightly damp or oily. When combining this texture with normal or height maps, blending should be handled carefully to preserve the delicate balance of fur depth and skin detail without causing artifacts or excessive surface distortion.
Import the texture maps into Blender with sRGB color space for albedo/base color and Non-Color for normal, roughness, metallic, AO, height, and ORM maps. Connect normal maps through a Normal Map node, then adjust UV scale with a Mapping node so the material repeats naturally on your model.
For the full step-by-step setup, see How to Use Seamless Textures in Blender. Browse related material examples in wood, concrete, and metal.
Yes. This texture is designed as a seamless tileable PBR material, so it can repeat across large surfaces without visible borders.
You can download PNG/WEBP versions and use 1K, 2K, 4K and 8K download options when available on the page.
Yes. The download options and engine-mapped ZIP workflow are designed for Blender, Unreal Engine, Unity Standard, URP and HDRP material pipelines.
Yes. The texture is available under the AITextured free commercial license. Review the license page for redistribution and AI-training restrictions.


Build, preview, and export seamless PBR materials. Generate full map sets from a single image, inspect them in a real-time WebGL viewer, and re-package maps for Unreal, Unity, and Blender—directly in your browser.
AI text-to-texture: type a prompt and get a seamless, tileable base image ready for PBR workflows (great starting point for materials).
Create a full PBR set (Normal, Roughness, AO, Metallic, etc.) from a single image. Seamless and tiling-friendly.
Instant WebGL viewer: inspect materials on a sphere, plane, and cube. Check tiling and lighting in real time.
Re-packages maps per engine: Unreal (BaseColor + ORM), Unity (Mask/MetallicSmoothness), Blender (separate channels).
PNG ↔ JPG ↔ SVG: fast convert, SVG rasterize, embed/trace options, quality & background controls.