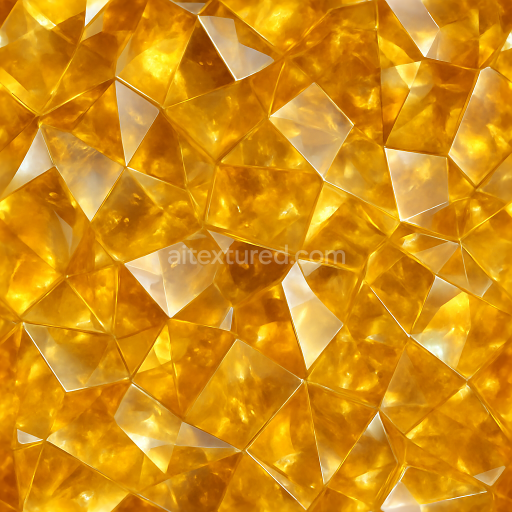
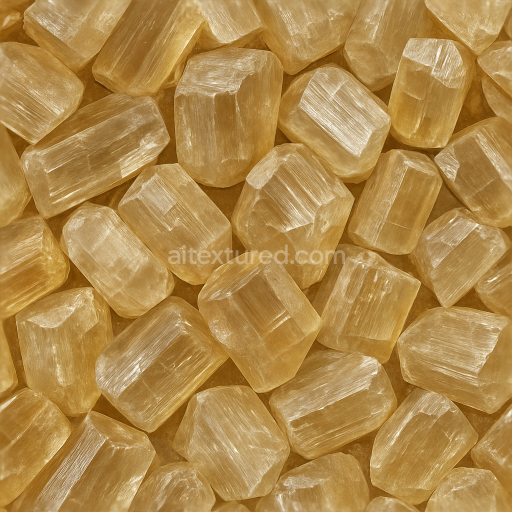
Citrine Polished Crystal Showing Inclusions And Crystal Lattice Structure
Seamless texture (tileable) · PNG, WEBP, PBR ZIP. License: AITextured Free Commercial License (FCL) v1.1. Free personal and commercial use. Raw resale, standalone redistribution, mirroring/scraping, competing asset packs, and AI/ML training are not allowed without written permission. Attribution is not required, but appreciated..

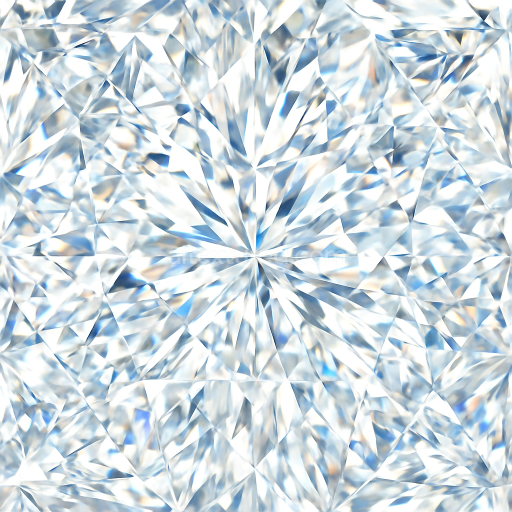
| ID | seamless-3d-texture-pbr-8k-diamond-crystalline-structure-with-facet-cuts-and-reflective-surface-light-dispersion |
|---|---|
| Category | Crystals |
| Formats | PNG, WEBP, PBR ZIP |
| Size | 1k (1024x1024px), 2k (2048x2048px), 4k (4096x4096px), 8k (8192x8192px) |
| Color | sRGB |
| Tileable | Yes |
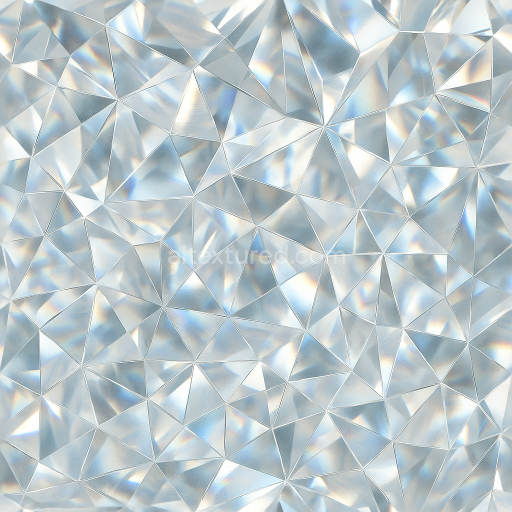
This seamless 3D PBR texture features an exquisitely detailed diamond crystalline structure rendered at an impressive 8K resolution. The base material is a highly pure, transparent carbon lattice characteristic of natural diamonds, exhibiting complex geometric formations composed of multifaceted cuts. These facets create a repetitive, tightly packed pattern reminiscent of a tessellated crystalline grid, which ensures flawless seamless tiling for continuous surface coverage. The texture captures the interplay of light with the polished surfaces, emphasizing the reflective and refractive qualities integral to diamond material, including subtle light dispersion and internal sparkle effects that simulate realistic gemstone brilliance.
The composition reflects a pristine substrate of carbon atoms arranged in a robust, cubic crystal system, with each facet representing a smooth planar surface. The texture’s PBR channels are meticulously crafted: the BaseColor (Albedo) channel remains nearly colorless with subtle hints of icy blue and white highlights, simulating minimal pigmentation and high clarity. The Normal map enhances the microfacet geometry, defining the sharp edges and fine cuts that break light into spectral components. Roughness values are kept very low to reflect the polished, glossy finish typical of diamond surfaces, while the Metallic channel is effectively null since diamonds are non-metallic. Ambient Occlusion subtly enhances the depth around facets, reinforcing the three-dimensional crystalline form. Height and Displacement maps add realistic surface relief, accentuating the multi-planar facets and light refraction paths.
Surface finish is meticulously polished, replicating the smooth, mirror-like quality of expertly cut diamonds. Porosity is negligible, reflecting the dense, non-porous atomic structure of diamond, which contributes to the texture’s clarity and hardness. Light dispersion effects are simulated through layered reflections and refractions visible in the texture’s specular highlights, crucial for achieving the authentic sparkle and fire of diamonds in digital renders. The texture’s seamless nature allows it to be applied uniformly over complex 3D geometries without visible borders or distortions, making it highly versatile for use in realistic gemstone models, jewelry design, or any digital asset requiring high-fidelity crystal surfaces.
Designed for compatibility with major 3D platforms including Blender, Unreal Engine, and Unity, this texture supports advanced rendering workflows and physically-based shading models. Its 8K resolution ensures exceptional detail even on close-up views or large surfaces, preserving intricate facet edges and subtle light interactions. For practical application, it is recommended to carefully adjust the UV scale to maintain the pattern’s natural crystalline proportions and to fine-tune the roughness map to balance between sharp reflections and subtle surface imperfections. Additionally, blending height and normal maps can enhance the perceived depth and realism of the facets, especially when combined with parallax or tessellation techniques for dynamic lighting conditions.
Import the texture maps into Blender with sRGB color space for albedo/base color and Non-Color for normal, roughness, metallic, AO, height, and ORM maps. Connect normal maps through a Normal Map node, then adjust UV scale with a Mapping node so the material repeats naturally on your model.
For the full step-by-step setup, see How to Use Seamless Textures in Blender. Browse related material examples in wood, concrete, and metal.
Yes. This texture is designed as a seamless tileable PBR material, so it can repeat across large surfaces without visible borders.
You can download PNG/WEBP versions and use 1K, 2K, 4K and 8K download options when available on the page.
Yes. The download options and engine-mapped ZIP workflow are designed for Blender, Unreal Engine, Unity Standard, URP and HDRP material pipelines.
Yes. The texture is available under the AITextured free commercial license. Review the license page for redistribution and AI-training restrictions.
Build, preview, and export seamless PBR materials. Generate full map sets from a single image, inspect them in a real-time WebGL viewer, and re-package maps for Unreal, Unity, and Blender—directly in your browser.
AI text-to-texture: type a prompt and get a seamless, tileable base image ready for PBR workflows (great starting point for materials).
Create a full PBR set (Normal, Roughness, AO, Metallic, etc.) from a single image. Seamless and tiling-friendly.
Instant WebGL viewer: inspect materials on a sphere, plane, and cube. Check tiling and lighting in real time.
Re-packages maps per engine: Unreal (BaseColor + ORM), Unity (Mask/MetallicSmoothness), Blender (separate channels).
PNG ↔ JPG ↔ SVG: fast convert, SVG rasterize, embed/trace options, quality & background controls.