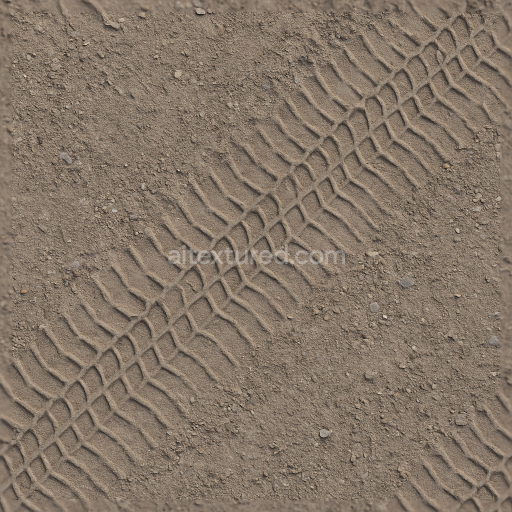
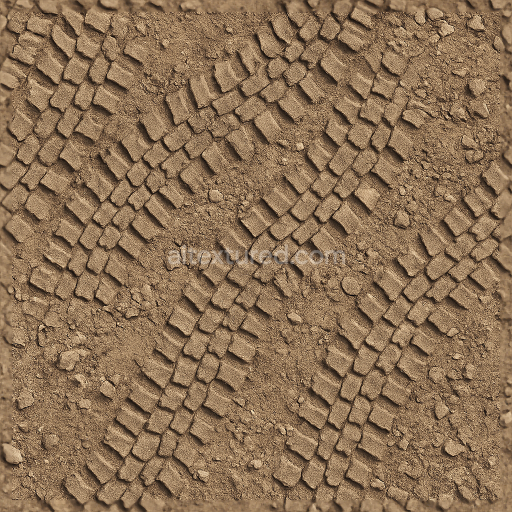
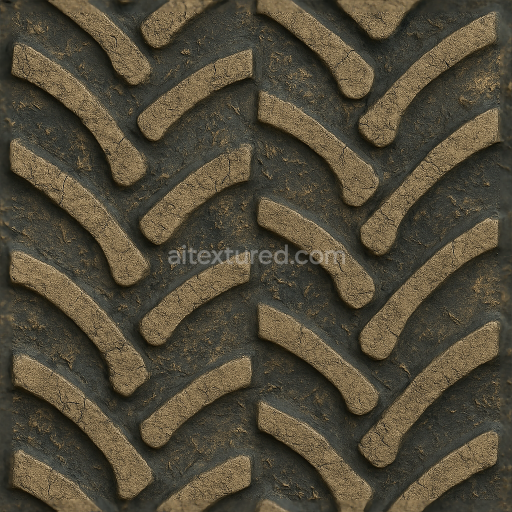
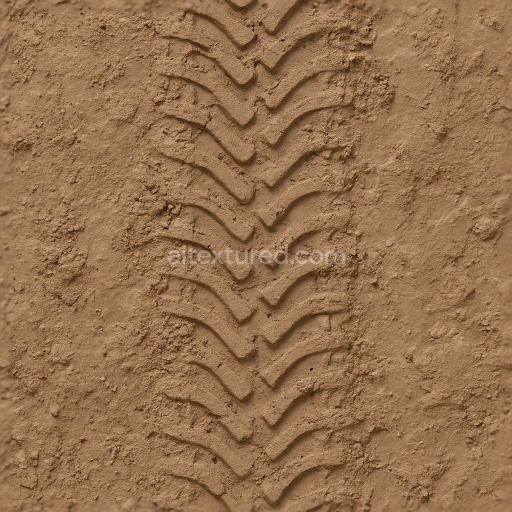
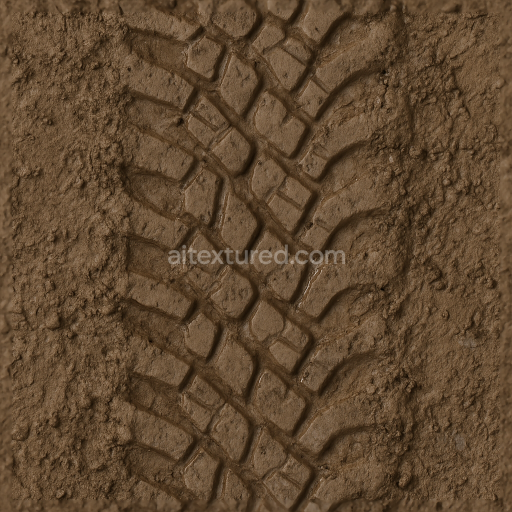
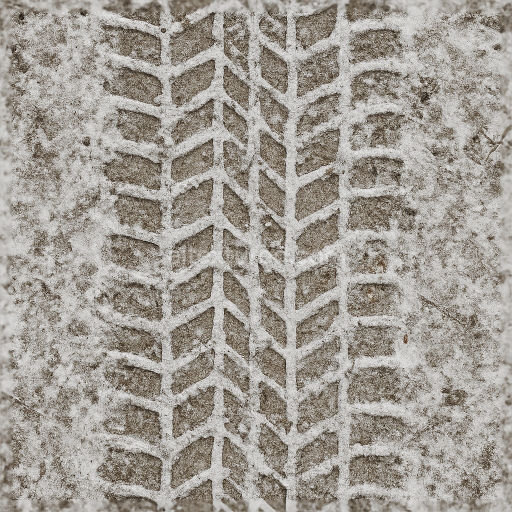
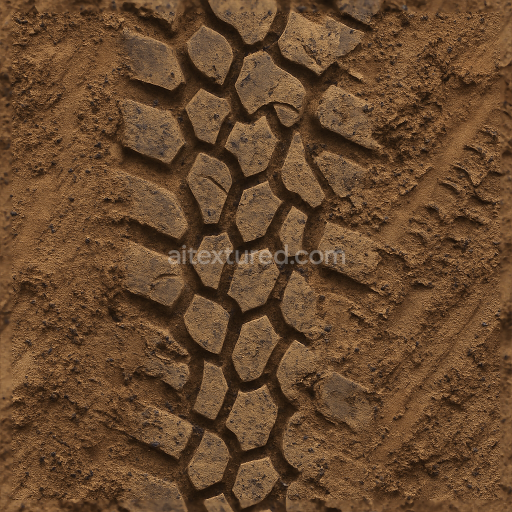
Gravel Tire Mark Gravel Road Track Tire Print Repeat
Seamless texture (tileable) · PNG, WEBP, PBR ZIP. License: AITextured Free Commercial License (FCL) v1.1. Free personal and commercial use. Raw resale, standalone redistribution, mirroring/scraping, competing asset packs, and AI/ML training are not allowed without written permission. Attribution is not required, but appreciated..

| ID | seamless-3d-texture-pbr-8k-motorcycle-tire-tire-skid-tire-track-overlay-tire-print-pattern |
|---|---|
| Category | Tire prints |
| Formats | PNG, WEBP, PBR ZIP |
| Size | 1k (1024x1024px), 2k (2048x2048px), 4k (4096x4096px), 8k (8192x8192px) |
| Color | sRGB |
| Tileable | Yes |
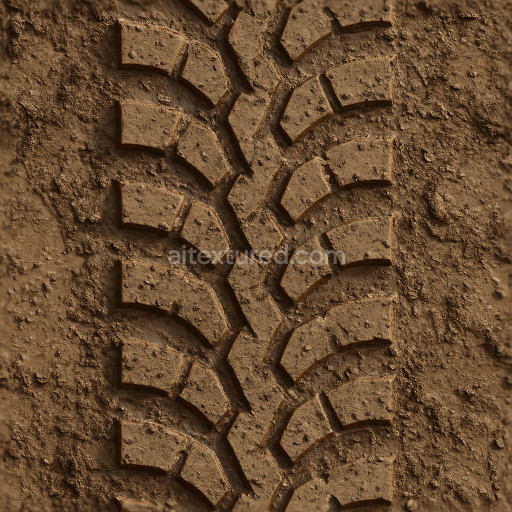
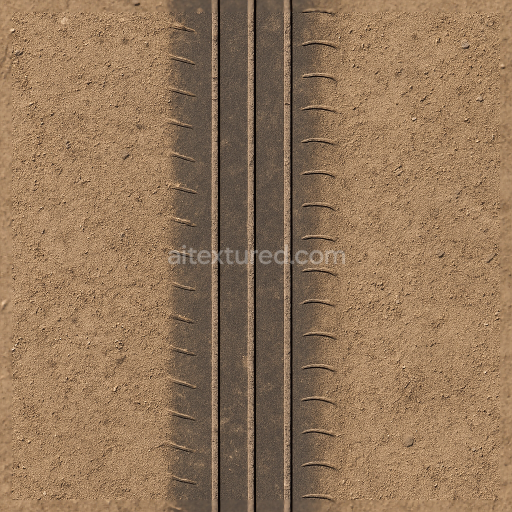
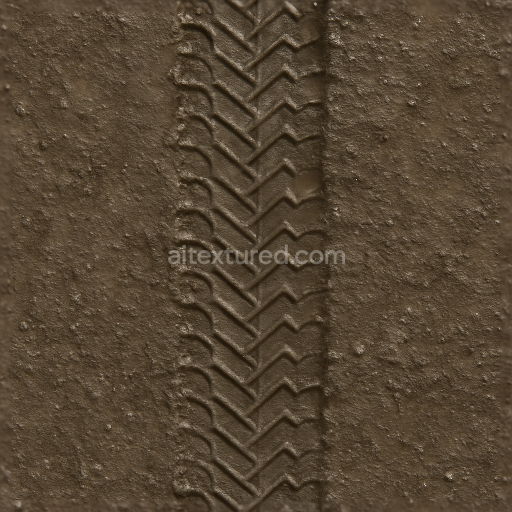
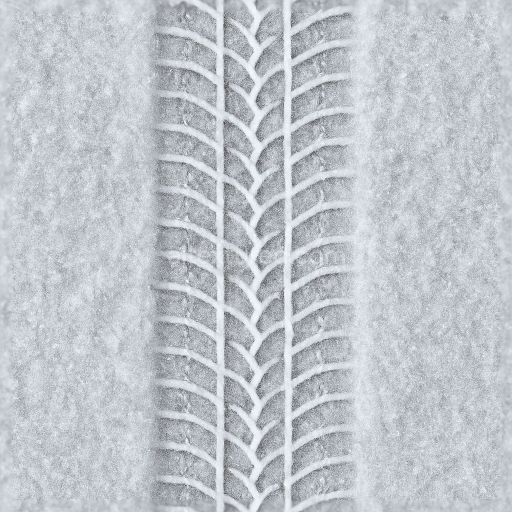
This seamless 8K PBR texture captures the intricate details of motorcycle tire prints featuring a complex pattern of tire skid marks tire track overlays and distinct tire tread designs. The underlying material represents vulcanized rubber characterized by a dense yet slightly porous substrate that offers both flexibility and durability. Embedded within this rubber matrix are fine aggregates and reinforcing fibers that contribute to the tread’s structural integrity and wear resistance. The tire grooves exhibit a geometric repetitive pattern created by alternating raised and recessed segments designed to enhance traction and channel road debris. The surface finish is matte with subtle scuffing and burnout marks reflecting realistic wear and exposure to road dust and asphalt particulates.
From a material composition perspective the base rubber contains carbon black pigments providing the deep black coloration while subtle variations in tone arise from accumulated dust and micro abrasions. The photorealistic BaseColor (Albedo) map faithfully reproduces these color nuances balancing the dark rubber with lighter dust overlays. The Normal map encodes the fine relief of tire grooves skid textures and burnout scuffs delivering high-fidelity surface detail essential for close-up renders. The Roughness channel captures the contrast between smoother worn rubber patches and rougher dusty areas contributing to realistic light scattering and specular highlights. Metallic values remain near zero consistent with non-metallic rubber materials while Ambient Occlusion enhances depth perception around the groove edges and tread intersections. The Height or Displacement map further accentuates the three-dimensional form of the tread pattern and road imprint enabling subtle parallax effects in supported engines.
Designed for seamless tiling this texture supports continuous application over large surfaces without visible repetition making it ideal for integrating motorcycle tire skid trails and track overlays on asphalt or dirt in racing simulations urban scenes or environmental visualizations. Its 8K resolution ensures exceptional clarity for both distant views and macro inspections compatible with Blender Unreal Engine and Unity workflows. The texture’s neutral lighting setup allows straightforward tweaking of shader parameters to match diverse scene conditions.
For practical use it is recommended to finely adjust the UV scale to maintain realistic proportions of tire tread relative to the vehicle model preventing distortion or unnatural repetition. Additionally blending the height map with normal details can enhance the perception of depth without excessive geometry displacement optimizing performance while preserving visual fidelity. Tuning the roughness channel can simulate varying surface conditions from freshly burned rubber to dusty weathered tracks offering flexible material responses depending on the desired environment and lighting setup.
Import the texture maps into Blender with sRGB color space for albedo/base color and Non-Color for normal, roughness, metallic, AO, height, and ORM maps. Connect normal maps through a Normal Map node, then adjust UV scale with a Mapping node so the material repeats naturally on your model.
For the full step-by-step setup, see How to Use Seamless Textures in Blender. Browse related material examples in wood, concrete, and metal.
Yes. This texture is designed as a seamless tileable PBR material, so it can repeat across large surfaces without visible borders.
You can download PNG/WEBP versions and use 1K, 2K, 4K and 8K download options when available on the page.
Yes. The download options and engine-mapped ZIP workflow are designed for Blender, Unreal Engine, Unity Standard, URP and HDRP material pipelines.
Yes. The texture is available under the AITextured free commercial license. Review the license page for redistribution and AI-training restrictions.


Build, preview, and export seamless PBR materials. Generate full map sets from a single image, inspect them in a real-time WebGL viewer, and re-package maps for Unreal, Unity, and Blender—directly in your browser.
AI text-to-texture: type a prompt and get a seamless, tileable base image ready for PBR workflows (great starting point for materials).
Create a full PBR set (Normal, Roughness, AO, Metallic, etc.) from a single image. Seamless and tiling-friendly.
Instant WebGL viewer: inspect materials on a sphere, plane, and cube. Check tiling and lighting in real time.
Re-packages maps per engine: Unreal (BaseColor + ORM), Unity (Mask/MetallicSmoothness), Blender (separate channels).
PNG ↔ JPG ↔ SVG: fast convert, SVG rasterize, embed/trace options, quality & background controls.