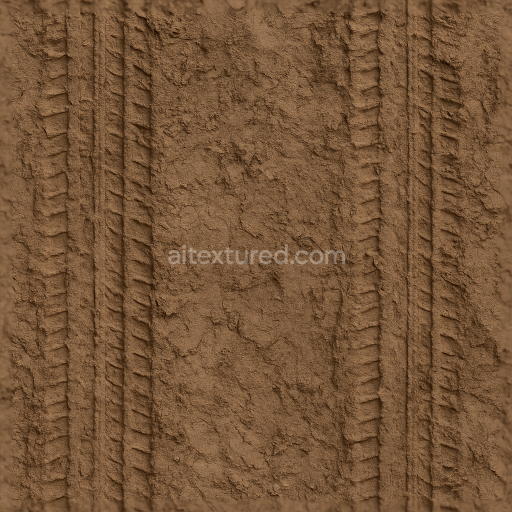
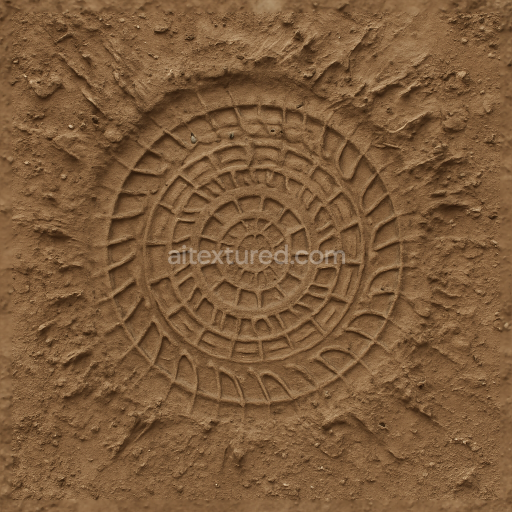
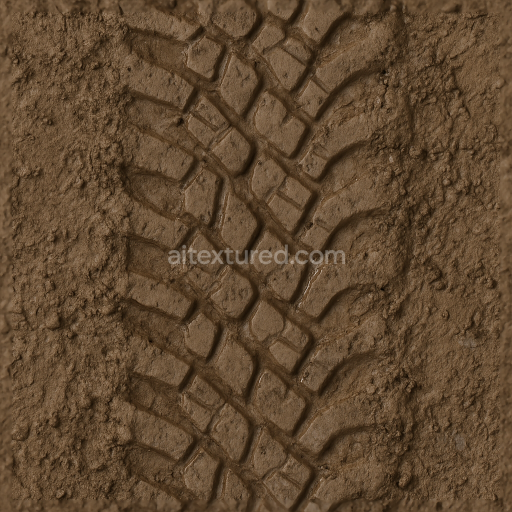
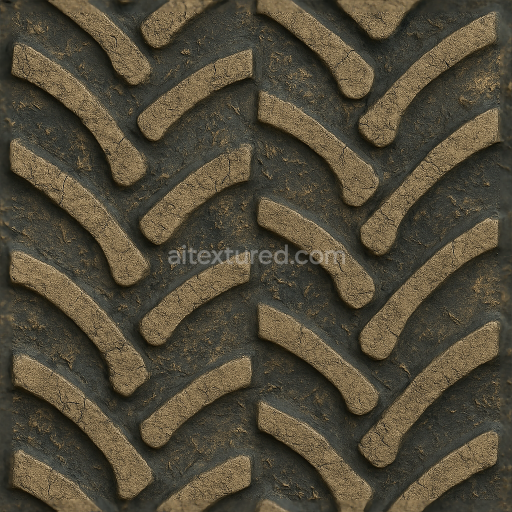
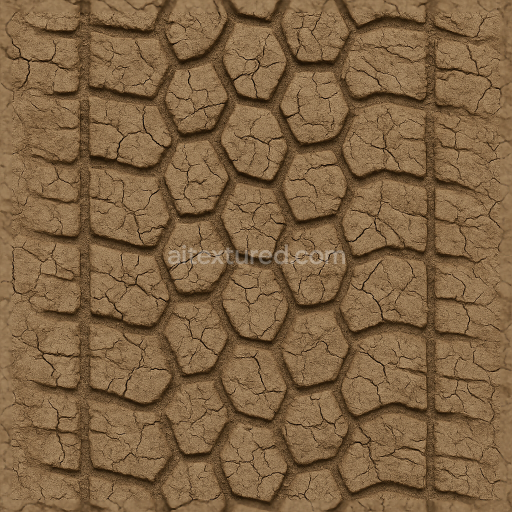
Muddy Road Tire Track Dirt Imprint Tire Mark Dirt Muddy Ground Track
Seamless texture (tileable) · PNG, WEBP, PBR ZIP. License: AITextured Free Commercial License (FCL) v1.1. Free personal and commercial use. Raw resale, standalone redistribution, mirroring/scraping, competing asset packs, and AI/ML training are not allowed without written permission. Attribution is not required, but appreciated..

| ID | seamless-3d-texture-pbr-8k-heavy-vehicle-tire-tire-sidewall-mark-tire-track-overlay-tire-print-repeat |
|---|---|
| Category | Tire prints |
| Formats | PNG, WEBP, PBR ZIP |
| Size | 1k (1024x1024px), 2k (2048x2048px), 4k (4096x4096px), 8k (8192x8192px) |
| Color | sRGB |
| Tileable | Yes |
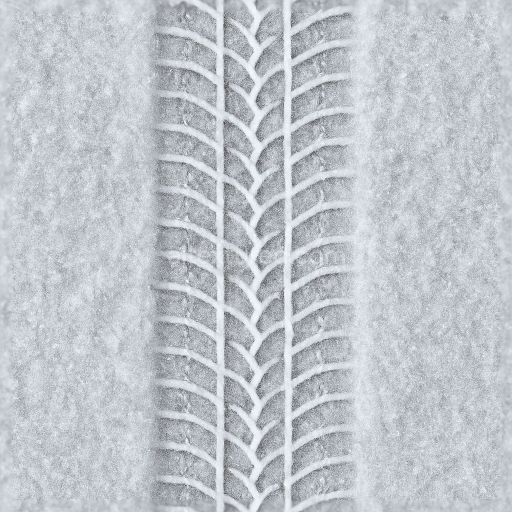
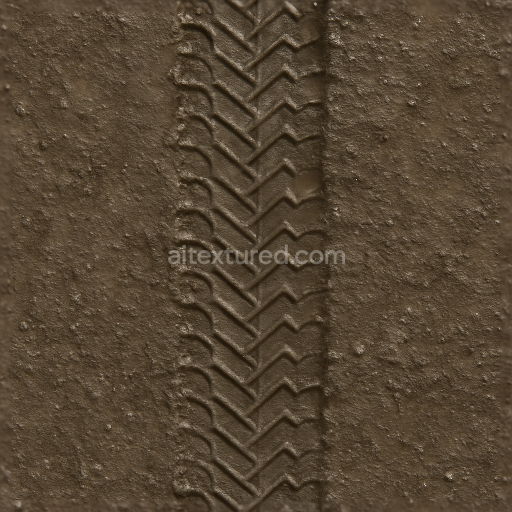
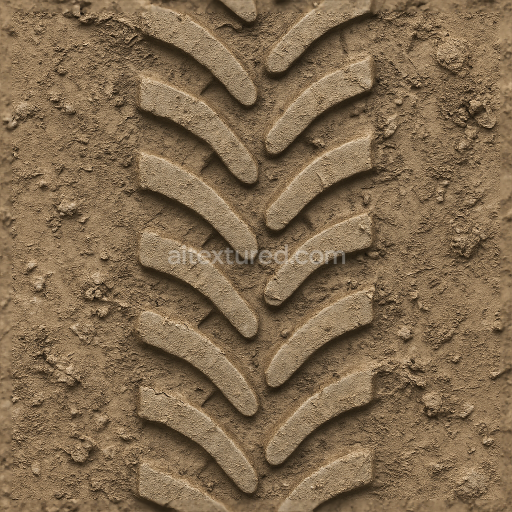
This seamless 8K PBR texture captures the intricate details of heavy vehicle tire prints focusing on the distinct tire sidewall marks and overlapping tire track patterns that form a repetitive layered geometric design. The underlying material is primarily dense rugged rubber characterized by a tough elastic substrate reinforced with synthetic polymers that provide durability and wear resistance. Embedded within this rubber matrix are fine aggregates and internal fiber reinforcements which contribute to the visible grain and texture variation especially within the tire grooves and tread details. The surface exhibits moderate porosity due to accumulated road dust and weathering effects lending a realistic slightly rough finish that simulates prolonged exposure to natural elements and road conditions.
The composition includes natural and synthetic binders that hold the rubber and embedded particles together creating a cohesive form that withstands heavy loads and abrasion. The tire tread pattern is geometrically repetitive with deep grooves and raised sidewall markings that form a dynamic interplay of shadows and highlights. These features are accentuated in the Normal and Height maps which provide detailed surface relief to enhance depth perception in 3D environments. The BaseColor (Albedo) map reproduces the dark matte black rubber tone subtly interspersed with dusty gray and brown hues from accumulated road grime while the Roughness map varies from smoother worn-down rubber on raised sections to rougher dirt-laden grooves ensuring nuanced light interaction. Metallic information is minimal reflecting the non-metallic nature of rubber while Ambient Occlusion enhances crevices and overlaps for added realism.
Designed for advanced 3D workflows this texture integrates seamlessly with Blender Unreal Engine and Unity offering real-time photorealistic tire print visuals at extremely high resolution. The 8K detail level ensures crisp representation of fine tread lines and sidewall inscriptions which is critical for close-up renders of heavy machinery trucks or construction vehicles on diverse terrains. The texture’s seamless tiling capability allows it to cover expansive surfaces without visible repetitions or seams maintaining authenticity across large-scale models and environments.
For practical application it is recommended to carefully adjust the UV scale to match the size of the vehicle tires in the scene ensuring the tread detail aligns realistically with the model’s proportions. Additionally fine-tuning the Roughness channel can control the balance between worn and fresh rubber appearance while blending the Height map with Normal details enhances the perceived depth of tire grooves and sidewall marks. This approach maximizes the use of available PBR channels delivering a convincing tire imprint overlay suitable for dynamic road or off-road scenarios.
Import the texture maps into Blender with sRGB color space for albedo/base color and Non-Color for normal, roughness, metallic, AO, height, and ORM maps. Connect normal maps through a Normal Map node, then adjust UV scale with a Mapping node so the material repeats naturally on your model.
For the full step-by-step setup, see How to Use Seamless Textures in Blender. Browse related material examples in wood, concrete, and metal.
Yes. This texture is designed as a seamless tileable PBR material, so it can repeat across large surfaces without visible borders.
You can download PNG/WEBP versions and use 1K, 2K, 4K and 8K download options when available on the page.
Yes. The download options and engine-mapped ZIP workflow are designed for Blender, Unreal Engine, Unity Standard, URP and HDRP material pipelines.
Yes. The texture is available under the AITextured free commercial license. Review the license page for redistribution and AI-training restrictions.


Build, preview, and export seamless PBR materials. Generate full map sets from a single image, inspect them in a real-time WebGL viewer, and re-package maps for Unreal, Unity, and Blender—directly in your browser.
AI text-to-texture: type a prompt and get a seamless, tileable base image ready for PBR workflows (great starting point for materials).
Create a full PBR set (Normal, Roughness, AO, Metallic, etc.) from a single image. Seamless and tiling-friendly.
Instant WebGL viewer: inspect materials on a sphere, plane, and cube. Check tiling and lighting in real time.
Re-packages maps per engine: Unreal (BaseColor + ORM), Unity (Mask/MetallicSmoothness), Blender (separate channels).
PNG ↔ JPG ↔ SVG: fast convert, SVG rasterize, embed/trace options, quality & background controls.