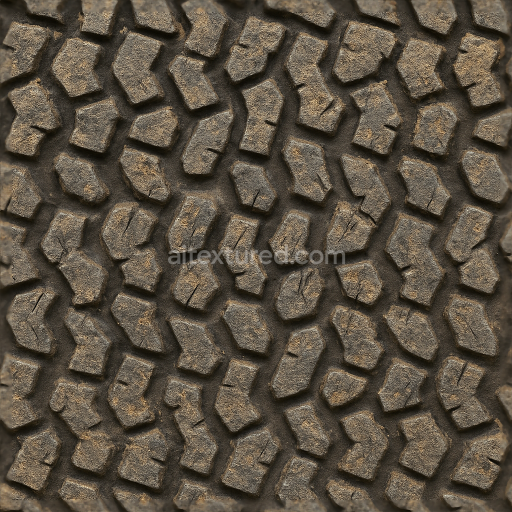
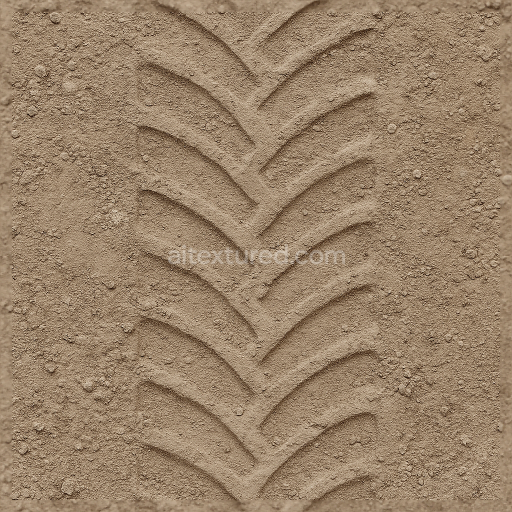
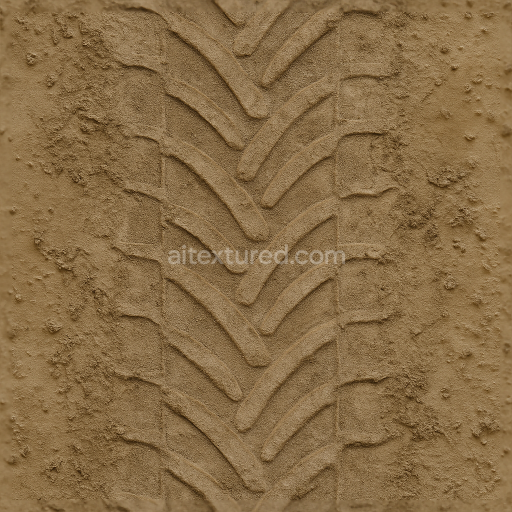
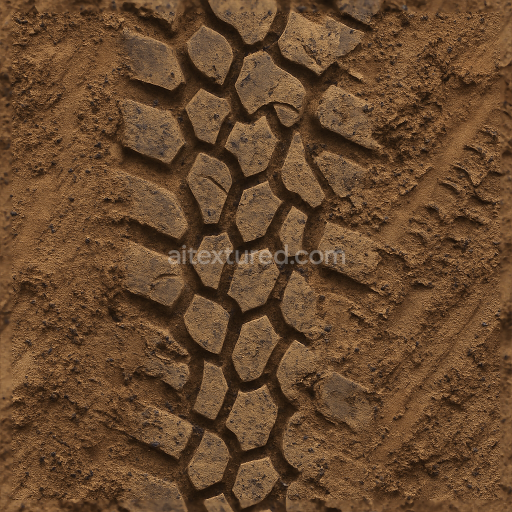
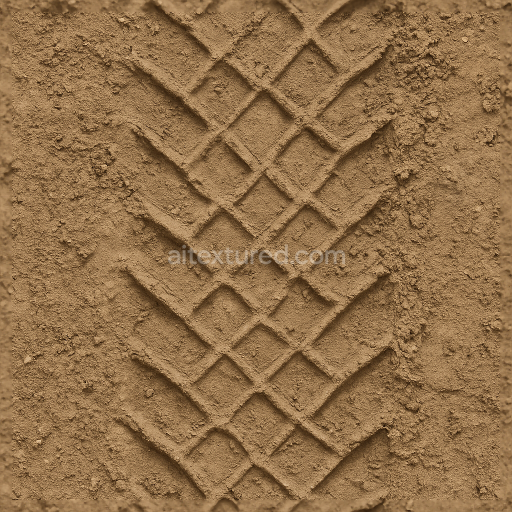
Offroad Tire With Knobby Tread And Dirt Embedded For Rugged Terrain Vehicle Tire Modeling
Seamless texture (tileable) · PNG, WEBP, PBR ZIP. License: AITextured Free Commercial License (FCL) v1.1. Free personal and commercial use. Raw resale, standalone redistribution, mirroring/scraping, competing asset packs, and AI/ML training are not allowed without written permission. Attribution is not required, but appreciated..

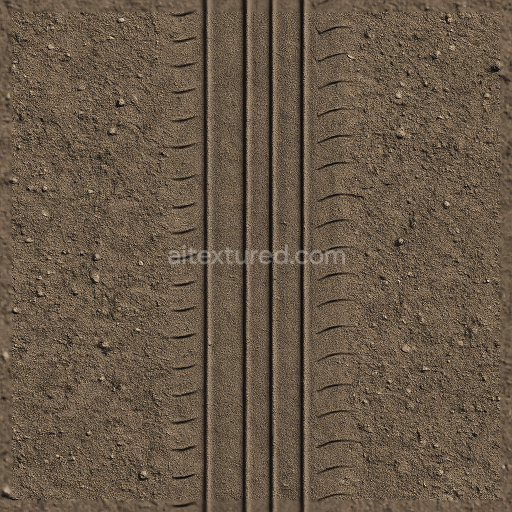
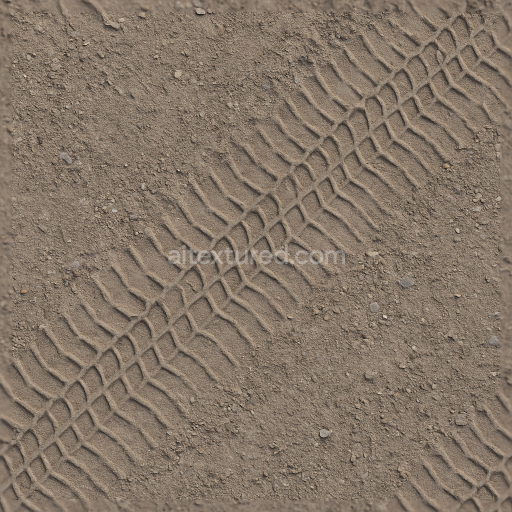
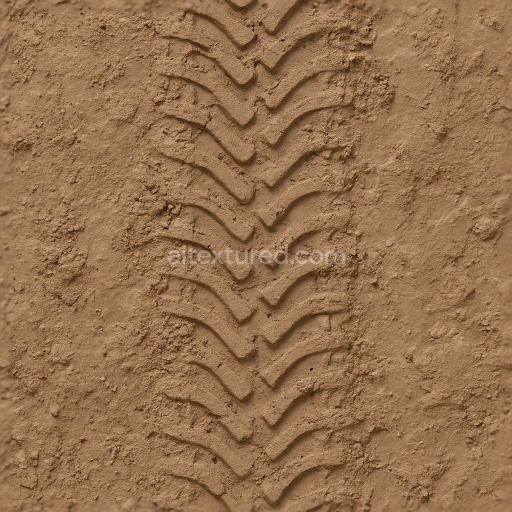
| ID | seamless-3d-texture-pbr-8k-road-tread-tire-track-on-urban-street-with-faded-tread-and-asphalt-print |
|---|---|
| Category | Tire prints |
| Formats | PNG, WEBP, PBR ZIP |
| Size | 1k (1024x1024px), 2k (2048x2048px), 4k (4096x4096px), 8k (8192x8192px) |
| Color | sRGB |
| Tileable | Yes |
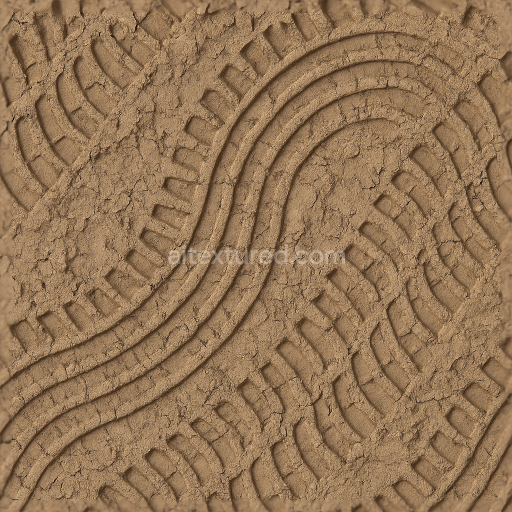
This seamless 8K PBR texture captures the intricate details of road tread tire tracks imprinted on an urban street surface showcasing a complex interplay between asphalt substrate and residual rubber patterns. The base material predominantly consists of weathered asphalt—a composite of bitumen binders mixed with mineral aggregates such as crushed stone and sand particles. This foundation exhibits a moderately rough porous surface with visible micro-cracks and subtle soil deposits embedded in crevices reflecting the natural wear and environmental exposure typical of city streets. The manual tire prints overlay the asphalt with varying degrees of faded tread depth indicating repeated traffic and partial erosion from weather and use.
The geometric form is defined by the repeating linear and curved patterns of road tread marks which create a rhythmic tileable array suitable for continuous surface coverage. The tread impressions are relatively shallow but distinctly textured featuring a combination of raised rubber segments and compressed asphalt areas. These patterns replicate a manual tire print design with a balanced distribution of tread blocks and voids that produce both visual and tactile variation. The texture’s surface finish is matte with a slight diffuse reflection from the asphalt contrasted by the smoother slightly polished rubber residue of the tire tracks which highlights subtle differences in glossiness and surface wear.
In terms of PBR channel mapping the BaseColor (Albedo) map accurately reproduces the dark gray to black hues of asphalt interspersed with muted soil tones and faded rubber blacks. The Normal map enhances the tactile perception by accentuating the micro-reliefs of aggregate granularity and the tread pattern’s depth variations. Roughness values correspond closely to the porous asphalt’s coarse texture providing a higher roughness level while the tire rubber marks present a somewhat lower roughness to simulate their smoother yet worn surface. The Metallic channel remains minimal or zero consistent with the non-metallic nature of asphalt and rubber materials. Ambient Occlusion captures the shadowing within the deeper tread grooves and aggregate pores enhancing depth perception. The Height/Displacement map offers subtle elevation differences between the asphalt substrate and the tire track impressions facilitating realistic parallax or displacement effects.
This texture is optimized for high-detail applications in Blender Unreal Engine and Unity ensuring compatibility across diverse 3D workflows and rendering pipelines. The 8K resolution provides exceptional clarity even at close viewing distances making it ideal for urban environment modeling traffic simulations or architectural visualizations that demand authentic road surface detail. For practical usage it is recommended to carefully adjust the UV scale to maintain natural tread proportions and to fine-tune roughness values to balance the contrast between asphalt and tire rubber surfaces. Additionally blending height or normal maps can enhance the integration of the tire tracks with uneven ground geometry improving realism in dynamic lighting conditions.
Import the texture maps into Blender with sRGB color space for albedo/base color and Non-Color for normal, roughness, metallic, AO, height, and ORM maps. Connect normal maps through a Normal Map node, then adjust UV scale with a Mapping node so the material repeats naturally on your model.
For the full step-by-step setup, see How to Use Seamless Textures in Blender. Browse related material examples in wood, concrete, and metal.
Yes. This texture is designed as a seamless tileable PBR material, so it can repeat across large surfaces without visible borders.
You can download PNG/WEBP versions and use 1K, 2K, 4K and 8K download options when available on the page.
Yes. The download options and engine-mapped ZIP workflow are designed for Blender, Unreal Engine, Unity Standard, URP and HDRP material pipelines.
Yes. The texture is available under the AITextured free commercial license. Review the license page for redistribution and AI-training restrictions.


Build, preview, and export seamless PBR materials. Generate full map sets from a single image, inspect them in a real-time WebGL viewer, and re-package maps for Unreal, Unity, and Blender—directly in your browser.
AI text-to-texture: type a prompt and get a seamless, tileable base image ready for PBR workflows (great starting point for materials).
Create a full PBR set (Normal, Roughness, AO, Metallic, etc.) from a single image. Seamless and tiling-friendly.
Instant WebGL viewer: inspect materials on a sphere, plane, and cube. Check tiling and lighting in real time.
Re-packages maps per engine: Unreal (BaseColor + ORM), Unity (Mask/MetallicSmoothness), Blender (separate channels).
PNG ↔ JPG ↔ SVG: fast convert, SVG rasterize, embed/trace options, quality & background controls.