
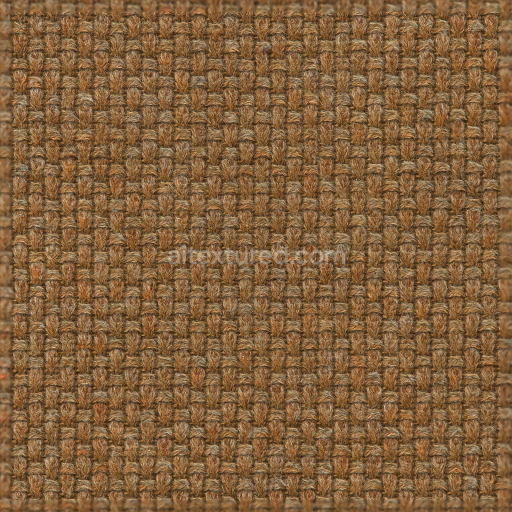
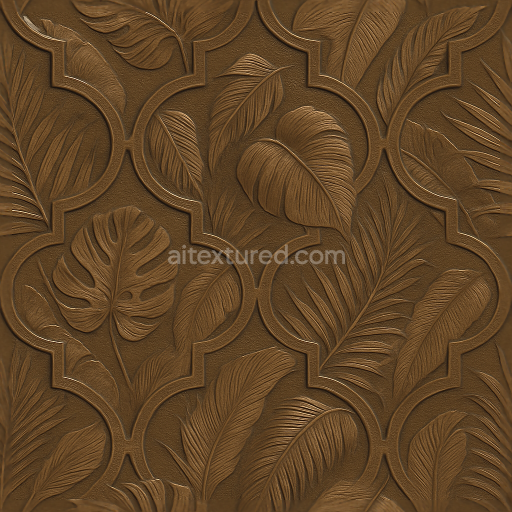
Modern Minimalist Wallpaper With Matte Cotton Woven Fabric Pattern
Seamless texture (tileable) · PNG, WEBP, PBR ZIP. License: AITextured Free Commercial License (FCL) v1.1. Free personal and commercial use. Raw resale, standalone redistribution, mirroring/scraping, competing asset packs, and AI/ML training are not allowed without written permission. Attribution is not required, but appreciated..

| ID | seamless-3d-texture-pbr-8k-classic-toile-floral-wallpaper-with-textured-woven-silk-sheen-finish |
|---|---|
| Category | Wallpaper |
| Formats | PNG, WEBP, PBR ZIP |
| Size | 1k (1024x1024px), 2k (2048x2048px), 4k (4096x4096px), 8k (8192x8192px) |
| Color | sRGB |
| Tileable | Yes |
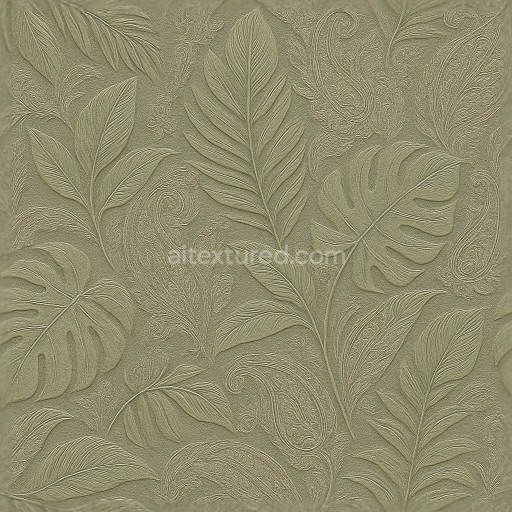
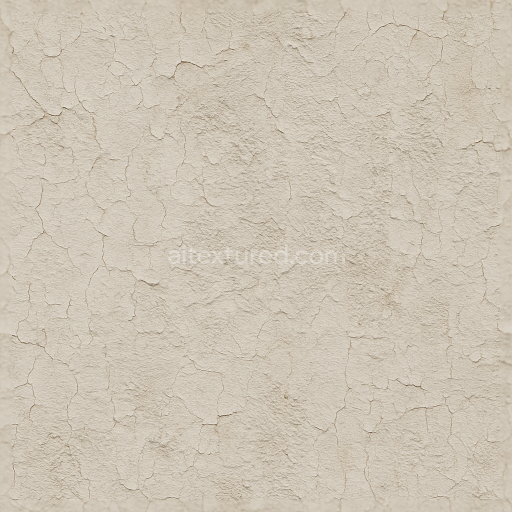
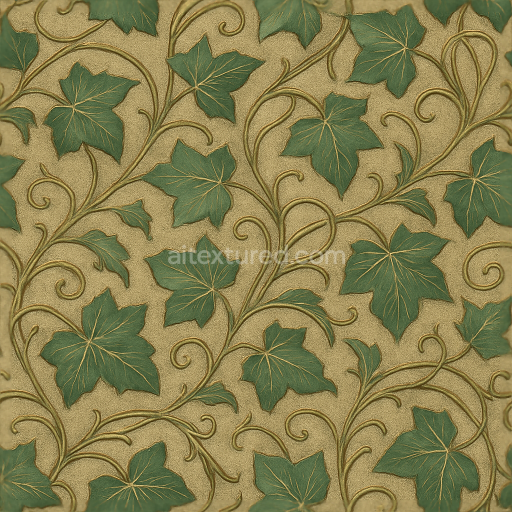
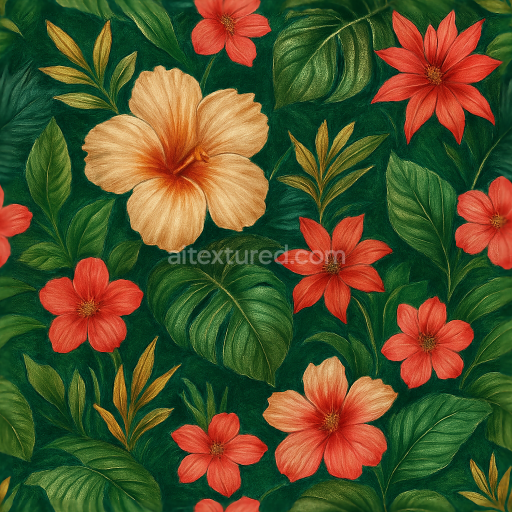
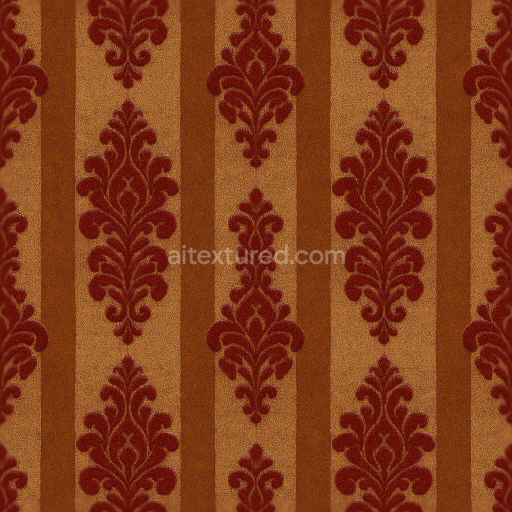
This seamless 3D texture showcases a classic toile floral wallpaper pattern rendered at an impressive 8K resolution designed to capture the finest details of its vintage-inspired motifs. The base material is a woven silk fabric carefully simulated to reflect its natural sheen and delicate fiber structure. The substrate mimics a dense textile weave where silk threads interlace in a tight diagonal pattern creating subtle variations in surface height and light reflection. The binder is represented as a fine transparent adhesive layer that holds the fibers together without obscuring their texture allowing the underlying weave to remain prominently visible. The color palette consists of muted natural pigments that faithfully reproduce the traditional toile floral design with soft contrasts and a slightly desaturated finish to evoke a timeless elegance.
From a geometric perspective the texture's form is defined by a repeating floral pattern composed of curved leaves blossoms and tendrils arranged in a balanced symmetrical layout. The woven silk base introduces a tactile depth through micro-elevations along the thread paths which are captured in the height and normal maps. These maps enhance the perception of fabric grain and thread intersections providing realistic light scattering and subtle shadows in ambient occlusion channels. The roughness map is finely tuned to reflect the silk’s characteristic semi-gloss finish—smooth areas show low roughness for soft light reflection while the textured woven sections have slightly increased roughness to indicate fiber irregularities. The metallic channel remains consistently low as silk is a non-metallic material ensuring accurate PBR representation.
In practical terms this wallpaper texture is optimized for use in physically based rendering workflows within Blender Unreal Engine and Unity. The 8K resolution ensures exceptional detail and clarity even on large surface applications making it suitable for high-end architectural visualizations and virtual interior designs. The seamless nature of the pattern guarantees flawless tiling without visible seams or repetition artifacts preserving the integrity of the classic toile motif across expansive walls. The height map supports parallax effects if desired adding an extra layer of realism by simulating fabric depth when viewed at oblique angles.
For best results consider adjusting the UV scale to maintain a natural fabric appearance—scaling too large may cause the weave to appear overly coarse while scaling too small can obscure the intricate floral details. Additionally fine-tuning the roughness values can help balance the silk sheen under different lighting conditions and blending the normal and height maps subtly can enhance the perception of textile texture without introducing harsh artificial edges. This careful approach ensures the wallpaper maintains its luxurious vintage floral character while remaining versatile across various 3D rendering applications.
Import the texture maps into Blender with sRGB color space for albedo/base color and Non-Color for normal, roughness, metallic, AO, height, and ORM maps. Connect normal maps through a Normal Map node, then adjust UV scale with a Mapping node so the material repeats naturally on your model.
For the full step-by-step setup, see How to Use Seamless Textures in Blender. Browse related material examples in wood, concrete, and metal.
Yes. This texture is designed as a seamless tileable PBR material, so it can repeat across large surfaces without visible borders.
You can download PNG/WEBP versions and use 1K, 2K, 4K and 8K download options when available on the page.
Yes. The download options and engine-mapped ZIP workflow are designed for Blender, Unreal Engine, Unity Standard, URP and HDRP material pipelines.
Yes. The texture is available under the AITextured free commercial license. Review the license page for redistribution and AI-training restrictions.


Generate, preview, and export seamless PBR materials for Blender, Unity, and Unreal Engine—directly in your browser.
AI text-to-texture: type a prompt and get a seamless, tileable base image ready for PBR workflows (great starting point for materials).
Create a full PBR set (Normal, Roughness, AO, Metallic, etc.) from a single image. Seamless and tiling-friendly.
Instant WebGL viewer: inspect materials on a sphere, plane, and cube. Check tiling and lighting in real time.
Re-packages maps per engine: Unreal (BaseColor + ORM), Unity (Mask/MetallicSmoothness), Blender (separate channels).
PNG ↔ JPG ↔ SVG: fast convert, SVG rasterize, embed/trace options, quality & background controls.