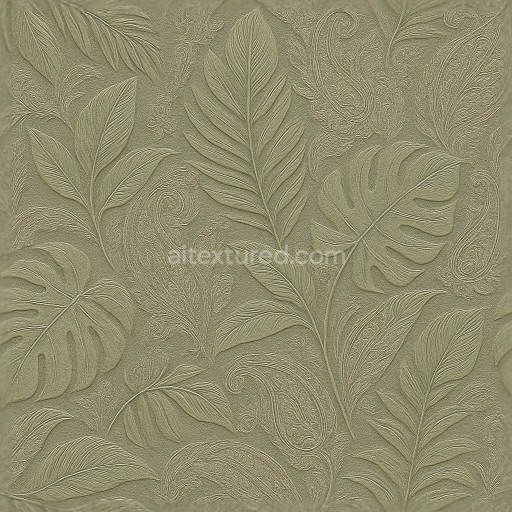
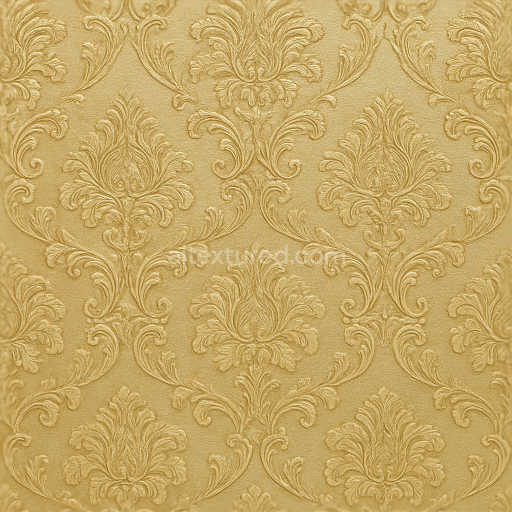
Tropical Leaves Paisley Wallpaper With Embossed Satin Finish And Muted Colors
Seamless texture (tileable) · PNG, WEBP, PBR ZIP. License: AITextured Free Commercial License (FCL) v1.1. Free personal and commercial use. Raw resale, standalone redistribution, mirroring/scraping, competing asset packs, and AI/ML training are not allowed without written permission. Attribution is not required, but appreciated..

| ID | seamless-3d-texture-pbr-8k-wallpaper-featuring-modern-houndstooth-brushed-tweed-textile-pattern |
|---|---|
| Category | Wallpaper |
| Formats | PNG, WEBP, PBR ZIP |
| Size | 1k (1024x1024px), 2k (2048x2048px), 4k (4096x4096px), 8k (8192x8192px) |
| Color | sRGB |
| Tileable | Yes |
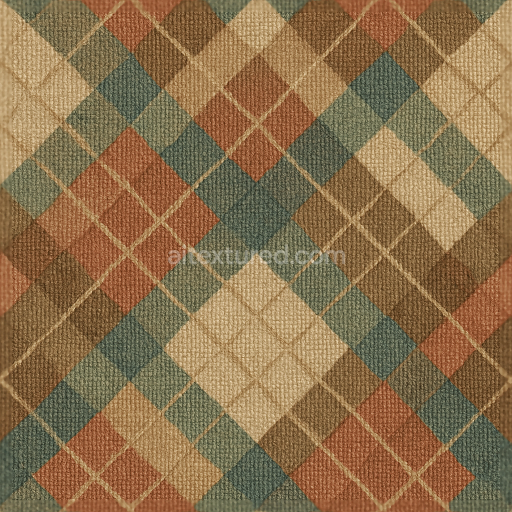
This seamless 3D texture in 8K resolution showcases a modern take on the classic houndstooth pattern rendered in photorealistic PBR quality. The base material simulates a woven tweed fabric characterized by tightly interlaced wool fibers that create a dense yet soft textile substrate. The composition includes natural fiber aggregates with subtle variations in thickness providing a tactile depth to the pattern. The tweed’s surface features a finely brushed finish which introduces directional fiber highlights and a gentle sheen without full glossiness enhancing the subtle interplay of light and shadow on the fabric’s surface. This brushed effect is captured through the roughness map delivering a balanced matte appearance with nuanced specular reflections typical of natural textiles.
The houndstooth pattern itself is geometrically precise formed by interlocking tessellated shapes that resemble broken checks or abstract four-pointed shapes. This pattern is embossed subtly via the height and normal maps creating a slight relief that accentuates the weave’s texture and fiber orientation. The base color (albedo) channel reflects a palette of muted tones often consisting of grayscale or soft earth colors simulating dyed wool threads. Ambient occlusion is finely tuned to emphasize recessed areas within the weave enhancing the perceived depth and realism. The metallic channel remains minimal or zero consistent with organic textile materials ensuring accurate light absorption and scattering without artificial shine.
The texture’s porosity is evident through micro-variations in the surface mimicking the tiny air pockets and natural irregularities present in handwoven tweed. This subtle roughness contributes to the fabric’s tactile quality and helps diffuse light realistically. Weathering effects are intentionally minimal to maintain a fresh modern aesthetic avoiding frays or worn edges. The seamless tile format allows this pattern to repeat flawlessly across large surfaces making it ideal for wallpaper applications that demand continuous and consistent texture without visible seams or distortions.
Designed for high-end rendering engines this texture is fully compatible with Blender Unreal Engine and Unity supporting all standard PBR workflows. The 8K resolution ensures exceptional detail allowing close-up views without loss of fidelity critical for interior visualization and architectural projects. For practical use it is advisable to adjust the UV scale to moderate values to prevent pattern distortion and maintain the fabric’s natural proportions. Additionally fine-tuning the roughness map can help adapt the material’s reflectivity to different lighting environments while blending slight height or parallax effects with normal maps can add further depth without compromising performance.
Import the texture maps into Blender with sRGB color space for albedo/base color and Non-Color for normal, roughness, metallic, AO, height, and ORM maps. Connect normal maps through a Normal Map node, then adjust UV scale with a Mapping node so the material repeats naturally on your model.
For the full step-by-step setup, see How to Use Seamless Textures in Blender. Browse related material examples in wood, concrete, and metal.
Yes. This texture is designed as a seamless tileable PBR material, so it can repeat across large surfaces without visible borders.
You can download PNG/WEBP versions and use 1K, 2K, 4K and 8K download options when available on the page.
Yes. The download options and engine-mapped ZIP workflow are designed for Blender, Unreal Engine, Unity Standard, URP and HDRP material pipelines.
Yes. The texture is available under the AITextured free commercial license. Review the license page for redistribution and AI-training restrictions.


Generate, preview, and export seamless PBR materials for Blender, Unity, and Unreal Engine—directly in your browser.
AI text-to-texture: type a prompt and get a seamless, tileable base image ready for PBR workflows (great starting point for materials).
Create a full PBR set (Normal, Roughness, AO, Metallic, etc.) from a single image. Seamless and tiling-friendly.
Instant WebGL viewer: inspect materials on a sphere, plane, and cube. Check tiling and lighting in real time.
Re-packages maps per engine: Unreal (BaseColor + ORM), Unity (Mask/MetallicSmoothness), Blender (separate channels).
PNG ↔ JPG ↔ SVG: fast convert, SVG rasterize, embed/trace options, quality & background controls.