Undyed Wool Wool Textile Soft Wool Natural Dye Wool Fibers
Seamless texture (tileable) · PNG, WEBP, PBR ZIP. License: AITextured Free Commercial License (FCL) v1.1. Free personal and commercial use. Raw resale, standalone redistribution, mirroring/scraping, competing asset packs, and AI/ML training are not allowed without written permission. Attribution is not required, but appreciated..

| ID | seamless-3d-texture-pbr-8k-undyed-wool-natural-wool-fibers-soft-wool-fluff |
|---|---|
| Category | Wool |
| Formats | PNG, WEBP, PBR ZIP |
| Size | 1k (1024x1024px), 2k (2048x2048px), 4k (4096x4096px), 8k (8192x8192px) |
| Color | sRGB |
| Tileable | Yes |
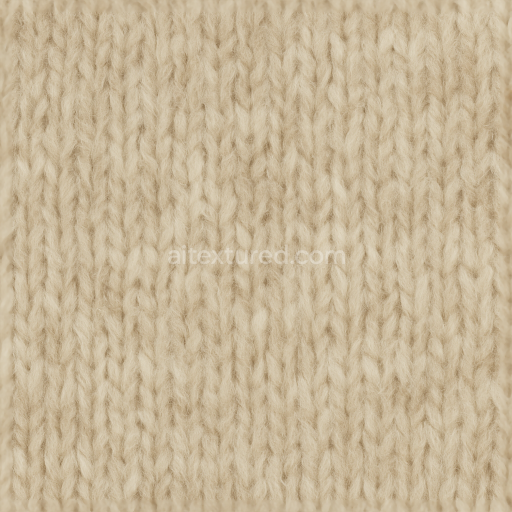
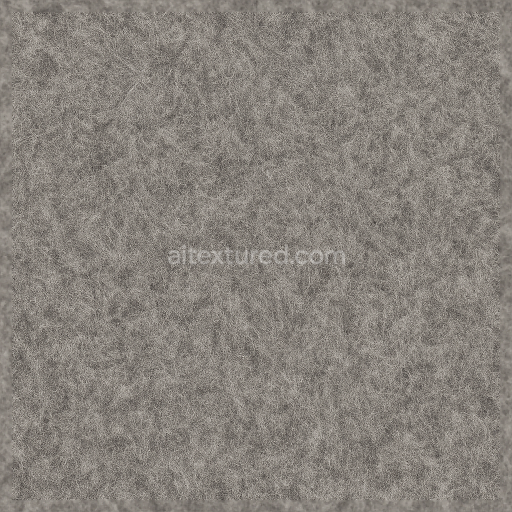
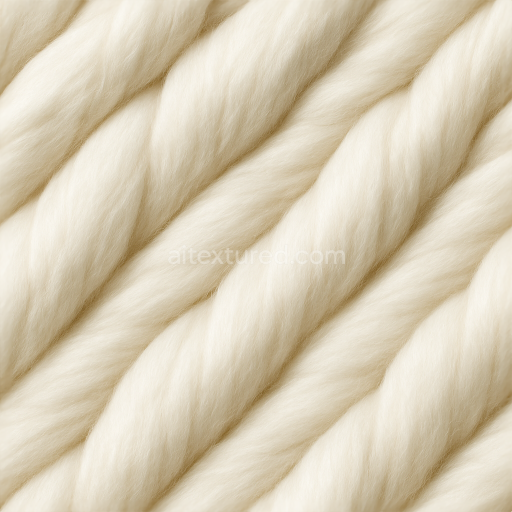
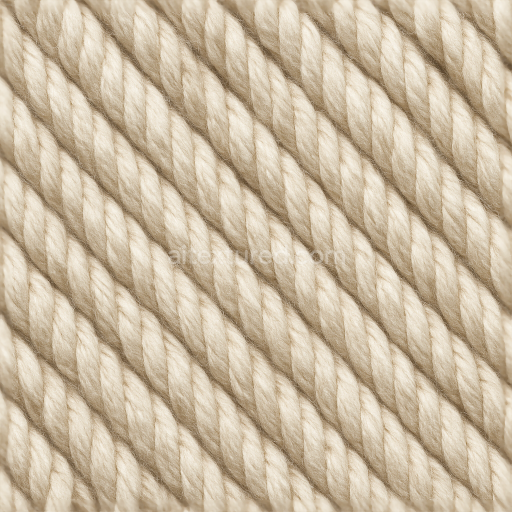
This seamless 3D texture captures the intricate details of undyed natural wool fibers in exceptional 8K resolution ideal for physically based rendering (PBR) workflows. The material consists primarily of densely packed wool fibers forming a soft fluffy substrate characterized by short wool pile and fine wool fluff. The fibers exhibit a slightly irregular interwoven pattern that creates a plush tactile surface with subtle depth and volume. The natural cream coloration reflects the absence of added pigments showcasing the raw unprocessed state of the wool. The texture’s geometry simulates a soft fibrous mat with gentle undulations and fiber clumps lending a realistic organic form to the surface.
From a material composition standpoint the texture represents a natural fiber aggregate without binders or adhesives relying solely on the intrinsic structure of wool fibers. This results in a porous surface with visible gaps in the weave contributing to its characteristic softness and breathability. The surface finish is matte with a slight fuzziness from the wool fluff lacking any polished or glossy elements. The albedo map accurately reproduces the soft cream tones and subtle fiber color variations while the normal and height maps define the fine fiber relief and pile depth. Roughness values remain relatively high to simulate the diffuse scattering of light on the wool’s textured surface. Ambient occlusion enhances the perception of fiber overlap and denser regions and metallic values are minimal to nil reflecting the natural insulating and non-metallic nature of wool.
Designed to integrate seamlessly with rendering engines such as Blender Unreal Engine and Unity this texture supports detailed close-up views and dynamic lighting setups. The 8K resolution ensures that micro-details like individual fiber strands and fluffiness remain crisp and clear even at extreme zoom levels making it suitable for digital textile visualization fashion design and realistic environment creation. The seamless tiling aspect allows for large-scale application without visible repetition preserving the organic randomness of natural wool.
When implementing this texture it can be beneficial to adjust the UV scale to maintain realistic fiber density relative to the scale of the 3D model. Fine-tuning the roughness map can help control the softness and light diffusion on the wool surface while blending height or parallax maps with normal maps can enhance the perception of depth and fiber layering. This approach maximizes realism and visual fidelity across various lighting conditions and camera angles ensuring the material performs well in both real-time and offline render contexts.
Import the texture maps into Blender with sRGB color space for albedo/base color and Non-Color for normal, roughness, metallic, AO, height, and ORM maps. Connect normal maps through a Normal Map node, then adjust UV scale with a Mapping node so the material repeats naturally on your model.
For the full step-by-step setup, see How to Use Seamless Textures in Blender. Browse related material examples in wood, concrete, and metal.
Yes. This texture is designed as a seamless tileable PBR material, so it can repeat across large surfaces without visible borders.
You can download PNG/WEBP versions and use 1K, 2K, 4K and 8K download options when available on the page.
Yes. The download options and engine-mapped ZIP workflow are designed for Blender, Unreal Engine, Unity Standard, URP and HDRP material pipelines.
Yes. The texture is available under the AITextured free commercial license. Review the license page for redistribution and AI-training restrictions.


Build, preview, and export seamless PBR materials. Generate full map sets from a single image, inspect them in a real-time WebGL viewer, and re-package maps for Unreal, Unity, and Blender—directly in your browser.
AI text-to-texture: type a prompt and get a seamless, tileable base image ready for PBR workflows (great starting point for materials).
Create a full PBR set (Normal, Roughness, AO, Metallic, etc.) from a single image. Seamless and tiling-friendly.
Instant WebGL viewer: inspect materials on a sphere, plane, and cube. Check tiling and lighting in real time.
Re-packages maps per engine: Unreal (BaseColor + ORM), Unity (Mask/MetallicSmoothness), Blender (separate channels).
PNG ↔ JPG ↔ SVG: fast convert, SVG rasterize, embed/trace options, quality & background controls.