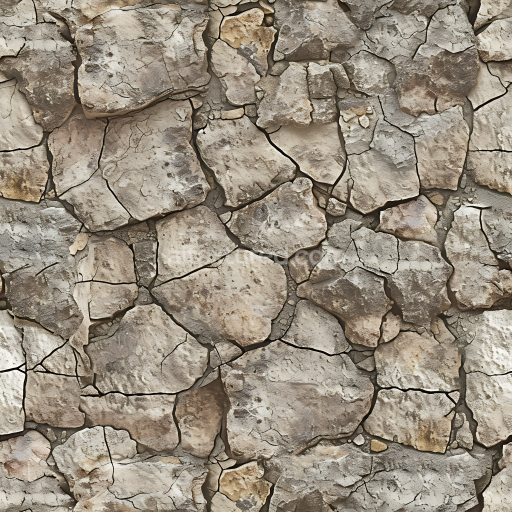
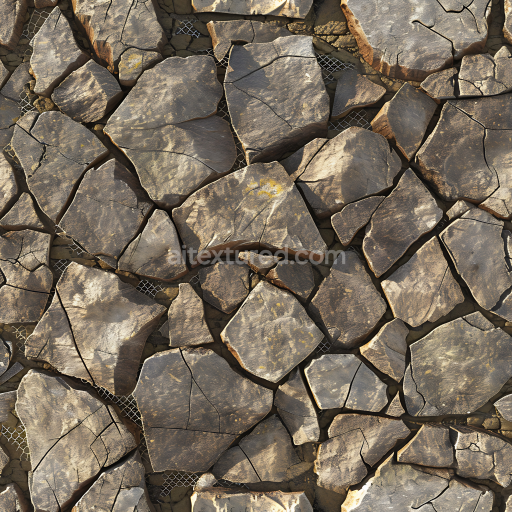
Cracked Dry Stone Ground Texture with Weathered Flat Stones
Seamless texture (tileable) · PNG, WEBP, PBR ZIP. License: AITextured Free Commercial License (FCL) v1.1. Free personal and commercial use. Raw resale, standalone redistribution, mirroring/scraping, competing asset packs, and AI/ML training are not allowed without written permission. Attribution is not required, but appreciated..

| ID | seamless-3d-texture-pbr-8k-carved-flagstone-surface-for-decorative-outdoor-paving |
|---|---|
| Category | Stone |
| Formats | PNG, WEBP, PBR ZIP |
| Size | 1k (1024x1024px), 2k (2048x2048px), 4k (4096x4096px), 8k (8192x8192px) |
| Color | sRGB |
| Tileable | Yes |
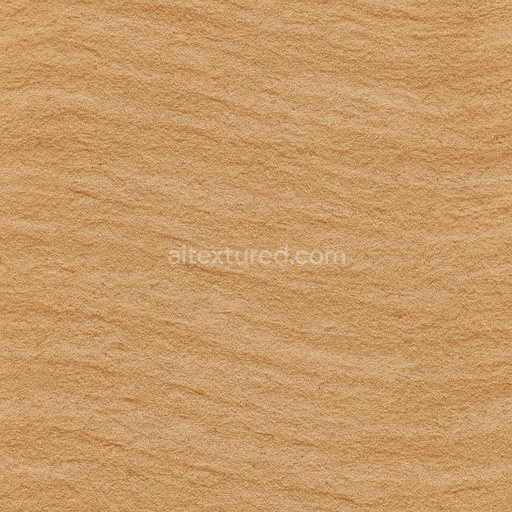
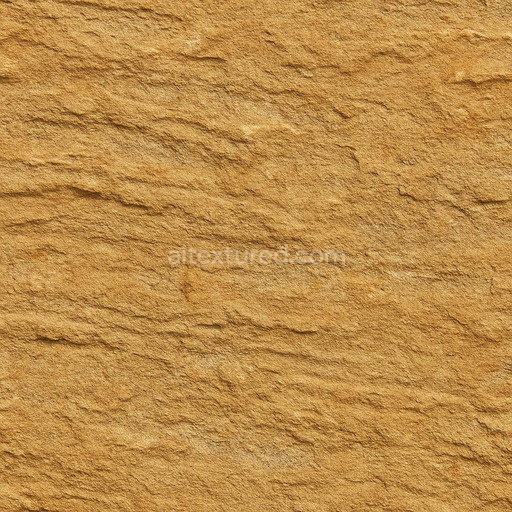
This seamless 3D texture represents a carved flagstone surface composed primarily of natural sedimentary stone slabs exhibiting a rugged yet refined structure typical of outdoor paving materials. The stone comprises a fine-grained siliceous matrix bound together with natural mineral cement giving rise to a dense substrate with moderate porosity. Over time weathering processes have introduced subtle fissures and micro-cracks throughout the slabs enhancing the realism of the surface by simulating natural stone aging. The flagstone pieces are irregularly shaped with rough chiseled edges that emphasize handcrafted carving techniques while the overall form follows an interlocking geometric pattern suited for decorative yet durable stone floors.
The material characteristics are conveyed through detailed PBR channels at an impressive 8K resolution ensuring exceptional fidelity in architectural visualization game development and garden design workflows compatible with Blender Unreal Engine and Unity. The BaseColor (Albedo) map captures the stone’s earthy tones—muted grays soft browns and subtle ochres—reflecting mineral deposits and iron oxide pigments within the stone. Normal and Height/Displacement maps articulate the intricate surface relief including pronounced stone grains carved grooves and recessed cracks while the Roughness map defines a predominantly matte finish with varying roughness to simulate both worn and freshly carved areas. Ambient Occlusion enhances depth perception by accentuating shadowed crevices and dust accumulation while the Metallic channel remains near zero consistent with the non-metallic nature of natural stone.
The texture’s surface finish exhibits a weathered brushed appearance rather than polished or glossy providing a tactile sense of coarse stone dust and subtle abrasions. This finish balances visual complexity with realistic wear patterns suitable for outdoor environments exposed to natural elements. The rough edges and interstitial gaps between slabs contribute to a believable paving layout making this texture ideal for simulating flagstone patios walkways and courtyards where both aesthetic appeal and textural authenticity are critical.
For practical implementation it is advisable to adjust the UV scale carefully to maintain consistent stone slab dimensions relative to the scene’s context avoiding unnaturally large or small patterns. Additionally fine-tuning the Roughness map can help simulate varying degrees of surface wear or moisture effects while blending the Height/Displacement with Normal maps can improve the perception of depth on low-polygon meshes without excessive geometry. Overall this high-resolution carved stone texture offers a versatile and realistic foundation for outdoor stone floors and paving projects across multiple rendering engines and real-time platforms.
Import the texture maps into Blender with sRGB color space for albedo/base color and Non-Color for normal, roughness, metallic, AO, height, and ORM maps. Connect normal maps through a Normal Map node, then adjust UV scale with a Mapping node so the material repeats naturally on your model.
For the full step-by-step setup, see How to Use Seamless Textures in Blender. Browse related material examples in wood, concrete, and metal.
Yes. This texture is designed as a seamless tileable PBR material, so it can repeat across large surfaces without visible borders.
You can download PNG/WEBP versions and use 1K, 2K, 4K and 8K download options when available on the page.
Yes. The download options and engine-mapped ZIP workflow are designed for Blender, Unreal Engine, Unity Standard, URP and HDRP material pipelines.
Yes. The texture is available under the AITextured free commercial license. Review the license page for redistribution and AI-training restrictions.


Build, preview, and export seamless PBR materials. Generate full map sets from a single image, inspect them in a real-time WebGL viewer, and re-package maps for Unreal, Unity, and Blender—directly in your browser.
AI text-to-texture: type a prompt and get a seamless, tileable base image ready for PBR workflows (great starting point for materials).
Create a full PBR set (Normal, Roughness, AO, Metallic, etc.) from a single image. Seamless and tiling-friendly.
Instant WebGL viewer: inspect materials on a sphere, plane, and cube. Check tiling and lighting in real time.
Re-packages maps per engine: Unreal (BaseColor + ORM), Unity (Mask/MetallicSmoothness), Blender (separate channels).
PNG ↔ JPG ↔ SVG: fast convert, SVG rasterize, embed/trace options, quality & background controls.