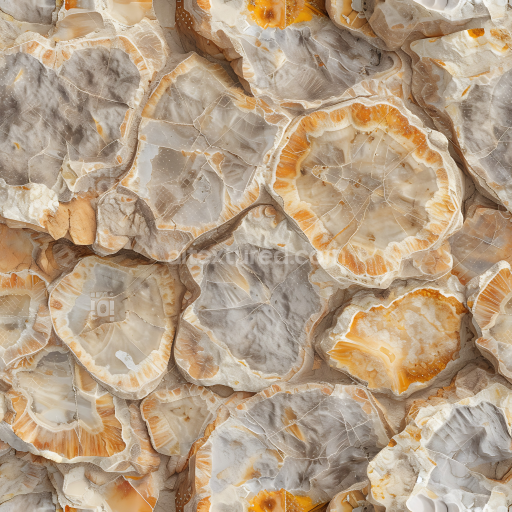
Agate Stone Slab PBR Texture with Orange and gray Patterns
Seamless texture (tileable) · PNG, WEBP, PBR ZIP. License: AITextured Free Commercial License (FCL) v1.1. Free personal and commercial use. Raw resale, standalone redistribution, mirroring/scraping, competing asset packs, and AI/ML training are not allowed without written permission. Attribution is not required, but appreciated..

| ID | seamless-3d-texture-pbr-8k-mossy-dolomite-stone-surface-for-natural-weathered-appearances |
|---|---|
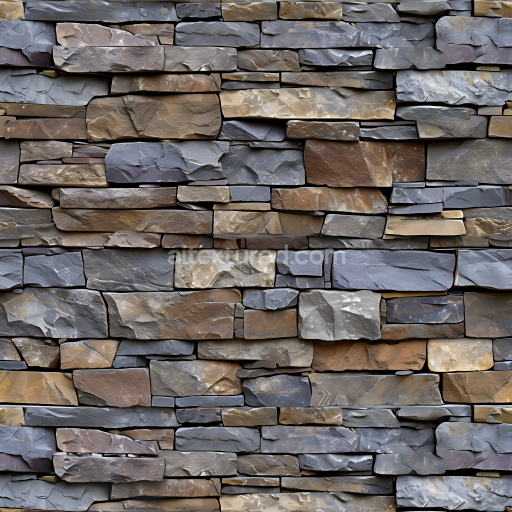
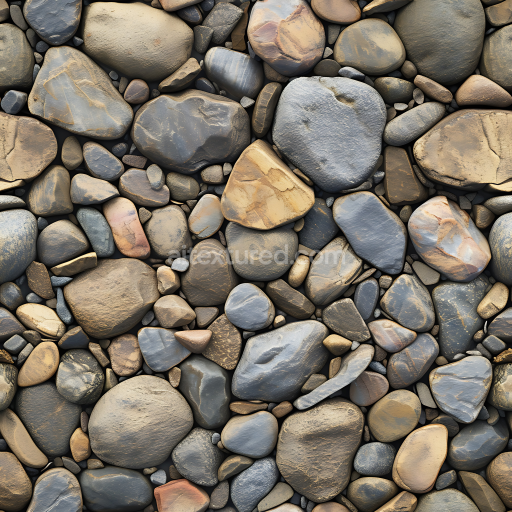
| Category | Stone |
| Formats | PNG, WEBP, PBR ZIP |
| Size | 1k (1024x1024px), 2k (2048x2048px), 4k (4096x4096px), 8k (8192x8192px) |
| Color | sRGB |
| Tileable | Yes |
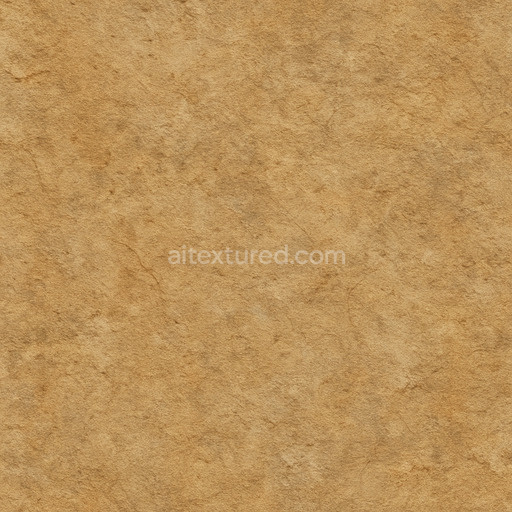
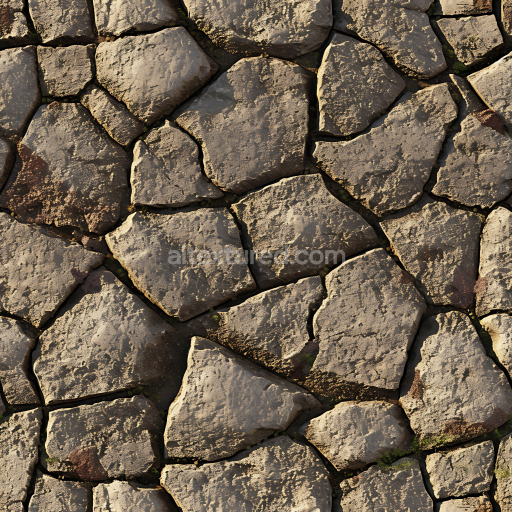
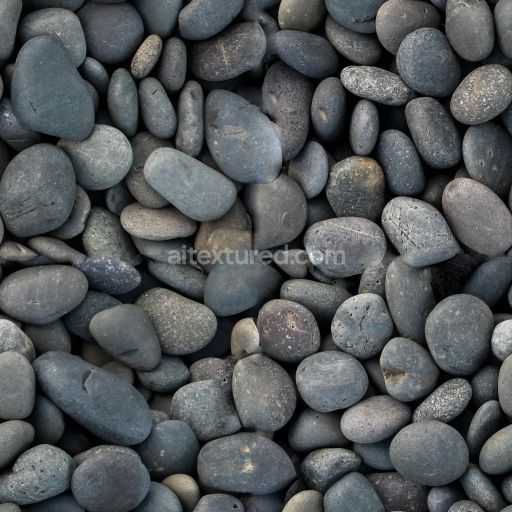
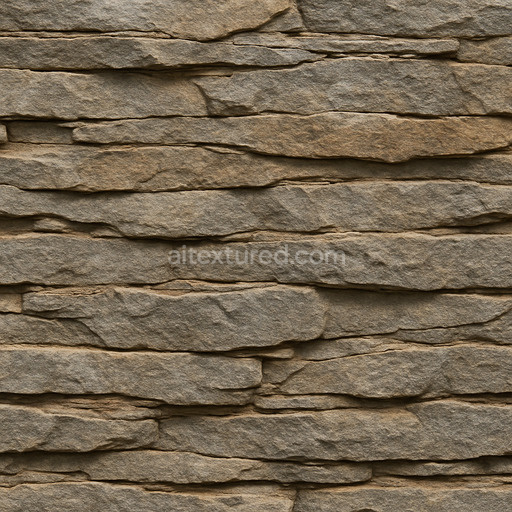
This seamless 8K PBR texture depicts a mossy dolomite stone surface characterized by natural weathering and organic growth. The base material is dolomite a sedimentary carbonate rock composed primarily of calcium magnesium carbonate which forms dense crystalline grains. Its geometric form resembles irregular stone slabs commonly found in natural cliffs and stone walls featuring rough edges and fractured surfaces. The texture captures fine stone grains and sediment layers interspersed with subtle stone cracks highlighting the porous and slightly eroded nature of the substrate. This porosity facilitates moss colonization which is represented by uneven soft green patches that partially veil the underlying stone adding depth and ecological realism.
The composition reflects a complex interplay between the dolomite substrate and the biological elements of moss with no artificial binders or adhesives as expected in natural formations. The stone’s surface finish is matte and rough shaped by prolonged exposure to environmental factors such as wind and moisture which contribute to its weathered appearance. Colorants within the texture range from muted grays and creamy whites of the dolomite mineral matrix to varying mossy greens and earthy browns accurately conveyed through the BaseColor (Albedo) map. The Normal map captures micro and macro surface variations including stone cracks and moss contours enhancing tactile realism. Roughness maps emphasize surface irregularities with higher roughness values where moss coverage increases and slightly lower values on exposed stone grains. Metallic values remain minimal consistent with dolomite’s non-metallic nature. Ambient Occlusion accentuates crevices and crevasses while Height/Displacement maps delineate subtle depth differences between stone surfaces and moss patches.
Designed for seamless tiling this texture avoids visible repetition making it suitable for expansive stone walls cliffs or ruin environments. The exceptionally high resolution of 8K ensures detailed close-ups without pixelation supporting high-fidelity renders in Blender Unreal Engine and Unity workflows. The texture’s accurate PBR channel separation facilitates physically correct lighting interactions and material responses across different rendering engines.
When integrating this texture it is advisable to carefully adjust the UV scale to prevent pattern distortion on large surfaces and to fine-tune the roughness map to control glossiness based on environmental context—more polished for sheltered areas rougher for exposed faces. Additionally blending height or parallax maps with normal maps can enhance perceived depth and surface complexity especially in first-person or close-range views optimizing visual authenticity without excessive geometry.
Import the texture maps into Blender with sRGB color space for albedo/base color and Non-Color for normal, roughness, metallic, AO, height, and ORM maps. Connect normal maps through a Normal Map node, then adjust UV scale with a Mapping node so the material repeats naturally on your model.
For the full step-by-step setup, see How to Use Seamless Textures in Blender. Browse related material examples in wood, concrete, and metal.
Yes. This texture is designed as a seamless tileable PBR material, so it can repeat across large surfaces without visible borders.
You can download PNG/WEBP versions and use 1K, 2K, 4K and 8K download options when available on the page.
Yes. The download options and engine-mapped ZIP workflow are designed for Blender, Unreal Engine, Unity Standard, URP and HDRP material pipelines.
Yes. The texture is available under the AITextured free commercial license. Review the license page for redistribution and AI-training restrictions.

Build, preview, and export seamless PBR materials. Generate full map sets from a single image, inspect them in a real-time WebGL viewer, and re-package maps for Unreal, Unity, and Blender—directly in your browser.
AI text-to-texture: type a prompt and get a seamless, tileable base image ready for PBR workflows (great starting point for materials).
Create a full PBR set (Normal, Roughness, AO, Metallic, etc.) from a single image. Seamless and tiling-friendly.
Instant WebGL viewer: inspect materials on a sphere, plane, and cube. Check tiling and lighting in real time.
Re-packages maps per engine: Unreal (BaseColor + ORM), Unity (Mask/MetallicSmoothness), Blender (separate channels).
PNG ↔ JPG ↔ SVG: fast convert, SVG rasterize, embed/trace options, quality & background controls.