
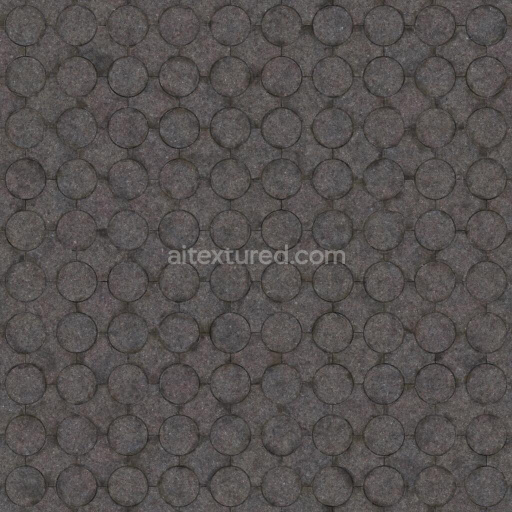
Brown Tile Texture with Scratches | Free PBR
Seamless texture (tileable) · PNG, WEBP, PBR ZIP. License: AITextured Free Commercial License (FCL) v1.1. Free personal and commercial use. Raw resale, standalone redistribution, mirroring/scraping, competing asset packs, and AI/ML training are not allowed without written permission. Attribution is not required, but appreciated..

| ID | retro-star-and-cross-shaped-black-kitchen-tiles-free-pbr |
|---|---|
| Category | Tile |
| Formats | PNG, WEBP, PBR ZIP |
| Size | 1k (1024x1024px), 2k (2048x2048px), 4k (4096x4096px), 8k (8192x8192px) |
| Color | sRGB |
| Tileable | Yes |
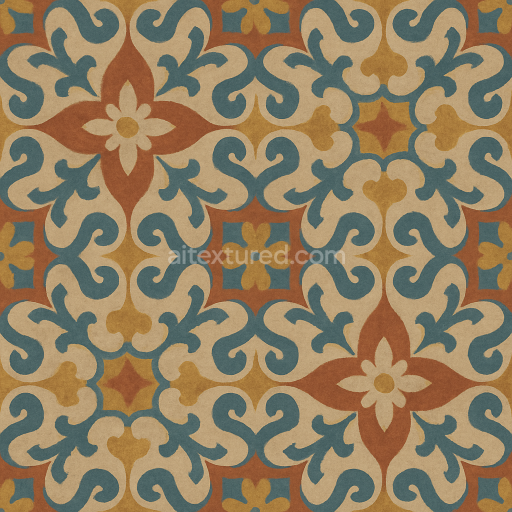
The Retro Star and Cross Shaped Black Kitchen Tiles (Tiles 0090) showcase a distinctive antique design that combines classic aesthetics with functional materials ideal for modern kitchen flooring. Crafted primarily from high-quality ceramic, these tiles feature a sturdy mineral-based substrate known for excellent durability and low porosity, making them resistant to moisture and wear in busy kitchen environments. The tile’s composition includes finely ground mineral aggregates bonded with advanced polymer-based adhesives, ensuring structural integrity and a smooth, consistent surface. A subtle reddish tint is applied through oxide pigment layers integrated into the glaze, enhancing the black base color with warm undertones that evoke a vintage, retro style. The surface finish is carefully polished to a satin sheen, balancing a slight reflective quality with enough texture to prevent slipping while maintaining an elegant appearance.
From a Physically Based Rendering (PBR) perspective, the tile’s BaseColor or Albedo map reveals the deep black tone accented by muted red highlights, accurately representing the antique glaze’s subtle color variations. The Normal map captures the delicate embossing of the star and cross shapes, adding realistic depth and surface detail without harsh edges. Roughness values are calibrated to reflect the satin finish—moderate roughness levels offer a soft diffuse reflection rather than a glossy shine. The Metallic channel is minimal, reflecting the ceramic’s non-metallic nature, while Ambient Occlusion enhances the shadows within the recessed patterns, emphasizing the tile’s intricate design. Height or Displacement maps provide fine surface relief, perfect for convincing parallax effects during close-up renders, helping to bring out the tactile quality of the textured shapes.
This tile texture is delivered in an ultra-high 8K resolution, making it exceptionally suitable for detailed renderings in Blender, Unreal Engine, and Unity. The resolution allows for close inspection without loss of detail, ideal for both architectural visualization and game environments where realism is paramount. For practical use, adjusting the UV scale to match realistic tile dimensions is recommended to avoid repetitive patterns in large kitchen floor layouts. Additionally, tweaking the roughness channel can simulate varying degrees of wear or polish, allowing customization from freshly installed to gently aged surfaces, thereby enhancing the sense of authenticity in your projects.
Import the texture maps into Blender with sRGB color space for albedo/base color and Non-Color for normal, roughness, metallic, AO, height, and ORM maps. Connect normal maps through a Normal Map node, then adjust UV scale with a Mapping node so the material repeats naturally on your model.
For the full step-by-step setup, see How to Use Seamless Textures in Blender. Browse related material examples in wood, concrete, and metal.
Yes. This texture is designed as a seamless tileable PBR material, so it can repeat across large surfaces without visible borders.
You can download PNG/WEBP versions and use 1K, 2K, 4K and 8K download options when available on the page.
Yes. The download options and engine-mapped ZIP workflow are designed for Blender, Unreal Engine, Unity Standard, URP and HDRP material pipelines.
Yes. The texture is available under the AITextured free commercial license. Review the license page for redistribution and AI-training restrictions.


Build, preview, and export seamless PBR materials. Generate full map sets from a single image, inspect them in a real-time WebGL viewer, and re-package maps for Unreal, Unity, and Blender—directly in your browser.
AI text-to-texture: type a prompt and get a seamless, tileable base image ready for PBR workflows (great starting point for materials).
Create a full PBR set (Normal, Roughness, AO, Metallic, etc.) from a single image. Seamless and tiling-friendly.
Instant WebGL viewer: inspect materials on a sphere, plane, and cube. Check tiling and lighting in real time.
Re-packages maps per engine: Unreal (BaseColor + ORM), Unity (Mask/MetallicSmoothness), Blender (separate channels).
PNG ↔ JPG ↔ SVG: fast convert, SVG rasterize, embed/trace options, quality & background controls.