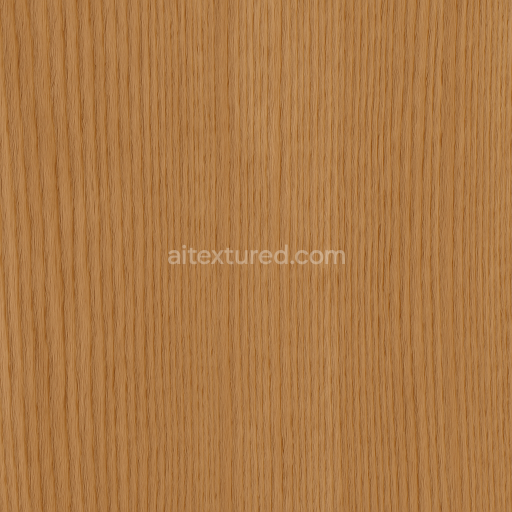
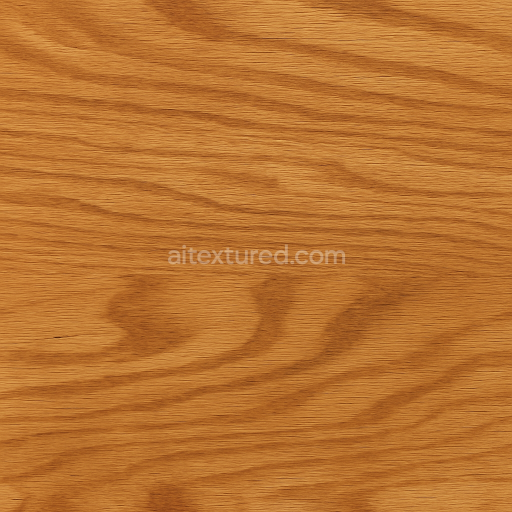
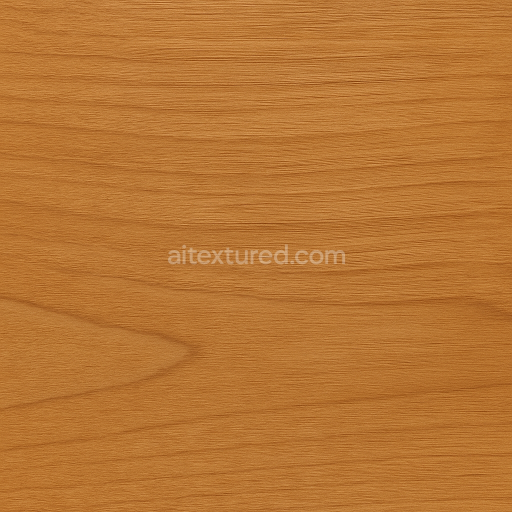
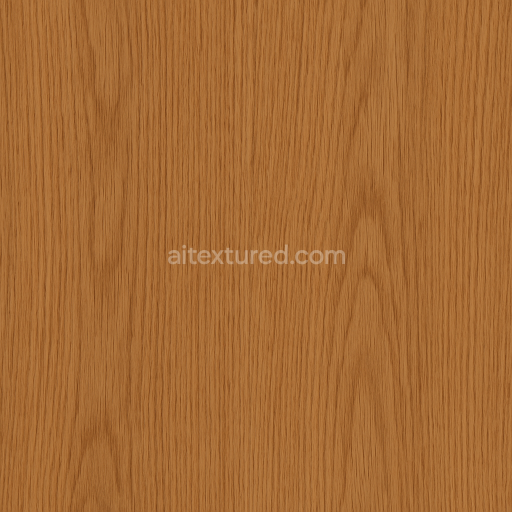
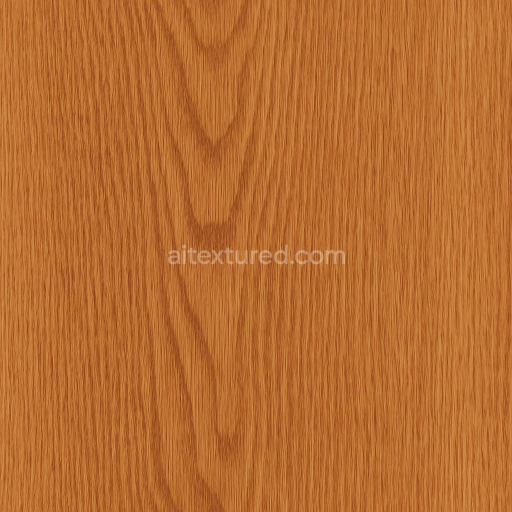
Oak Wood With Natural Grain And Matte Finish
Seamless texture (tileable) · PNG, WEBP, PBR ZIP. License: AITextured Free Commercial License (FCL) v1.1. Free personal and commercial use. Raw resale, standalone redistribution, mirroring/scraping, competing asset packs, and AI/ML training are not allowed without written permission. Attribution is not required, but appreciated..

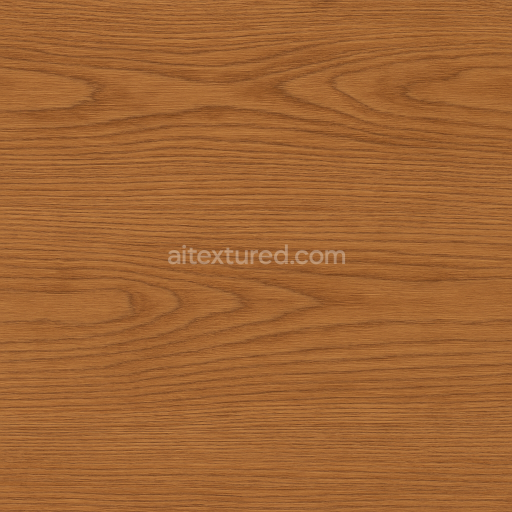
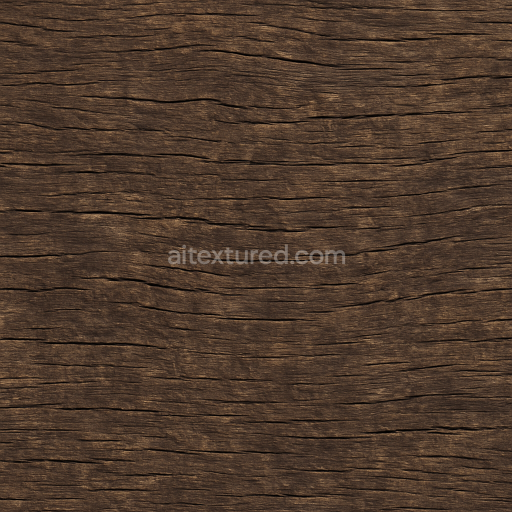
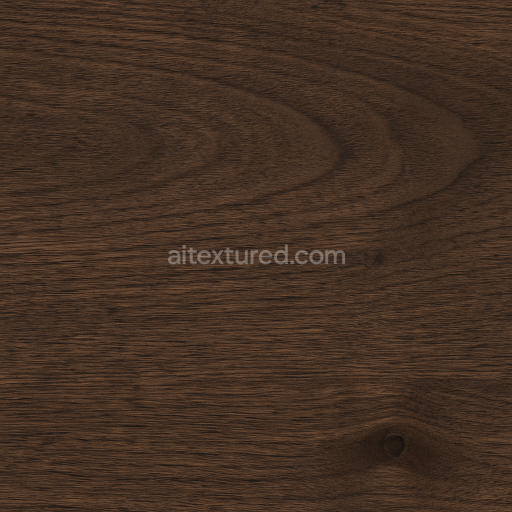
| ID | seamless-3d-texture-pbr-8k-walnut-wood-with-matte-finish-and-curly-grain-detail |
|---|---|
| Category | Furniture wood |
| Formats | PNG, WEBP, PBR ZIP |
| Size | 1k (1024x1024px), 2k (2048x2048px), 4k (4096x4096px), 8k (8192x8192px) |
| Color | sRGB |
| Tileable | Yes |
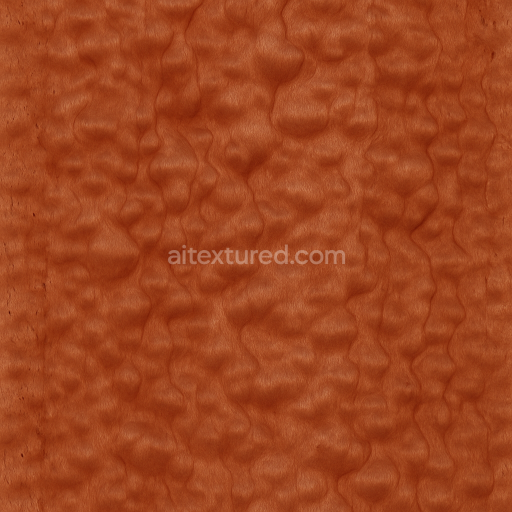
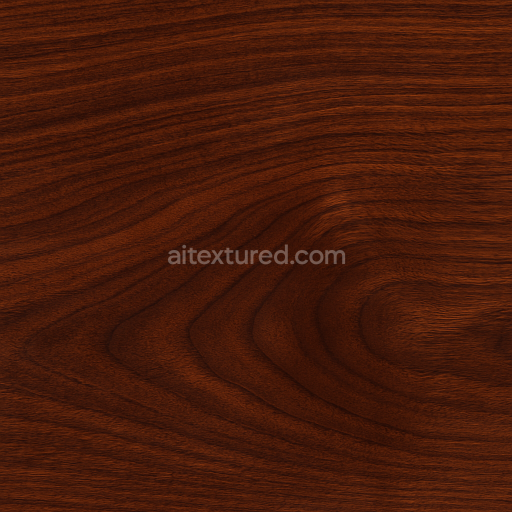
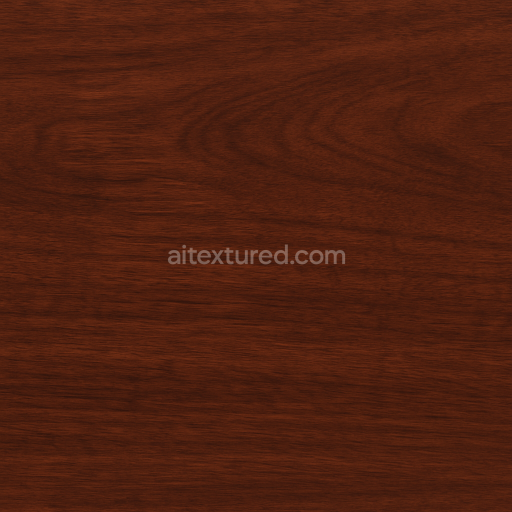
This seamless 3D texture showcases premium walnut wood characterized by its rich dark brown tones and distinctive curly grain patterns. Walnut a dense hardwood renowned for its natural beauty and durability serves as the base substrate delivering an organic warm aesthetic ideal for high-fidelity interior renders. The texture emphasizes a matte finish that softens reflections and enhances the subtle interplay of light across the surface providing a natural non-glossy appearance. The curly grain orientation adds a dynamic flowing visual rhythm without overpowering the model capturing the authentic complexity of walnut’s natural growth patterns. The material’s porosity and fine grain structure are evident in the texture’s surface detail simulating the tactile qualities of real wood while the finish suggests a finely sanded hand-rubbed polish that retains a soft tactile sensation without shine.
In terms of PBR material channels this 8K resolution texture offers a highly detailed BaseColor/Albedo map that faithfully reproduces walnut’s warm earthy hues combined with subtle color variations and knots. The Normal map enhances the curly grain’s three-dimensional relief providing convincing depth and shadow effects that interact realistically with dynamic lighting. The Roughness channel controls the matte finish by maintaining a medium-high roughness value diffusing specular highlights for a soft natural glow. The Metallic map is kept at zero to reflect walnut’s purely organic non-metallic nature. Ambient Occlusion enriches the perception of depth within grain crevices and knots while the Height/Displacement map allows for fine surface modulation to increase realism in close-up views supporting parallax or tessellation techniques for added dimensionality.
This photorealistic walnut wood texture is perfectly seamless ensuring continuous grain flow without visible tiling artifacts making it ideal for 3D applications such as panelled wood surfaces drawers furniture components and chair elements. Its ultra-high 8K resolution guarantees exceptional fidelity across all scales from broad interior scenes to tight detail shots. The texture is fully optimized and ready for use in major 3D software platforms including Blender Unreal Engine and Unity facilitating smooth integration into PBR workflows for realistic furniture and interior renders. For best results adjusting the UV scale to match the natural grain size of walnut and fine-tuning the roughness map can help achieve a balanced lifelike surface appearance. Additionally leveraging the height map with subtle parallax displacement can significantly enhance the tactile impression without overloading rendering resources.
Import the texture maps into Blender with sRGB color space for albedo/base color and Non-Color for normal, roughness, metallic, AO, height, and ORM maps. Connect normal maps through a Normal Map node, then adjust UV scale with a Mapping node so the material repeats naturally on your model.
For the full step-by-step setup, see How to Use Seamless Textures in Blender. Browse related material examples in wood, concrete, and metal.
Yes. This texture is designed as a seamless tileable PBR material, so it can repeat across large surfaces without visible borders.
You can download PNG/WEBP versions and use 1K, 2K, 4K and 8K download options when available on the page.
Yes. The download options and engine-mapped ZIP workflow are designed for Blender, Unreal Engine, Unity Standard, URP and HDRP material pipelines.
Yes. The texture is available under the AITextured free commercial license. Review the license page for redistribution and AI-training restrictions.
Build, preview, and export seamless PBR materials. Generate full map sets from a single image, inspect them in a real-time WebGL viewer, and re-package maps for Unreal, Unity, and Blender—directly in your browser.
AI text-to-texture: type a prompt and get a seamless, tileable base image ready for PBR workflows (great starting point for materials).
Create a full PBR set (Normal, Roughness, AO, Metallic, etc.) from a single image. Seamless and tiling-friendly.
Instant WebGL viewer: inspect materials on a sphere, plane, and cube. Check tiling and lighting in real time.
Re-packages maps per engine: Unreal (BaseColor + ORM), Unity (Mask/MetallicSmoothness), Blender (separate channels).
PNG ↔ JPG ↔ SVG: fast convert, SVG rasterize, embed/trace options, quality & background controls.