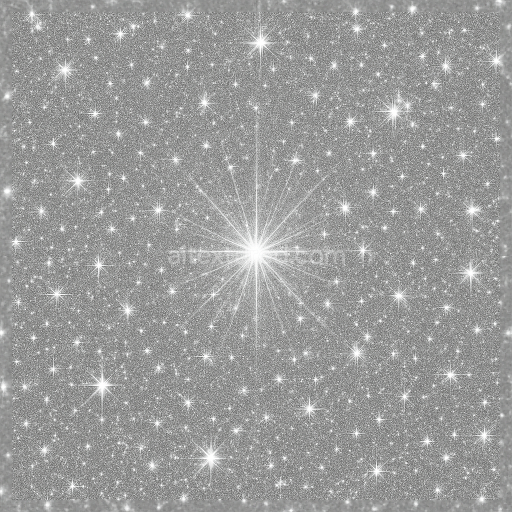
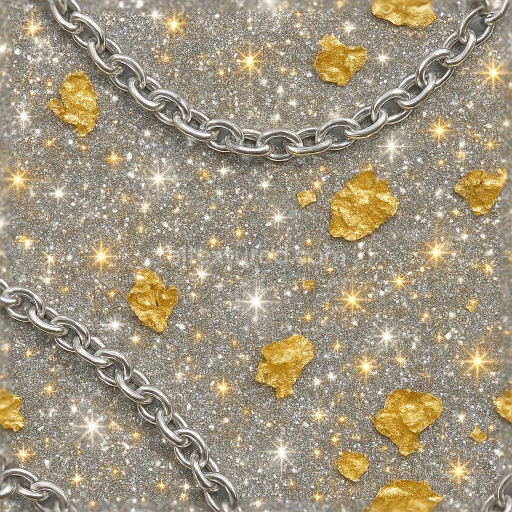
Sparkling Silver Starburst Pattern
Seamless texture (tileable) · PNG, WEBP, PBR ZIP. License: AITextured Free Commercial License (FCL) v1.1. Free personal and commercial use. Raw resale, standalone redistribution, mirroring/scraping, competing asset packs, and AI/ML training are not allowed without written permission. Attribution is not required, but appreciated..

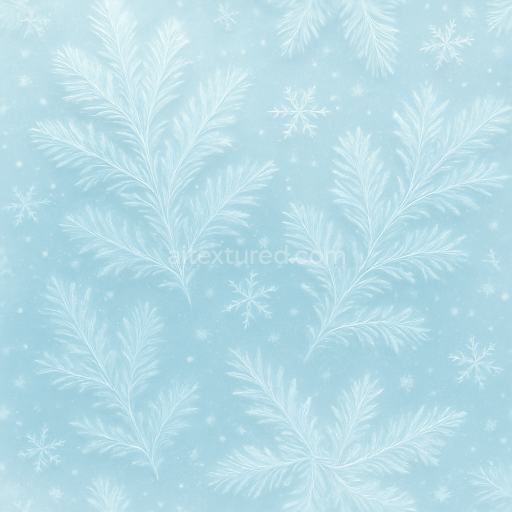
| ID | seamless-3d-texture-pbr-8k-frosted-snowflakes-and-sparkling-snow-texture-for-winter-new-year |
|---|---|
| Category | New Year |
| Formats | PNG, WEBP, PBR ZIP |
| Size | 1k (1024x1024px), 2k (2048x2048px), 4k (4096x4096px), 8k (8192x8192px) |
| Color | sRGB |
| Tileable | Yes |
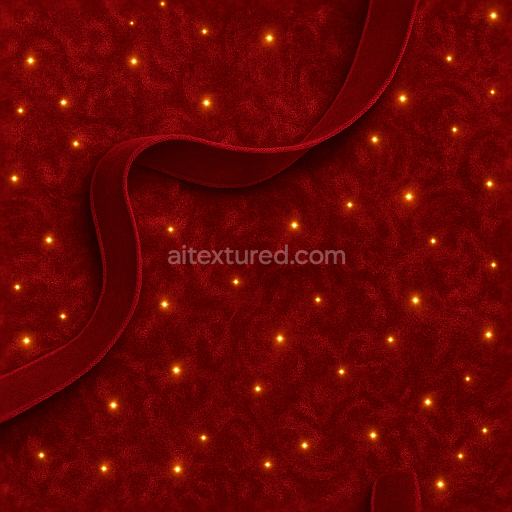
This seamless 3D texture features an intricately detailed surface inspired by frosted glass and delicate snowflakes resting atop a fresh snow texture, evoking the essence of winter frost and holiday celebration glow. The base material resembles a lightly compacted snow substrate with a fine crystalline structure, interspersed with translucent ice particles that simulate frost formation. The geometric pattern consists of overlapping, stylized snowflake shapes with softly rounded edges and subtle depth variations, creating a natural, organic tessellation that flows seamlessly in all directions. This pattern is enhanced by scattered sparkle dust elements that catch light differently, introducing a subtle, festive sparkle effect across the surface.
From a material composition standpoint, the texture mimics a complex matrix where the primary substrate is a semi-translucent, fine-grained snow layer acting as the aggregate. Embedded within this are micro-crystalline frost formations that serve as natural binders, adhering to the snow base and creating a slightly roughened surface with moderate porosity. The interplay between these components results in a delicately weathered finish reminiscent of early morning frost on glass, combining matte snowy regions with glossy, frosted glass-like highlights. Colorants are minimal, primarily relying on variations of pure white and pale blue hues to replicate natural snow and ice pigmentation, while subtle warm tones simulate celebration and holiday glow effects emerging from beneath the surface.
Mapping this to PBR channels, the BaseColor (Albedo) channel captures the soft gradient from pure white snow to translucent icy blue frosted areas, with tiny specks of warm glow colors to simulate light diffusion through the frost. The Normal map emphasizes the raised snowflake geometries and fine frost crystal details, introducing convincing surface irregularities and depth cues. Roughness values vary across the texture: smoother, almost polished patches imitate glazed frost, while rougher zones reflect untouched snow granularity. The Metallic channel remains close to zero, reflecting the non-metallic nature of snow and ice. Ambient Occlusion highlights subtle crevices at snowflake edges and frost clusters, adding dimensionality and realism. Finally, the Height/Displacement map provides fine relief for snowflake contours and sparkling dust particles, enabling enhanced parallax and depth effects in 3D environments.
Rendered in ultra-high 8K resolution, this texture is optimized for use in Blender, Unreal Engine, and Unity, ensuring exceptional detail and fidelity even in close-up views. It is fully tileable, making it ideal for large winter scenes or seasonal environments requiring authentic, sparkling snow surfaces. For practical application, adjusting the UV scale can help maintain the natural size of snowflakes relative to scene proportions, while fine-tuning roughness values can control the balance between frosted gloss and matte snow regions. Additionally, blending height and normal maps can enhance the perceived depth of the snowflake relief without compromising performance, providing flexibility across various rendering pipelines.
Import the texture maps into Blender with sRGB color space for albedo/base color and Non-Color for normal, roughness, metallic, AO, height, and ORM maps. Connect normal maps through a Normal Map node, then adjust UV scale with a Mapping node so the material repeats naturally on your model.
For the full step-by-step setup, see How to Use Seamless Textures in Blender. Browse related material examples in wood, concrete, and metal.
Yes. This texture is designed as a seamless tileable PBR material, so it can repeat across large surfaces without visible borders.
You can download PNG/WEBP versions and use 1K, 2K, 4K and 8K download options when available on the page.
Yes. The download options and engine-mapped ZIP workflow are designed for Blender, Unreal Engine, Unity Standard, URP and HDRP material pipelines.
Yes. The texture is available under the AITextured free commercial license. Review the license page for redistribution and AI-training restrictions.


Build, preview, and export seamless PBR materials. Generate full map sets from a single image, inspect them in a real-time WebGL viewer, and re-package maps for Unreal, Unity, and Blender—directly in your browser.
AI text-to-texture: type a prompt and get a seamless, tileable base image ready for PBR workflows (great starting point for materials).
Create a full PBR set (Normal, Roughness, AO, Metallic, etc.) from a single image. Seamless and tiling-friendly.
Instant WebGL viewer: inspect materials on a sphere, plane, and cube. Check tiling and lighting in real time.
Re-packages maps per engine: Unreal (BaseColor + ORM), Unity (Mask/MetallicSmoothness), Blender (separate channels).
PNG ↔ JPG ↔ SVG: fast convert, SVG rasterize, embed/trace options, quality & background controls.