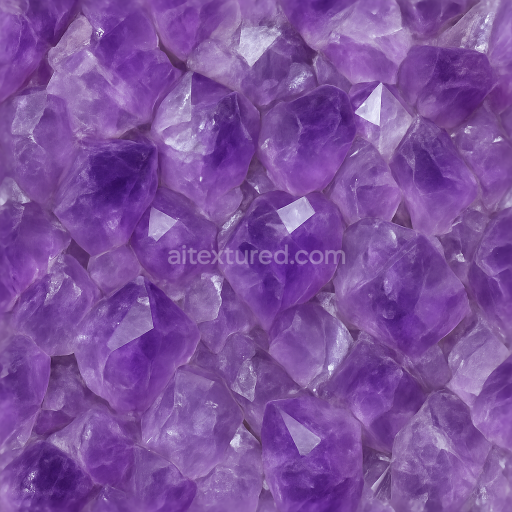
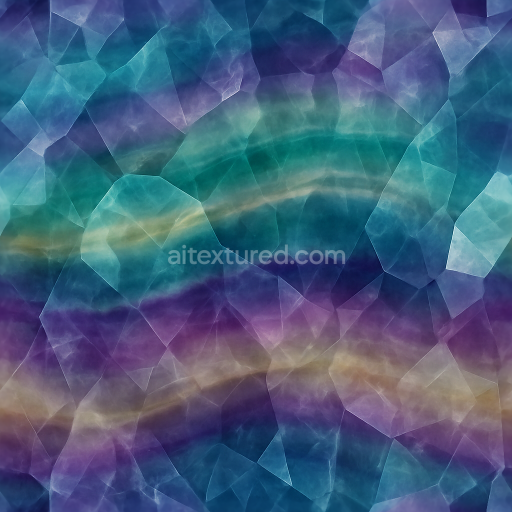
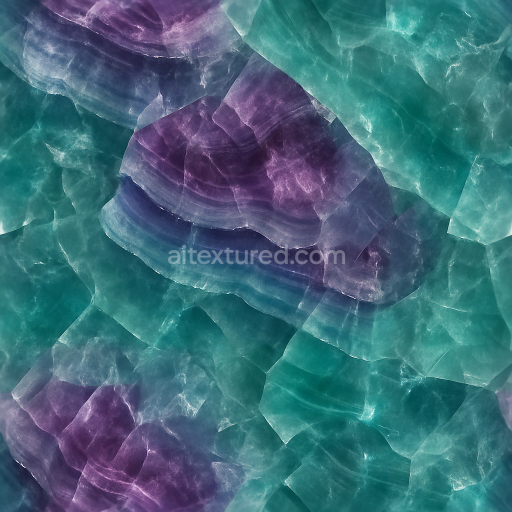
Amethyst Rough Crystal With Color Zoning And Vitreous Luster Effects
Seamless texture (tileable) · PNG, WEBP, PBR ZIP. License: AITextured Free Commercial License (FCL) v1.1. Free personal and commercial use. Raw resale, standalone redistribution, mirroring/scraping, competing asset packs, and AI/ML training are not allowed without written permission. Attribution is not required, but appreciated..

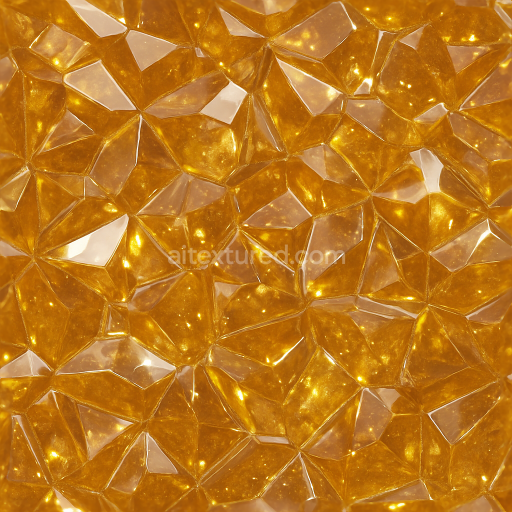
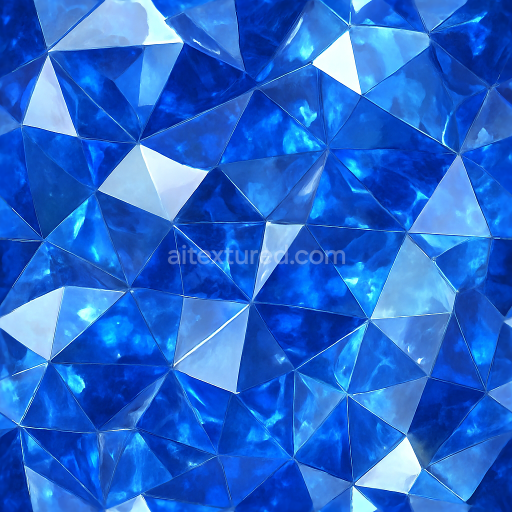
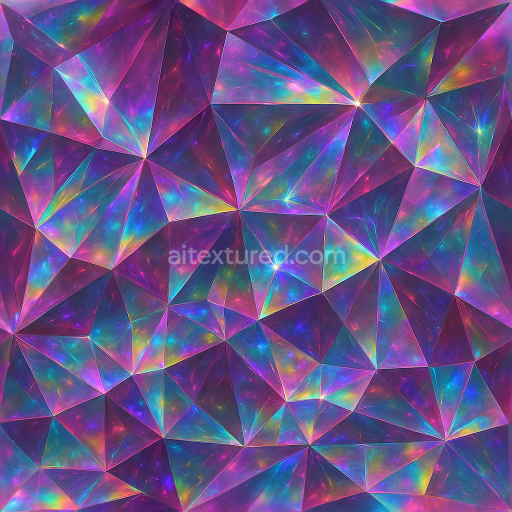
| ID | seamless-3d-texture-pbr-8k-diamond-facet-edges-sparkling-gemstone-cut-natural-crystal |
|---|---|
| Category | Crystals |
| Formats | PNG, WEBP, PBR ZIP |
| Size | 1k (1024x1024px), 2k (2048x2048px), 4k (4096x4096px), 8k (8192x8192px) |
| Color | sRGB |
| Tileable | Yes |
This seamless 3D texture presents a meticulously crafted diamond surface that replicates the intricate geometric form of a gemstone cut, characterized by sharp facet edges arranged in a precise, symmetrical pattern. The texture’s base material emulates natural crystal, predominantly pure carbon atoms arranged in a rigid lattice structure, giving rise to the diamond’s renowned hardness and optical clarity. The facets are polished to a mirror-like finish, which is essential for the sparkling reflections and light refractions typical of real diamonds. The surface is virtually non-porous, with minimal weathering or abrasion, preserving pristine clarity and brilliance. These physical qualities are translated into the PBR workflow through a high-resolution BaseColor map capturing subtle color variations from pure white to faint bluish hues, while the Normal map defines the angular facet geometry to simulate depth and sharp edges without actual displacement.
In terms of composition, the texture simulates a flawless crystalline substrate with no binders or adhesives, as diamonds are naturally occurring gemstones formed under extreme pressure. The facets serve as geometric aggregates, each acting like tiny prisms that break and reflect light. The Roughness map is finely tuned to represent the polished nature of the cut surfaces, showing very low roughness values on the main facets, which results in crisp, well-defined reflections and highlights. Metallic properties are negligible here, as diamonds are dielectric materials, thus the Metallic channel remains near zero to emphasize non-metallic optical behavior. Ambient Occlusion enhances the subtle shadowing where facets meet, adding realism by simulating light occlusion in tight crevices. The Height or Displacement map defines the minute elevation changes between facets, improving silhouette definition and enhancing parallax effects in 3D renders.
Rendered at an impressive 8K resolution, this texture ensures exceptional detail and clarity, making it well-suited for high-end applications within Blender, Unreal Engine, and Unity environments. The seamless tiling capability allows it to cover large surfaces uniformly without visible repetition or seams, which is crucial for creating believable jewelry visualizations or luxury product renderings. The texture’s PBR channels are balanced to offer a realistic interplay of light and material response, faithfully reproducing the diamond’s unique optical properties such as sharp sparkle, light dispersion, and refraction effects inherent to gemstone cuts.
For practical usage, it is recommended to carefully adjust the UV scale depending on the object size to maintain the natural proportions of the facets and avoid distortion. Additionally, fine-tuning the Roughness map can help control the intensity of the sparkling highlights, allowing for either a softer glow or a more pronounced diamond brilliance. When combining this texture with other surface details, blending the Height map with subtle Normal maps can enhance the overall tactile realism without compromising performance, especially in real-time engines like Unreal and Unity. This approach ensures the diamond facets appear crisp and dynamically responsive to lighting conditions.
Import the texture maps into Blender with sRGB color space for albedo/base color and Non-Color for normal, roughness, metallic, AO, height, and ORM maps. Connect normal maps through a Normal Map node, then adjust UV scale with a Mapping node so the material repeats naturally on your model.
For the full step-by-step setup, see How to Use Seamless Textures in Blender. Browse related material examples in wood, concrete, and metal.
Yes. This texture is designed as a seamless tileable PBR material, so it can repeat across large surfaces without visible borders.
You can download PNG/WEBP versions and use 1K, 2K, 4K and 8K download options when available on the page.
Yes. The download options and engine-mapped ZIP workflow are designed for Blender, Unreal Engine, Unity Standard, URP and HDRP material pipelines.
Yes. The texture is available under the AITextured free commercial license. Review the license page for redistribution and AI-training restrictions.
Build, preview, and export seamless PBR materials. Generate full map sets from a single image, inspect them in a real-time WebGL viewer, and re-package maps for Unreal, Unity, and Blender—directly in your browser.
AI text-to-texture: type a prompt and get a seamless, tileable base image ready for PBR workflows (great starting point for materials).
Create a full PBR set (Normal, Roughness, AO, Metallic, etc.) from a single image. Seamless and tiling-friendly.
Instant WebGL viewer: inspect materials on a sphere, plane, and cube. Check tiling and lighting in real time.
Re-packages maps per engine: Unreal (BaseColor + ORM), Unity (Mask/MetallicSmoothness), Blender (separate channels).
PNG ↔ JPG ↔ SVG: fast convert, SVG rasterize, embed/trace options, quality & background controls.