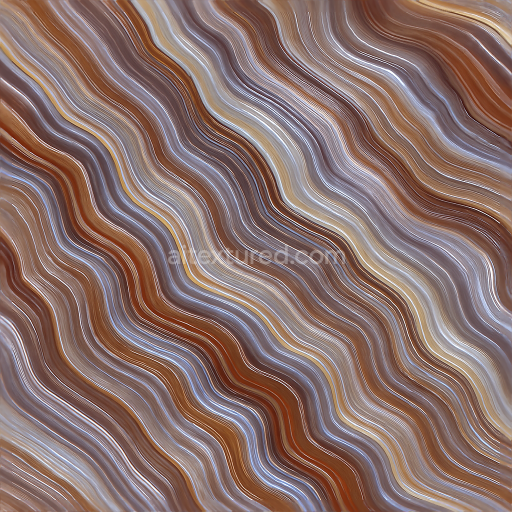
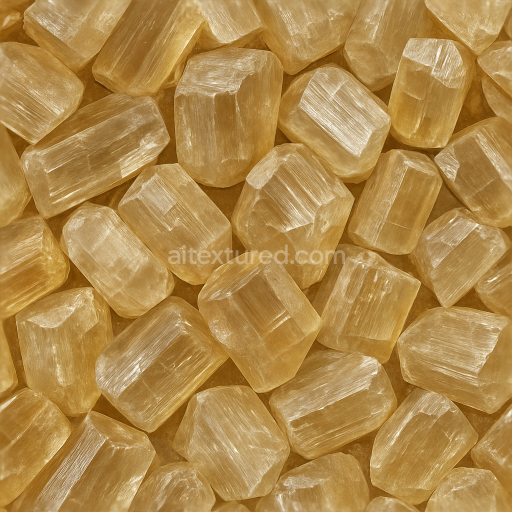
Agate Banded Crystal With Translucent Layers And Glossy Finish Reflective Surfaces
Seamless texture (tileable) · PNG, WEBP, PBR ZIP. License: AITextured Free Commercial License (FCL) v1.1. Free personal and commercial use. Raw resale, standalone redistribution, mirroring/scraping, competing asset packs, and AI/ML training are not allowed without written permission. Attribution is not required, but appreciated..

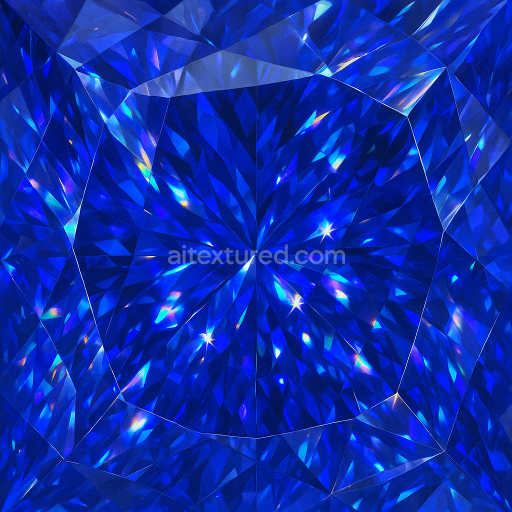
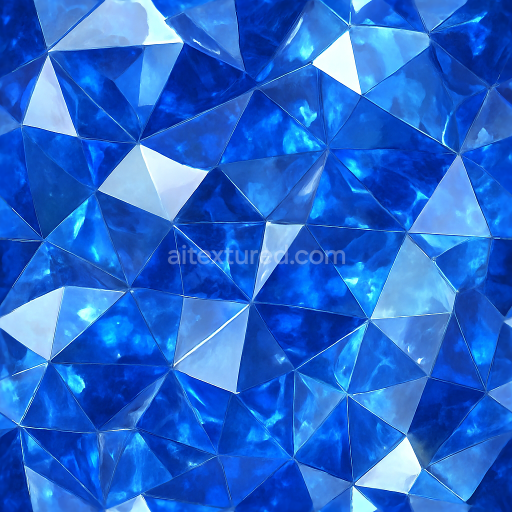
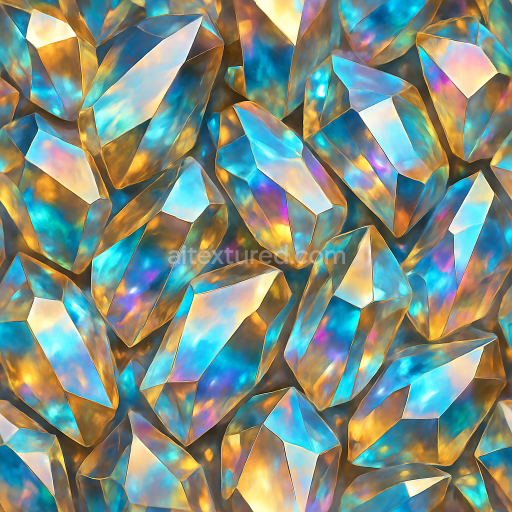
| ID | seamless-3d-texture-pbr-8k-of-lustrous-sapphire-faceted-gem-with-deep-blue-polished-facets-and-crystal-sparkle |
|---|---|
| Category | Crystals |
| Formats | PNG, WEBP, PBR ZIP |
| Size | 1k (1024x1024px), 2k (2048x2048px), 4k (4096x4096px), 8k (8192x8192px) |
| Color | sRGB |
| Tileable | Yes |
This seamless 3D PBR 8K texture depicts a lustrous sapphire faceted gem characterized by deep blue polished facets arranged in a precise geometric pattern typical of expertly cut gemstones. The underlying material is a crystalline aluminum oxide substrate, renowned for its hardness and optical clarity. This base is enhanced with trace elements imparting the rich cobalt blue coloration. The texture captures the intricate faceting—triangular and kite-shaped planes converging to create a complex, multi-angular form that maximizes internal reflections and refractions, producing vivid crystal sparkle and scintillation effects. The surface finish is highly polished, providing a mirror-like reflectivity with minimal surface roughness, critical to conveying the gem’s brilliance and clarity.
In terms of physical properties mapped to PBR channels, the BaseColor (Albedo) channel reflects the sapphire’s vibrant deep blue hue with subtle gradients caused by light dispersion within the gem. The Normal map defines the sharply angled facets and subtle microfacets, simulating the intricate cuts and enhancing light interaction on the surface. Roughness values are very low and finely varied to replicate the polished finish, allowing for precise reflections and highlights. The Metallic channel is near zero, as sapphire is a dielectric material rather than metallic. Ambient Occlusion captures subtle shadowing within the facet intersections, adding depth and realism. Height/Displacement maps provide accurate surface relief to emphasize facet edges and slight variations in thickness, improving parallax and silhouette detail when rendered.
The texture’s seamless tiling capability ensures it can be applied continuously without visible boundaries, ideal for large-scale 3D environments or detailed close-ups in jewelry visualization. The 8K resolution supports extremely high fidelity, preserving fine crystal details and facet sharpness even under close inspection. This texture is optimized for use in Blender, Unreal Engine, and Unity, enabling accurate PBR rendering workflows across these platforms. The material’s layered composition and precise channel data allow artists to tune roughness and normal intensity to adapt to lighting conditions or stylistic choices.
For practical application, it is recommended to adjust the UV scale conservatively to maintain the natural size of the gem’s facets, preventing distortion of the intricate geometry. Additionally, blending height maps with normal maps can enhance the sense of depth and realism without introducing harsh edges. Fine-tuning roughness can help balance the reflective brilliance against environmental lighting, ensuring the sapphire’s characteristic sparkle is neither muted nor exaggerated.
Import the texture maps into Blender with sRGB color space for albedo/base color and Non-Color for normal, roughness, metallic, AO, height, and ORM maps. Connect normal maps through a Normal Map node, then adjust UV scale with a Mapping node so the material repeats naturally on your model.
For the full step-by-step setup, see How to Use Seamless Textures in Blender. Browse related material examples in wood, concrete, and metal.
Yes. This texture is designed as a seamless tileable PBR material, so it can repeat across large surfaces without visible borders.
You can download PNG/WEBP versions and use 1K, 2K, 4K and 8K download options when available on the page.
Yes. The download options and engine-mapped ZIP workflow are designed for Blender, Unreal Engine, Unity Standard, URP and HDRP material pipelines.
Yes. The texture is available under the AITextured free commercial license. Review the license page for redistribution and AI-training restrictions.
Generate, preview, and export seamless PBR materials for Blender, Unity, and Unreal Engine—directly in your browser.
AI text-to-texture: type a prompt and get a seamless, tileable base image ready for PBR workflows (great starting point for materials).
Create a full PBR set (Normal, Roughness, AO, Metallic, etc.) from a single image. Seamless and tiling-friendly.
Instant WebGL viewer: inspect materials on a sphere, plane, and cube. Check tiling and lighting in real time.
Re-packages maps per engine: Unreal (BaseColor + ORM), Unity (Mask/MetallicSmoothness), Blender (separate channels).
PNG ↔ JPG ↔ SVG: fast convert, SVG rasterize, embed/trace options, quality & background controls.