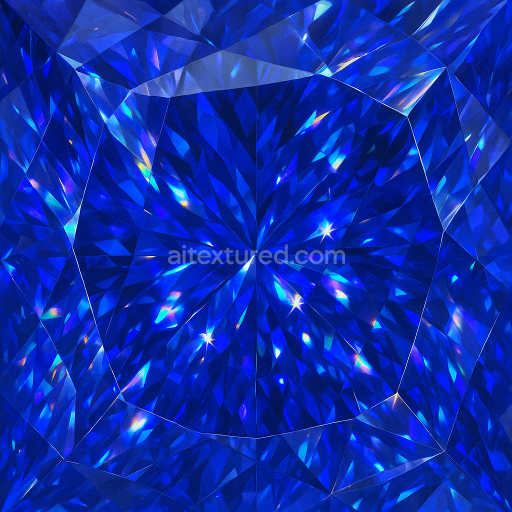
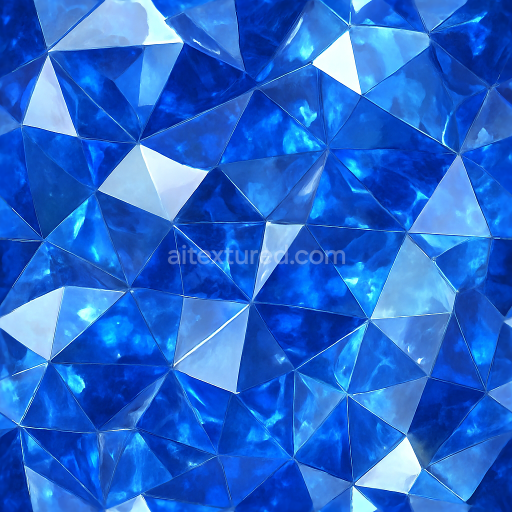
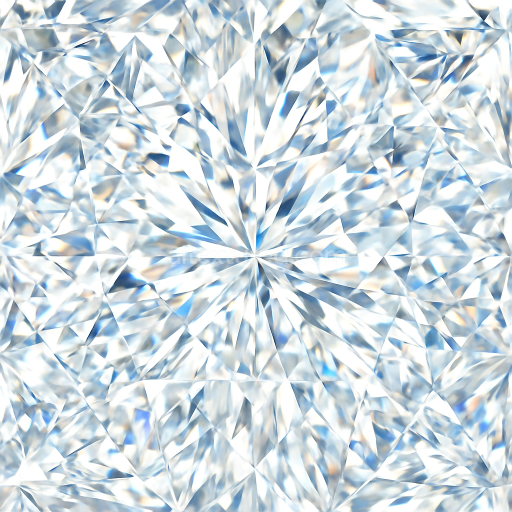
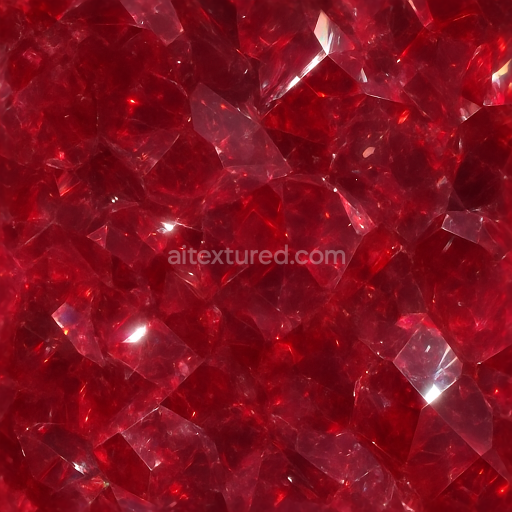
Tanzanite Faceted Gem With Prismatic Refraction And Gemstone Facets
Seamless texture (tileable) · PNG, WEBP, PBR ZIP. License: AITextured Free Commercial License (FCL) v1.1. Free personal and commercial use. Raw resale, standalone redistribution, mirroring/scraping, competing asset packs, and AI/ML training are not allowed without written permission. Attribution is not required, but appreciated..

| ID | seamless-3d-texture-pbr-8k-of-faceted-ruby-gemstone-with-polished-reflective-facets-and-vibrant-gemstone-brilliance |
|---|---|
| Category | Crystals |
| Formats | PNG, WEBP, PBR ZIP |
| Size | 1k (1024x1024px), 2k (2048x2048px), 4k (4096x4096px), 8k (8192x8192px) |
| Color | sRGB |
| Tileable | Yes |
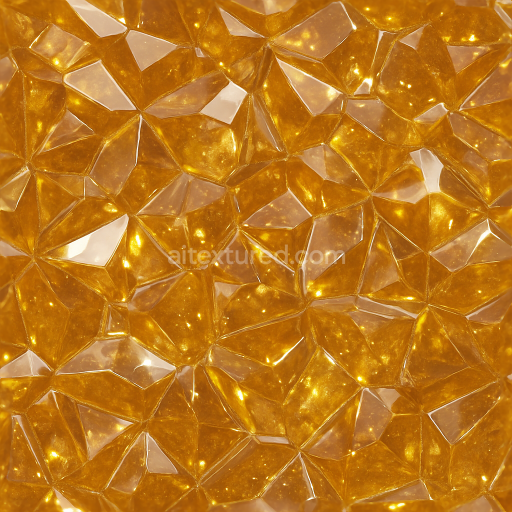
This seamless 3D texture represents a faceted ruby gemstone rendered in ultra-high 8K resolution, designed to faithfully replicate the material and optical properties of a polished gem surface. The base material is crystalline corundum, where aluminum oxide forms a dense, hard substrate with minimal porosity. The intense red coloration arises from trace chromium ions acting as natural pigments within the crystal lattice. The geometry captures a precise, multi-faceted cut typical of fine gemstones, with sharp crystal edges and symmetrical planes that reflect and refract light dynamically. These facets are modeled to simulate the complex interplay of internal refraction and external reflection, essential for conveying the characteristic brilliance and fire of a ruby.
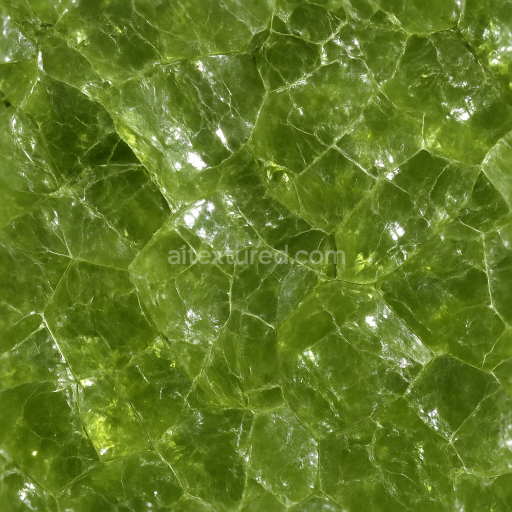
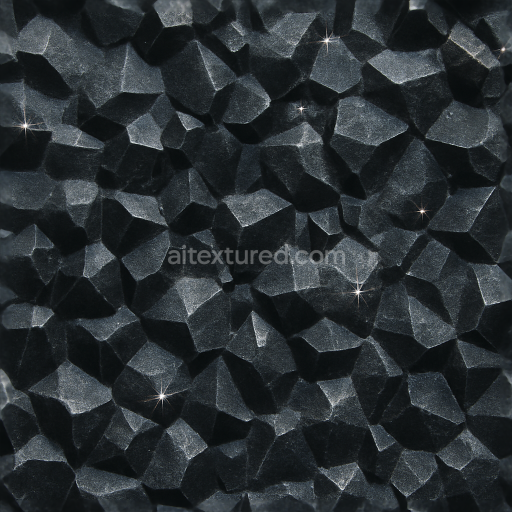
The texture’s surface finish is meticulously polished, resulting in highly reflective facets with low roughness values mapped in the PBR roughness channel to ensure crisp specular highlights. The BaseColor (Albedo) channel conveys the rich, saturated crimson hues with subtle color zoning to simulate natural variations found in genuine stones. Normal and Height maps define the sharp facet edges and subtle micro-geometry, enhancing the three-dimensionality and depth perception when applied in 3D environments. The Metallic channel is set close to zero, consistent with the non-metallic nature of corundum, while the Ambient Occlusion map accentuates the shadows between facets, adding realism by simulating light occlusion in crevices.
Designed for seamless tiling, this texture supports realistic application across curved or complex surfaces without visible repetition, making it suitable for detailed close-ups or large-scale visualizations. Its compatibility with Blender, Unreal Engine, and Unity ensures broad usability in digital content creation workflows, enabling artists to leverage the texture’s high fidelity in real-time rendering or offline ray tracing. The 8K resolution allows for exceptional detail preservation, crucial for projects requiring macro-level scrutiny of gemstone surfaces.
For optimal results, it is recommended to carefully adjust the UV scale to maintain facet proportions relative to the model’s size, preventing distortion of the gem’s geometry. Additionally, tuning the roughness parameters allows control over the polish level, from a mirror finish to slightly more diffuse reflections, depending on the desired artistic effect. Combining the Height map with normal mapping can enhance the perception of depth and refraction on the facets, especially when using parallax occlusion techniques, further increasing realism in interactive applications.
Import the texture maps into Blender with sRGB color space for albedo/base color and Non-Color for normal, roughness, metallic, AO, height, and ORM maps. Connect normal maps through a Normal Map node, then adjust UV scale with a Mapping node so the material repeats naturally on your model.
For the full step-by-step setup, see How to Use Seamless Textures in Blender. Browse related material examples in wood, concrete, and metal.
Yes. This texture is designed as a seamless tileable PBR material, so it can repeat across large surfaces without visible borders.
You can download PNG/WEBP versions and use 1K, 2K, 4K and 8K download options when available on the page.
Yes. The download options and engine-mapped ZIP workflow are designed for Blender, Unreal Engine, Unity Standard, URP and HDRP material pipelines.
Yes. The texture is available under the AITextured free commercial license. Review the license page for redistribution and AI-training restrictions.
Generate, preview, and export seamless PBR materials for Blender, Unity, and Unreal Engine—directly in your browser.
AI text-to-texture: type a prompt and get a seamless, tileable base image ready for PBR workflows (great starting point for materials).
Create a full PBR set (Normal, Roughness, AO, Metallic, etc.) from a single image. Seamless and tiling-friendly.
Instant WebGL viewer: inspect materials on a sphere, plane, and cube. Check tiling and lighting in real time.
Re-packages maps per engine: Unreal (BaseColor + ORM), Unity (Mask/MetallicSmoothness), Blender (separate channels).
PNG ↔ JPG ↔ SVG: fast convert, SVG rasterize, embed/trace options, quality & background controls.