
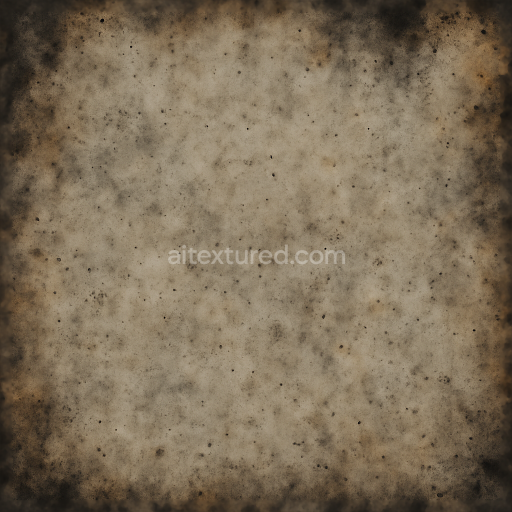
Scratched Metal And Rusted Bolts With Surface Corrosion Effects
Seamless texture (tileable) · PNG, WEBP, PBR ZIP. License: AITextured Free Commercial License (FCL) v1.1. Free personal and commercial use. Raw resale, standalone redistribution, mirroring/scraping, competing asset packs, and AI/ML training are not allowed without written permission. Attribution is not required, but appreciated..

| ID | seamless-3d-texture-pbr-8k-graffiti-tags-and-scratch-graffiti-with-sticker-residue-and-torn-paper |
|---|---|
| Category | Decals |
| Formats | PNG, WEBP, PBR ZIP |
| Size | 1k (1024x1024px), 2k (2048x2048px), 4k (4096x4096px), 8k (8192x8192px) |
| Color | sRGB |
| Tileable | Yes |
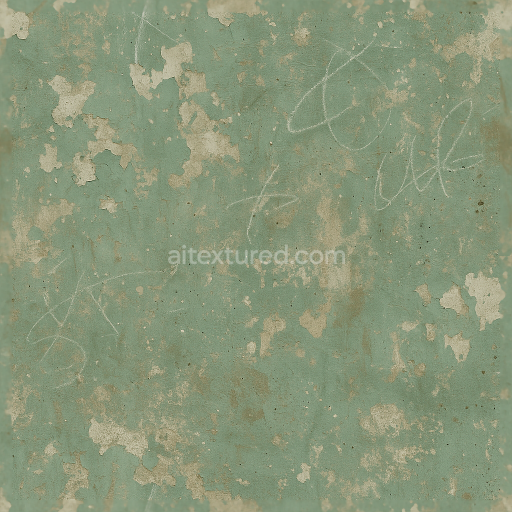
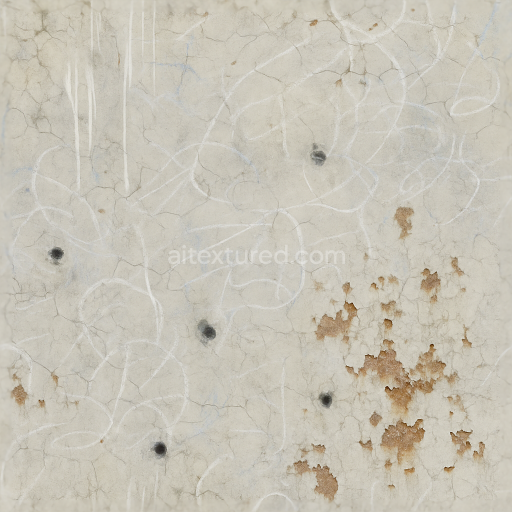
This seamless 3D texture presents an intricate urban surface composed primarily of weathered concrete as the base material overlaid with layers of graffiti tags and scratch graffiti. The concrete substrate exhibits a moderately porous rough finish with subtle micro-cracks and wear marks indicative of prolonged exposure to outdoor elements. Its surface is punctuated by remnants of torn paper and sticker residue that create uneven patches of adhesive binders and fibrous paper fragments adding depth and complexity to the form. The graffiti pigments—vivid spray paints in various hues—intermingle with chipped paint flakes and scratches forming a textured mosaic of color and degradation.
From a materials perspective the texture combines several composite components: the concrete base provides a solid slightly coarse aggregate surface with mineral grains visible through the paint layers while the torn paper and sticker adhesives introduce localized variations in roughness and height. Scratched plastic elements appear as thin polished yet marred overlays with distinct specular highlights that contrast against the matte concrete. Dust particles and grime settle into crevices and adhesive residues enhancing the ambient occlusion effect and reinforcing the sense of urban decay. The overall surface finish is irregular—ranging from matte concrete to semi-glossy plastic scratches and peeling paint chips—creating a highly detailed tactile feel.
In terms of PBR channel mapping the BaseColor (Albedo) captures the rich palette of graffiti pigments faded sticker dyes and natural concrete grays. The Normal map encodes the height variations of paint chips torn paper edges and scratch indentations delivering realistic surface relief. Roughness varies across the texture with lower values on scratched plastic and paint chips producing subtle gloss while the concrete and paper residues maintain higher roughness for a diffuse appearance. The Metallic channel remains minimal reflecting the non-metallic nature of the materials except for occasional slight metallic hints in worn adhesive remnants. Ambient Occlusion enhances shadowing in crevices torn paper overlaps and scratch grooves to heighten depth perception. Height (Displacement) maps enable fine parallax effects on the torn paper and scratch details emphasizing form without excessive geometry.
Rendered at an ultra-high 8K resolution this texture is optimized for real-time engines such as Unreal Engine and Unity as well as offline renderers like Blender’s Cycles and Eevee. Its seamless tiling ensures consistent application across expansive surfaces without visible repetition making it ideal for urban environments street art visualizations or distressed signage. For practical use adjusting the UV scale to maintain natural graffiti proportions is recommended alongside fine-tuning roughness maps to balance gloss between scratched plastic elements and matte concrete areas. Additionally blending height and normal maps carefully can preserve crisp surface details while avoiding artifacts in parallax occlusion implementations.
Import the texture maps into Blender with sRGB color space for albedo/base color and Non-Color for normal, roughness, metallic, AO, height, and ORM maps. Connect normal maps through a Normal Map node, then adjust UV scale with a Mapping node so the material repeats naturally on your model.
For the full step-by-step setup, see How to Use Seamless Textures in Blender. Browse related material examples in wood, concrete, and metal.
Yes. This texture is designed as a seamless tileable PBR material, so it can repeat across large surfaces without visible borders.
You can download PNG/WEBP versions and use 1K, 2K, 4K and 8K download options when available on the page.
Yes. The download options and engine-mapped ZIP workflow are designed for Blender, Unreal Engine, Unity Standard, URP and HDRP material pipelines.
Yes. The texture is available under the AITextured free commercial license. Review the license page for redistribution and AI-training restrictions.


Build, preview, and export seamless PBR materials. Generate full map sets from a single image, inspect them in a real-time WebGL viewer, and re-package maps for Unreal, Unity, and Blender—directly in your browser.
AI text-to-texture: type a prompt and get a seamless, tileable base image ready for PBR workflows (great starting point for materials).
Create a full PBR set (Normal, Roughness, AO, Metallic, etc.) from a single image. Seamless and tiling-friendly.
Instant WebGL viewer: inspect materials on a sphere, plane, and cube. Check tiling and lighting in real time.
Re-packages maps per engine: Unreal (BaseColor + ORM), Unity (Mask/MetallicSmoothness), Blender (separate channels).
PNG ↔ JPG ↔ SVG: fast convert, SVG rasterize, embed/trace options, quality & background controls.