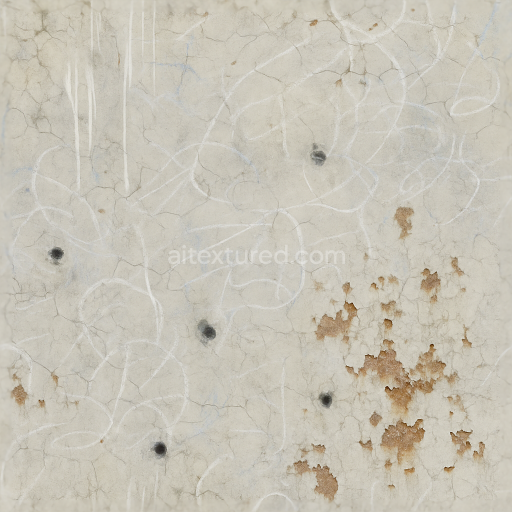
Cracked Paint With Paint Drips And Paint Splatter For Aged Surfaces
Seamless texture (tileable) · PNG, WEBP, PBR ZIP. License: AITextured Free Commercial License (FCL) v1.1. Free personal and commercial use. Raw resale, standalone redistribution, mirroring/scraping, competing asset packs, and AI/ML training are not allowed without written permission. Attribution is not required, but appreciated..

| ID | seamless-3d-texture-pbr-8k-oil-slick-and-oil-stains-with-water-droplets-and-wet-marks-for-slick-surfaces |
|---|---|
| Category | Decals |
| Formats | PNG, WEBP, PBR ZIP |
| Size | 1k (1024x1024px), 2k (2048x2048px), 4k (4096x4096px), 8k (8192x8192px) |
| Color | sRGB |
| Tileable | Yes |
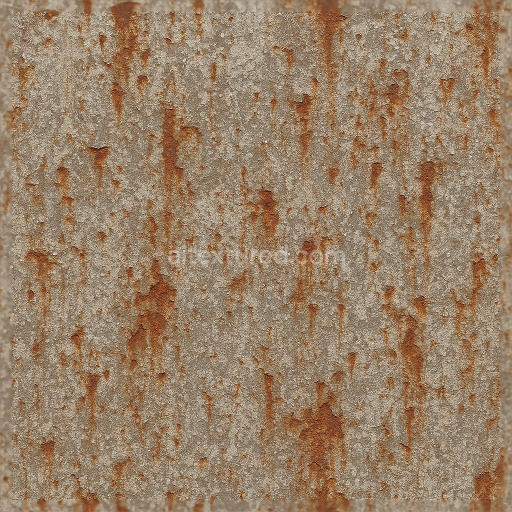
This seamless 3D PBR texture rendered at an impressive 8K resolution captures the intricate interplay of oil slicks and stains spread across a worn metallic substrate. The base material suggests a weathered steel or painted metal surface displaying subtle corrosion and paint fade indicative of prolonged environmental exposure. The geometric form is irregular and organic mimicking natural fluid dispersion patterns typical of spilled oil combined with the cracking and chipping of aged paint and grime buildup. Fine mud cracks and surface corrosion reveal underlying oxidation processes while wet marks and water droplets add a dynamic layer of moisture interaction enhancing the textural complexity and realism.
Compositionally this texture combines a solid metal or industrial base likely steel or aluminum with a thin deteriorating paint layer acting as a binder that adheres oil residues and grime to the surface. The oil slicks and stains form viscous semi-transparent films characterized by iridescent color shifts created by microscopic interference patterns within the thin oil layer. These films overlay rough porous paint areas with accumulated dirt and fine particulate aggregates contributing to a non-uniform surface porosity. The paint’s pigment has partially faded due to UV exposure revealing subtle color desaturation and discoloration. The surface finish is a complex blend of oxidized metal with wet glossy regions from oil and water contrasted by matte dusty grime patches.
In terms of PBR channel mapping the BaseColor (Albedo) captures the nuanced color variations of oil’s iridescent sheen faded paint tones and grime’s earthy hues. The Normal map emphasizes micro-geometry such as mud cracks paint peeling and water droplet curvature providing depth and tactile variation. Roughness maps delineate the slick low-roughness oily patches and water droplets against rougher corroded and dusty paint areas. The Metallic channel reflects the underlying metal substrate’s properties modulated by the paint and oil layers’ diminished metallic response. Ambient Occlusion enhances shadowing around cracks and grime accumulations while Height or Displacement maps define the subtle elevation changes of corrosion paint peeling and water droplets adding realism in close-up renders.
This texture is fully optimized for use in Blender Unreal Engine and Unity supporting high-fidelity visuals in automotive industrial and environmental 3D scenes requiring photorealistic slick surfaces. For practical application it is recommended to carefully adjust the UV scaling to maintain the natural scale of water droplets and oil patterns avoiding repetition artifacts. Additionally fine-tuning the roughness values can help balance between glossy wet marks and matte grime buildup while blending height and normal maps can enhance surface detail without causing excessive geometric distortion.
Import the texture maps into Blender with sRGB color space for albedo/base color and Non-Color for normal, roughness, metallic, AO, height, and ORM maps. Connect normal maps through a Normal Map node, then adjust UV scale with a Mapping node so the material repeats naturally on your model.
For the full step-by-step setup, see How to Use Seamless Textures in Blender. Browse related material examples in wood, concrete, and metal.
Yes. This texture is designed as a seamless tileable PBR material, so it can repeat across large surfaces without visible borders.
You can download PNG/WEBP versions and use 1K, 2K, 4K and 8K download options when available on the page.
Yes. The download options and engine-mapped ZIP workflow are designed for Blender, Unreal Engine, Unity Standard, URP and HDRP material pipelines.
Yes. The texture is available under the AITextured free commercial license. Review the license page for redistribution and AI-training restrictions.


Build, preview, and export seamless PBR materials. Generate full map sets from a single image, inspect them in a real-time WebGL viewer, and re-package maps for Unreal, Unity, and Blender—directly in your browser.
AI text-to-texture: type a prompt and get a seamless, tileable base image ready for PBR workflows (great starting point for materials).
Create a full PBR set (Normal, Roughness, AO, Metallic, etc.) from a single image. Seamless and tiling-friendly.
Instant WebGL viewer: inspect materials on a sphere, plane, and cube. Check tiling and lighting in real time.
Re-packages maps per engine: Unreal (BaseColor + ORM), Unity (Mask/MetallicSmoothness), Blender (separate channels).
PNG ↔ JPG ↔ SVG: fast convert, SVG rasterize, embed/trace options, quality & background controls.