
Paint Scratches And Paint Drips With Paint Splatter And Paint Brush Strokes Overlay
Seamless texture (tileable) · PNG, WEBP, PBR ZIP. License: AITextured Free Commercial License (FCL) v1.1. Free personal and commercial use. Raw resale, standalone redistribution, mirroring/scraping, competing asset packs, and AI/ML training are not allowed without written permission. Attribution is not required, but appreciated..

| ID | seamless-3d-texture-pbr-8k-chalk-drawings-and-chalk-scribbles-with-graffiti-scribbles-and-paint-splatter-overlay |
|---|---|
| Category | Decals |
| Formats | PNG, WEBP, PBR ZIP |
| Size | 1k (1024x1024px), 2k (2048x2048px), 4k (4096x4096px), 8k (8192x8192px) |
| Color | sRGB |
| Tileable | Yes |
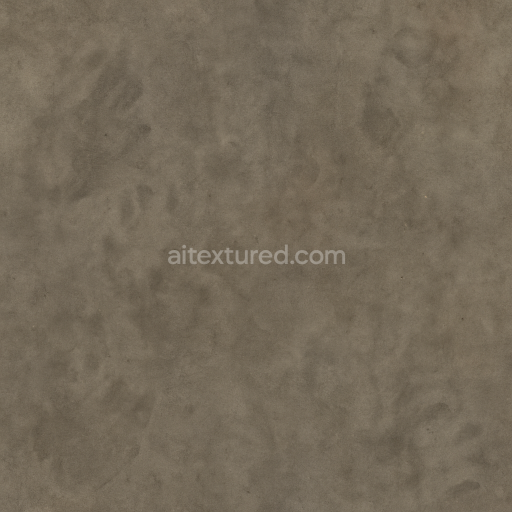
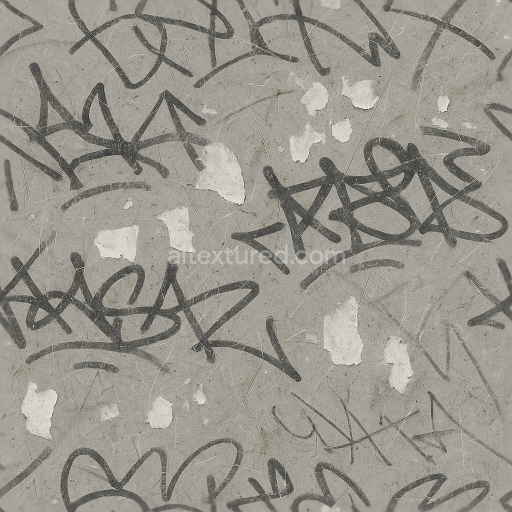
This seamless 3D PBR texture at 8K resolution captures the intricate layering of chalk drawings and chalk scribbles intermixed with expressive graffiti scribbles and dynamic paint splatter overlays. The underlying substrate suggests a coarse weathered concrete or rough cement wall surface characterized by uneven porosity and subtle micro-roughness. This base material provides the perfect canvas for chalk pigments which adhere loosely and create a powdery matte finish with slight graininess. The chalk markings exhibit soft edges and varying thicknesses indicating manual application with natural smudging and wear over time.
The texture’s composition reflects a multi-layered assembly where chalk pigments—composed of calcium carbonate binder mixed with fine mineral aggregates—sit atop a silicate-rich cementitious base. The graffiti elements incorporate spray paint binders with synthetic resins and color pigments which overlay the chalk in irregular patterns. Paint splatters add a dynamic semi-gloss finish with uneven opacity and subtle cracking suggesting aged acrylic or enamel paints exposed to weathering. Scuff marks grunge spots and wear marks introduce micro-abrasions and surface degradation revealing parts of the rough substrate beneath. Paint fade effects simulate UV exposure and oxidation softening color vibrancy and contributing to the realistic time-worn appearance.
In terms of PBR channel mapping the BaseColor (Albedo) captures the full spectrum of chalk whites pastel hues muted graffiti colors and faded paint tones with high fidelity. The Normal map represents the delicate relief of chalk ridges paint buildup and surface imperfections enhancing depth perception on 3D models. Roughness values vary from the matte powdery chalk areas to the semi-glossy weathered paint splatters providing realistic light scattering and reflection. The Metallic channel remains mostly neutral or zero as the materials are primarily non-metallic. Ambient Occlusion emphasizes crevices and worn recesses enhancing shadow detail while the Height/Displacement map conveys subtle elevation differences from chalk layers paint thickness and substrate texture.
This texture is optimized for use in Blender Unreal Engine and Unity ensuring compatibility and performance across diverse 3D workflows. Its high 8K resolution enables close-up realism especially useful for urban environments street art scenes or any project requiring detailed artistic surface wear. For practical application adjusting UV scale to maintain natural chalk and paint proportions is recommended along with fine-tuning roughness to balance matte chalk with semi-gloss paint areas. Blending height or parallax maps with normal details can further enhance the tactile quality of the surface delivering a convincing immersive material appearance.
Import the texture maps into Blender with sRGB color space for albedo/base color and Non-Color for normal, roughness, metallic, AO, height, and ORM maps. Connect normal maps through a Normal Map node, then adjust UV scale with a Mapping node so the material repeats naturally on your model.
For the full step-by-step setup, see How to Use Seamless Textures in Blender. Browse related material examples in wood, concrete, and metal.
Yes. This texture is designed as a seamless tileable PBR material, so it can repeat across large surfaces without visible borders.
You can download PNG/WEBP versions and use 1K, 2K, 4K and 8K download options when available on the page.
Yes. The download options and engine-mapped ZIP workflow are designed for Blender, Unreal Engine, Unity Standard, URP and HDRP material pipelines.
Yes. The texture is available under the AITextured free commercial license. Review the license page for redistribution and AI-training restrictions.


Build, preview, and export seamless PBR materials. Generate full map sets from a single image, inspect them in a real-time WebGL viewer, and re-package maps for Unreal, Unity, and Blender—directly in your browser.
AI text-to-texture: type a prompt and get a seamless, tileable base image ready for PBR workflows (great starting point for materials).
Create a full PBR set (Normal, Roughness, AO, Metallic, etc.) from a single image. Seamless and tiling-friendly.
Instant WebGL viewer: inspect materials on a sphere, plane, and cube. Check tiling and lighting in real time.
Re-packages maps per engine: Unreal (BaseColor + ORM), Unity (Mask/MetallicSmoothness), Blender (separate channels).
PNG ↔ JPG ↔ SVG: fast convert, SVG rasterize, embed/trace options, quality & background controls.