
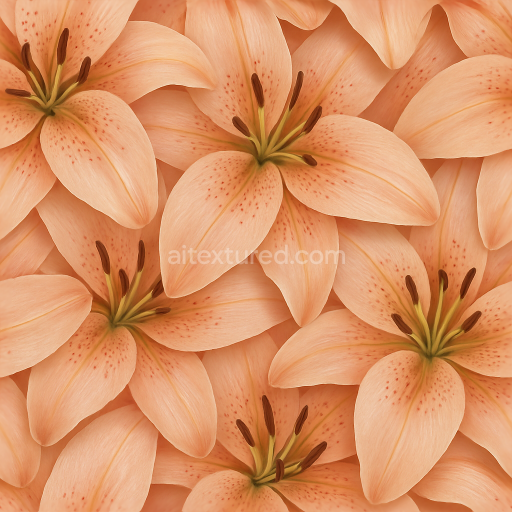
Iris Petals Flower Petals Closeup Flower Arrangement Photorealistic
Seamless texture (tileable) · PNG, WEBP, PBR ZIP. License: AITextured Free Commercial License (FCL) v1.1. Free personal and commercial use. Raw resale, standalone redistribution, mirroring/scraping, competing asset packs, and AI/ML training are not allowed without written permission. Attribution is not required, but appreciated..

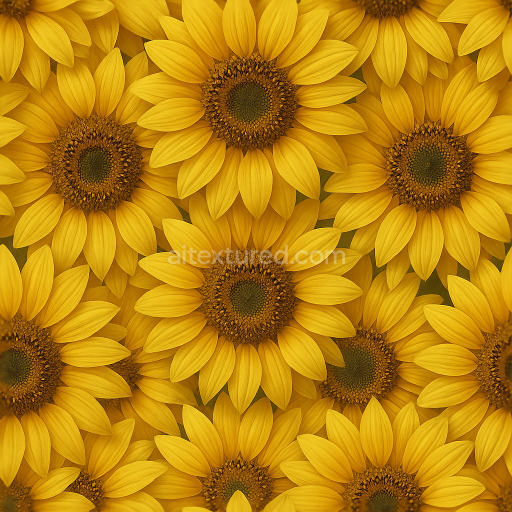
| ID | seamless-3d-texture-pbr-8k-daisy-cluster-flower-garden-flower-petals-closeup-photorealistic |
|---|---|
| Category | Flowers |
| Formats | PNG, WEBP, PBR ZIP |
| Size | 1k (1024x1024px), 2k (2048x2048px), 4k (4096x4096px), 8k (8192x8192px) |
| Color | sRGB |
| Tileable | Yes |
This seamless 3D texture features a richly detailed cluster of daisy flowers, rendered in stunning 8K resolution using physically based rendering (PBR) techniques. The material composition mimics natural floral anatomy, where the primary substrate consists of delicate flower petals formed from thin, slightly translucent cellulose fibers. These fibers create a soft yet structured surface, enhanced by subtle venation patterns that provide natural rigidity and organic texture. The petals’ surface finish is matte with gentle satin highlights, replicating the way real flower petals scatter and reflect light softly. The central flower stamens exhibit a slightly rougher texture with fine granularity, representing pollen grains and tiny filament structures, which contribute to the tactile complexity of the texture.
From a geometric perspective, the texture displays a densely packed, overlapping arrangement of daisy petals and flower centers, forming a naturalistic cluster reminiscent of a vibrant flower garden. The organic pattern avoids repetition by incorporating varied petal shapes, sizes, and orientations, which enhances the seamless tiling effect. Surface topology includes fine height variations for petals and stamens, captured in the height/displacement map, while the normal map accurately encodes micro-details such as petal veins and subtle creases. The roughness map balances glossy highlights on the moist petal tips with matte areas on broader surfaces, and the ambient occlusion map deepens shadows between overlapping petals, enhancing depth perception without harsh contrast.
The color composition focuses on natural pigments: bright white and cream tones for the petals, with warm yellow to golden hues for the stamens and flower centers. These colors are faithfully represented in the BaseColor (Albedo) channel, ensuring vibrancy without oversaturation. There is no metallic content, so the Metallic channel remains zeroed, maintaining the organic non-metallic appearance. The surface exhibits minimal weathering effects, preserving freshness and vitality typical of a blooming flower garden. This fresh look makes the texture ideal for close-up renders where fine detail and color fidelity are paramount.
Designed for compatibility with Blender, Unreal Engine, and Unity, this texture provides all necessary PBR maps—BaseColor, Normal, Roughness, Metallic, Ambient Occlusion, and Height/Displacement—enabling seamless integration into various rendering pipelines. The 8K resolution ensures exceptional clarity at close ranges or when applied to large surfaces within 3D environments. For practical use, it is recommended to carefully adjust UV scaling to avoid overly repetitive patterns in extensive flower meadows, and to fine-tune the roughness channel to simulate varying moisture levels on petals for enhanced realism. Blending height and normal maps can further improve parallax effects, adding convincing depth to the flower cluster arrangement.
Import the texture maps into Blender with sRGB color space for albedo/base color and Non-Color for normal, roughness, metallic, AO, height, and ORM maps. Connect normal maps through a Normal Map node, then adjust UV scale with a Mapping node so the material repeats naturally on your model.
For the full step-by-step setup, see How to Use Seamless Textures in Blender. Browse related material examples in wood, concrete, and metal.
Yes. This texture is designed as a seamless tileable PBR material, so it can repeat across large surfaces without visible borders.
You can download PNG/WEBP versions and use 1K, 2K, 4K and 8K download options when available on the page.
Yes. The download options and engine-mapped ZIP workflow are designed for Blender, Unreal Engine, Unity Standard, URP and HDRP material pipelines.
Yes. The texture is available under the AITextured free commercial license. Review the license page for redistribution and AI-training restrictions.


Build, preview, and export seamless PBR materials. Generate full map sets from a single image, inspect them in a real-time WebGL viewer, and re-package maps for Unreal, Unity, and Blender—directly in your browser.
AI text-to-texture: type a prompt and get a seamless, tileable base image ready for PBR workflows (great starting point for materials).
Create a full PBR set (Normal, Roughness, AO, Metallic, etc.) from a single image. Seamless and tiling-friendly.
Instant WebGL viewer: inspect materials on a sphere, plane, and cube. Check tiling and lighting in real time.
Re-packages maps per engine: Unreal (BaseColor + ORM), Unity (Mask/MetallicSmoothness), Blender (separate channels).
PNG ↔ JPG ↔ SVG: fast convert, SVG rasterize, embed/trace options, quality & background controls.