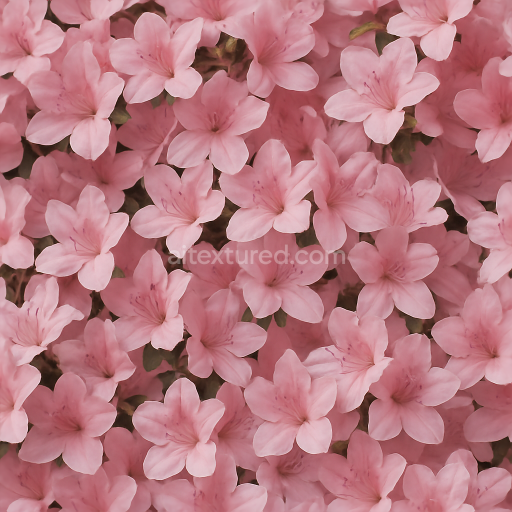
Azalea Cluster Flower Garden Flower Petals Closeup Natural Lighting
Seamless texture (tileable) · PNG, WEBP, PBR ZIP. License: AITextured Free Commercial License (FCL) v1.1. Free personal and commercial use. Raw resale, standalone redistribution, mirroring/scraping, competing asset packs, and AI/ML training are not allowed without written permission. Attribution is not required, but appreciated..

| ID | seamless-3d-texture-pbr-8k-of-delicate-cherry-blossoms-capturing-flower-translucency-and-surface-detail |
|---|---|
| Category | Flowers |
| Formats | PNG, WEBP, PBR ZIP |
| Size | 1k (1024x1024px), 2k (2048x2048px), 4k (4096x4096px), 8k (8192x8192px) |
| Color | sRGB |
| Tileable | Yes |
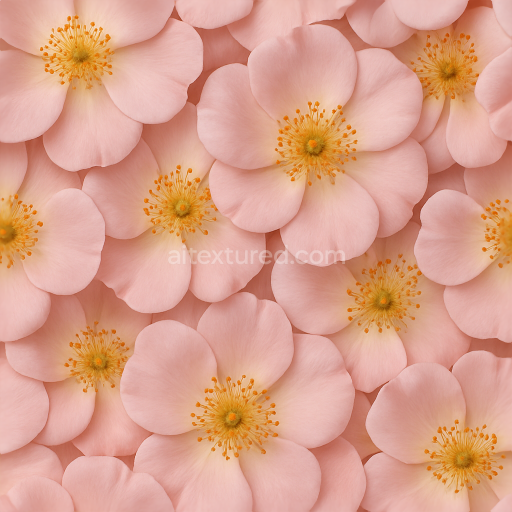
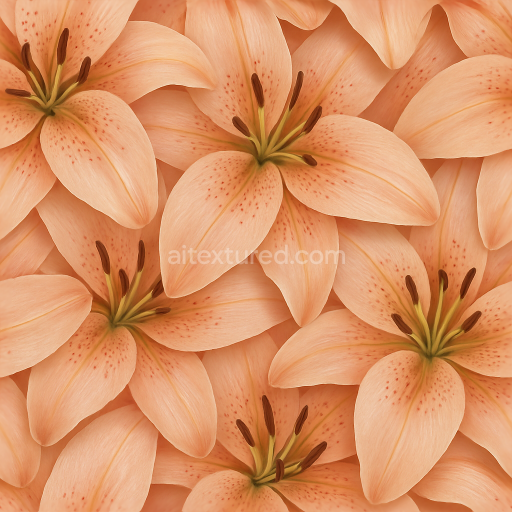
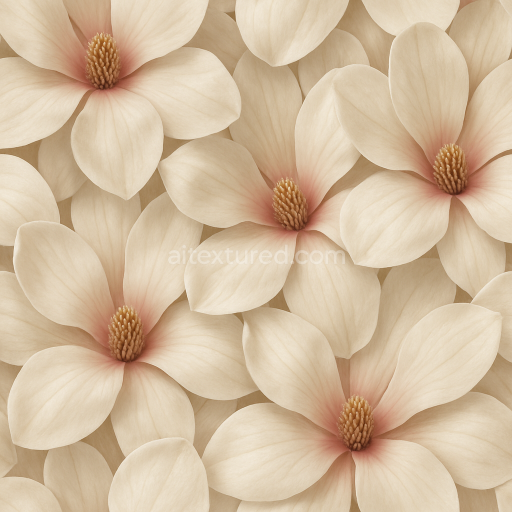
This seamless 3D texture presents an exquisite depiction of delicate cherry blossoms, designed to replicate the intricate materials and subtle forms found in nature. The base material emulates the soft, thin petals of cherry blossoms, characterized by a lightweight, semi-translucent organic substrate. This substrate mimics the fine cellulose fibers that form the petal structure, giving the texture a natural translucency and gentle surface undulations. The petals’ surface exhibits extremely fine veins and subtle curvature, captured through the high-resolution normal and height maps, which convey a delicate, almost fragile relief that enhances realism in close-up renders.
The composition is carefully layered to represent the natural complexity of flower petals: a slightly porous, soft surface finish complements the smooth gradients of color variations ranging from pale pinks to subtle whites and occasional hints of deeper magentas. These pigments are distributed unevenly to emulate natural flower color gradations, while the albedo (BaseColor) channel captures this nuanced palette without baked lighting or shadows, ensuring flexibility within PBR workflows. The roughness map reflects the soft, matte surface, avoiding any metallic reflections, which aligns with the exclusively organic, non-metallic nature of flower petals. Ambient occlusion enhances the depth in petal overlaps and creases, providing additional spatial context.
The texture’s geometry follows a veined, overlapping pattern that mimics the natural arrangement of cherry blossom petals in clusters. The height and displacement maps are finely tuned to emphasize the subtle curvature and layering of petals, creating a realistic sense of volume and form when rendered. This 8K tileable texture is optimized for various 3D environments and engines such as Blender, Unreal Engine, and Unity, delivering exceptional detail and fidelity even in extreme closeups. The seamless tiling nature allows large-scale floral scenes without visible repetition, suitable for both organic environment design and detailed flower models.
For practical application, it is advisable to adjust the UV scale carefully when deploying this texture to maintain the natural petal size and avoid distortion. Additionally, fine-tuning the roughness parameter can help achieve the desired softness or slight surface moisture effect typical of fresh blossoms. When combining height and normal maps, blending them subtly will enhance the tactile feel of the petals’ surface without exaggerated depth, preserving the delicate translucency and softness that define cherry blossoms.
Import the texture maps into Blender with sRGB color space for albedo/base color and Non-Color for normal, roughness, metallic, AO, height, and ORM maps. Connect normal maps through a Normal Map node, then adjust UV scale with a Mapping node so the material repeats naturally on your model.
For the full step-by-step setup, see How to Use Seamless Textures in Blender. Browse related material examples in wood, concrete, and metal.
Yes. This texture is designed as a seamless tileable PBR material, so it can repeat across large surfaces without visible borders.
You can download PNG/WEBP versions and use 1K, 2K, 4K and 8K download options when available on the page.
Yes. The download options and engine-mapped ZIP workflow are designed for Blender, Unreal Engine, Unity Standard, URP and HDRP material pipelines.
Yes. The texture is available under the AITextured free commercial license. Review the license page for redistribution and AI-training restrictions.


Build, preview, and export seamless PBR materials. Generate full map sets from a single image, inspect them in a real-time WebGL viewer, and re-package maps for Unreal, Unity, and Blender—directly in your browser.
AI text-to-texture: type a prompt and get a seamless, tileable base image ready for PBR workflows (great starting point for materials).
Create a full PBR set (Normal, Roughness, AO, Metallic, etc.) from a single image. Seamless and tiling-friendly.
Instant WebGL viewer: inspect materials on a sphere, plane, and cube. Check tiling and lighting in real time.
Re-packages maps per engine: Unreal (BaseColor + ORM), Unity (Mask/MetallicSmoothness), Blender (separate channels).
PNG ↔ JPG ↔ SVG: fast convert, SVG rasterize, embed/trace options, quality & background controls.