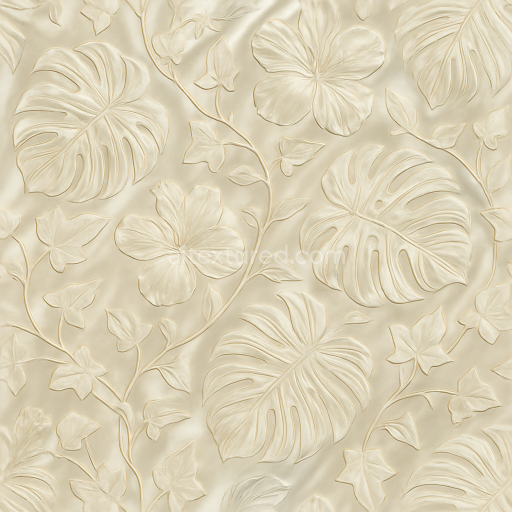
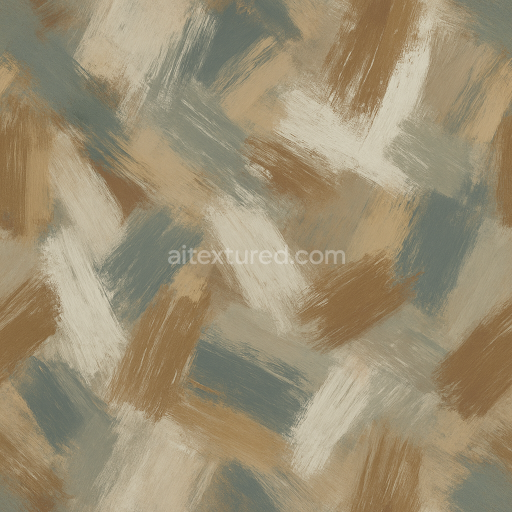
This seamless 3D texture features an abstract marbled pattern rendered on a soft suede substrate combining the organic complexity of natural leather with artistic fluid veining. The base material simulates a finely napped suede fabric composed of densely packed microfibers that create a plush surface with subtle depth variations. The distressed finish introduces slight irregularities such as faint scuffs wear marks and gentle abrasions contributing to a weathered tactile quality that enhances visual authenticity. The marbled effect overlays sinuous flowing veins reminiscent of natural stone or mineral deposits forming an abstract geometric pattern that breaks uniformity without disrupting the seamless tile arrangement. This interplay between marbled veining and suede fiber creates a layered multidimensional surface ideal for high-fidelity digital environments.
From a materials science perspective the substrate mimics a fibrous textile structure with a moderate level of porosity allowing light to scatter softly within the pile. Binders and adhesives are implied in the model by uniform density and fiber cohesion ensuring structural integrity while maintaining surface softness. Pigmentation involves subtle earth tones and muted pastels carefully blended to highlight the marbled contours and distressed patches without overpowering the suede’s natural warmth. The finish is matte with a slightly brushed texture avoiding gloss to preserve the authentic look of worn suede. The texture composition is optimized for physically based rendering (PBR) with dedicated maps for each channel: the BaseColor (Albedo) captures diffuse color variations; Normal maps provide detailed fiber directionality and marbled relief; Roughness maps define surface micro-roughness variations reflecting suede’s soft yet tactile nature; Metallic maps remain near zero to reflect the non-metallic fabric; Ambient Occlusion enhances depth perception in fiber clusters and distressed crevices; Height/Displacement maps simulate subtle surface undulations and marbled veins for realistic parallax effects.
Rendered at an ultra-high 8K resolution this wallpaper texture preserves intricate details such as individual suede fibers nuanced color transitions and micro-abrasions making it suitable for close-up inspection in professional 3D workflows. It is fully compatible with Blender Unreal Engine and Unity facilitating integration into diverse projects ranging from interior visualizations to game environments. The seamless nature ensures that tiling produces a continuous surface without visible repetition artifacts essential for large-scale applications.
For practical application it is recommended to carefully adjust the UV scale depending on the scene’s spatial context to maintain fabric realism—too large a scale may exaggerate the suede fibers while too small may lose the marbled pattern’s impact. Additionally fine-tuning the roughness map can help balance between softness and wear; increasing roughness will emphasize the suede’s matte texture while reducing it can simulate slightly polished or less distressed areas. Blending height or parallax maps with the normal map enhances the perception of depth especially when viewed at oblique angles further enriching the material’s tactile illusion.
Using This PBR Texture in Blender
Import the texture maps into Blender with sRGB color space for albedo/base color and
Non-Color for normal, roughness, metallic, AO, height, and ORM maps. Connect normal maps
through a Normal Map node, then adjust UV scale with a Mapping node so the material repeats naturally on
your model.
- Albedo -> Principled BSDF Base Color
- Roughness -> Roughness, Metallic -> Metallic
- Normal -> Normal Map node -> Normal
- Height -> Bump or Displacement depending on render setup
For the full step-by-step setup, see
How to Use Seamless Textures in Blender.
Browse related material examples in
wood,
concrete, and
metal.
FAQ
Is this texture seamless and tileable?
Yes. This texture is designed as a seamless tileable PBR material, so it can repeat across large surfaces without visible borders.
Which resolutions and formats are available?
You can download PNG/WEBP versions and use 1K, 2K, 4K and 8K download options when available on the page.
Can I use it in Blender, Unreal Engine and Unity?
Yes. The download options and engine-mapped ZIP workflow are designed for Blender, Unreal Engine, Unity Standard, URP and HDRP material pipelines.
Is commercial use allowed?
Yes. The texture is available under the AITextured free commercial license. Review the license page for redistribution and AI-training restrictions.