
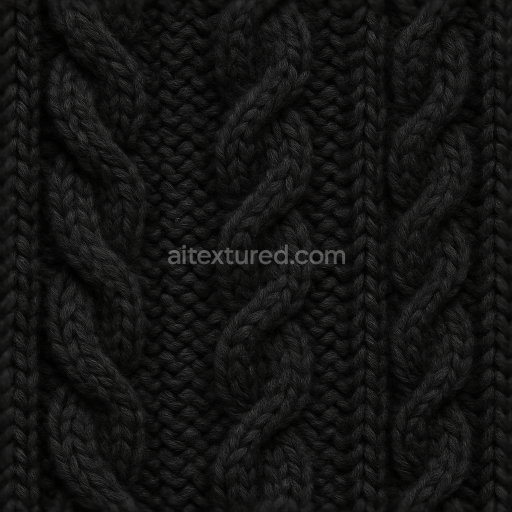
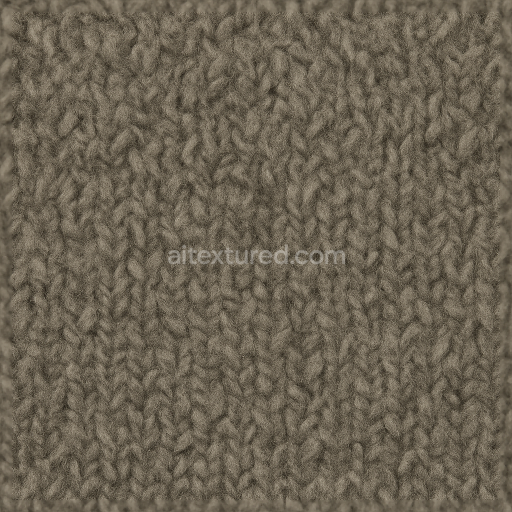
Tweed Wool Herringbone Wool Wool Textile Natural Dye
Seamless texture (tileable) · PNG, WEBP, PBR ZIP. License: AITextured Free Commercial License (FCL) v1.1. Free personal and commercial use. Raw resale, standalone redistribution, mirroring/scraping, competing asset packs, and AI/ML training are not allowed without written permission. Attribution is not required, but appreciated..

| ID | seamless-3d-texture-pbr-8k-wool-crimped-wool-fibers-closeup-natural-wool-soft-wool |
|---|---|
| Category | Wool |
| Formats | PNG, WEBP, PBR ZIP |
| Size | 1k (1024x1024px), 2k (2048x2048px), 4k (4096x4096px), 8k (8192x8192px) |
| Color | sRGB |
| Tileable | Yes |
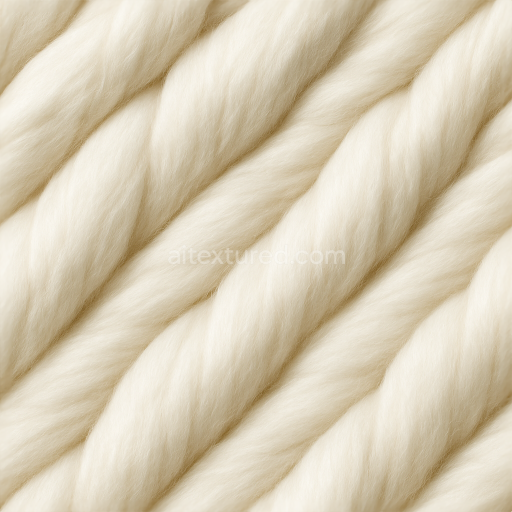
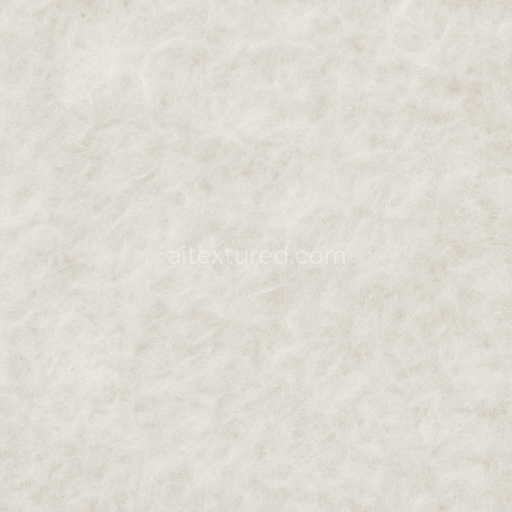
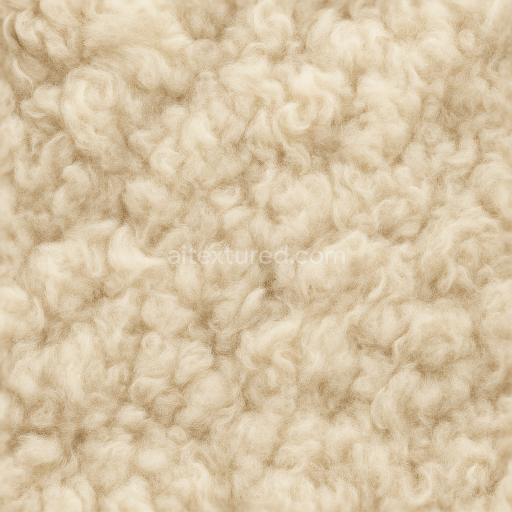
This seamless 3D texture showcases the intricate structure of natural crimped wool fibers captured in stunning 8K resolution providing exceptional detail for photorealistic rendering. The material simulates a densely packed layer of short wool pile where each fiber exhibits characteristic waviness and softness resulting in a plush fluffy surface with a subtle tactile depth. The underlying substrate mimics a tightly interwoven network of wool fibers bound naturally through the crimped geometry that enhances insulation and elasticity. The surface appearance reflects the creamy off-white color typical of undyed wool with delicate tonal variations that emulate the natural pigmentation and slight fiber translucency found in raw fleece.
From a geometric perspective the form presents a highly detailed fibrous topology where each strand of wool is crisply defined and arranged in a randomly oriented yet dense pattern. This complexity accounts for the texture’s porosity and softness with visible gaps between fibers that contribute to realistic light scattering and shadowing effects. The surface finish is matte and slightly fuzzy avoiding any metallic or glossy reflections which is accurately represented through the PBR channels: the BaseColor (Albedo) conveys the natural cream tones and subtle color shifts; the Normal map captures the fine fiber crimps and surface undulations; Roughness is calibrated to enhance the soft diffuse quality of the wool fluff; Metallic is near zero reflecting wool’s non-metallic nature; Ambient Occlusion emphasizes fiber depth and crevices; while Height/Displacement maps provide the volumetric depth needed for parallax and surface relief in close-up views.
Designed for seamless tiling this texture integrates smoothly into digital environments making it highly suitable for applications in Blender Unreal Engine and Unity. Its high resolution ensures that even the finest wool fibers retain clarity during extreme close-ups supporting realistic material creation in textile visualization character clothing and interior fabric elements. The texture’s balanced roughness and height detail allow for nuanced shading and light interaction essential for achieving believable softness and warmth in 3D scenes.
For optimal results it is advisable to adjust the UV scale carefully to prevent fiber repetition from becoming noticeable especially on larger surfaces. Additionally fine-tuning the roughness parameter can help simulate varying levels of wool wear or felting while blending the height map with normal detail can enhance the perception of fiber depth without excessive geometry displacement balancing performance and visual fidelity.
Import the texture maps into Blender with sRGB color space for albedo/base color and Non-Color for normal, roughness, metallic, AO, height, and ORM maps. Connect normal maps through a Normal Map node, then adjust UV scale with a Mapping node so the material repeats naturally on your model.
For the full step-by-step setup, see How to Use Seamless Textures in Blender. Browse related material examples in wood, concrete, and metal.
Yes. This texture is designed as a seamless tileable PBR material, so it can repeat across large surfaces without visible borders.
You can download PNG/WEBP versions and use 1K, 2K, 4K and 8K download options when available on the page.
Yes. The download options and engine-mapped ZIP workflow are designed for Blender, Unreal Engine, Unity Standard, URP and HDRP material pipelines.
Yes. The texture is available under the AITextured free commercial license. Review the license page for redistribution and AI-training restrictions.


Build, preview, and export seamless PBR materials. Generate full map sets from a single image, inspect them in a real-time WebGL viewer, and re-package maps for Unreal, Unity, and Blender—directly in your browser.
AI text-to-texture: type a prompt and get a seamless, tileable base image ready for PBR workflows (great starting point for materials).
Create a full PBR set (Normal, Roughness, AO, Metallic, etc.) from a single image. Seamless and tiling-friendly.
Instant WebGL viewer: inspect materials on a sphere, plane, and cube. Check tiling and lighting in real time.
Re-packages maps per engine: Unreal (BaseColor + ORM), Unity (Mask/MetallicSmoothness), Blender (separate channels).
PNG ↔ JPG ↔ SVG: fast convert, SVG rasterize, embed/trace options, quality & background controls.