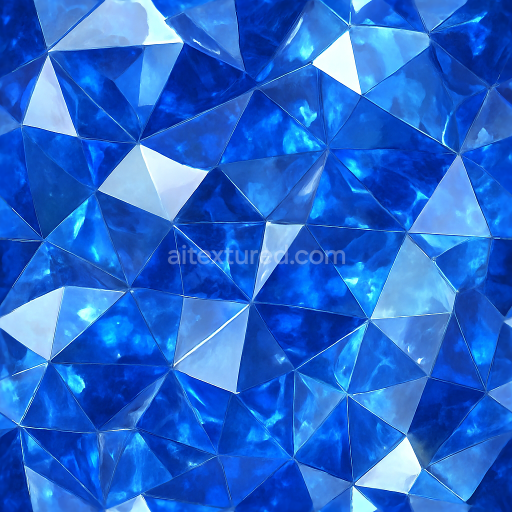
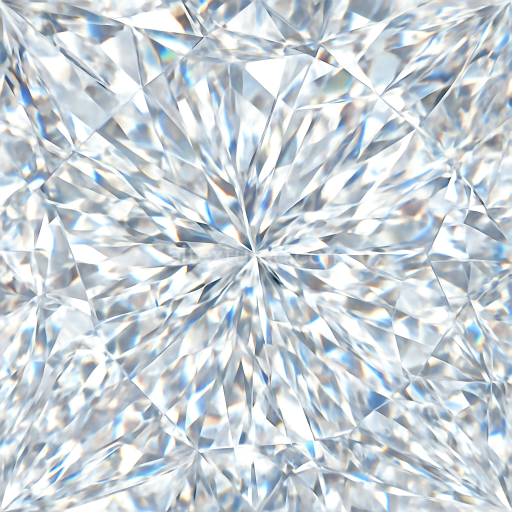
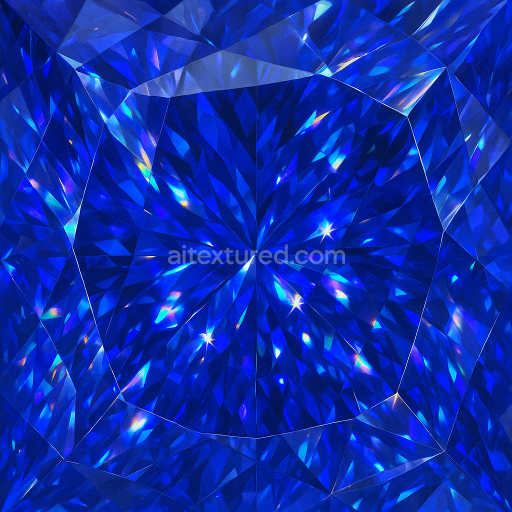
Sapphire Gemstone Cut Facet Edges Sparkling Natural Crystal
Seamless texture (tileable) · PNG, WEBP, PBR ZIP. License: AITextured Free Commercial License (FCL) v1.1. Free personal and commercial use. Raw resale, standalone redistribution, mirroring/scraping, competing asset packs, and AI/ML training are not allowed without written permission. Attribution is not required, but appreciated..

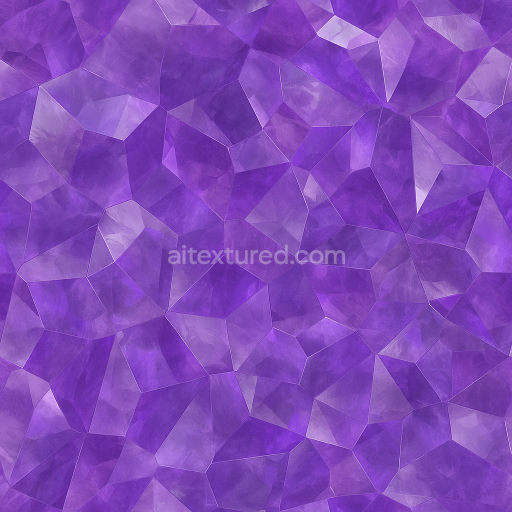
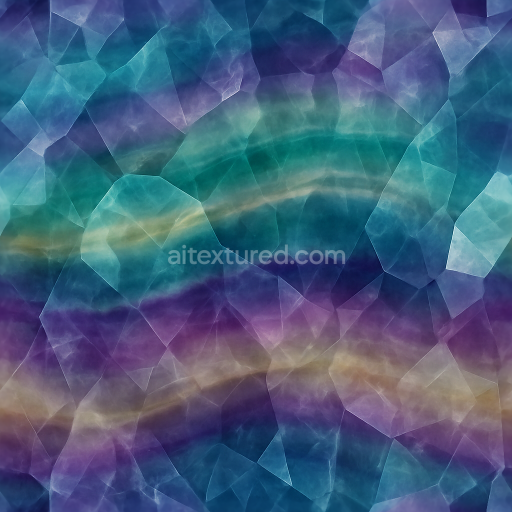
| ID | seamless-3d-texture-pbr-8k-of-raw-fluorite-with-cubic-crystals-exhibiting-translucent-color-zoning-and-natural-crystal-opacity |
|---|---|
| Category | Crystals |
| Formats | PNG, WEBP, PBR ZIP |
| Size | 1k (1024x1024px), 2k (2048x2048px), 4k (4096x4096px), 8k (8192x8192px) |
| Color | sRGB |
| Tileable | Yes |
This seamless 3D PBR 8K texture captures the intricate materiality of raw fluorite, characterized by its distinctive cubic crystal formations. The base material is a naturally occurring calcium fluoride mineral, whose cubic geometry manifests as tightly packed, well-defined crystal units. These crystals exhibit translucent color zoning, with subtle gradients ranging from pale greens to deep purples, reflecting the mineral’s variable trace element content. The substrate is composed of dense crystalline aggregates, interspersed with minor mineral inclusions and occasional growth imperfections that contribute to the texture’s natural complexity. The overall porosity is low, typical of fluorite’s dense structure, but subtle surface irregularities reveal slight weathering effects, enhancing realism in 3D applications.
In terms of form, the texture presents a continuous, tessellated pattern of cubic crystals, creating a seamless tiled effect ideal for large surface coverage without visible repetition. The crystal faces exhibit a predominantly glassy finish, combining polished smooth planes with minor microfacets that produce prism-like refraction and light dispersion. This finish translates into the PBR maps through a high-quality Normal map that captures the sharp edges and planar facets, while the Roughness map balances between smooth reflective surfaces and softly diffused crystal boundaries. Metallic values remain minimal, reflecting the non-metallic nature of fluorite, whereas the Ambient Occlusion map enhances the depth perception between tightly clustered cubic formations.
The BaseColor (Albedo) channel accurately reproduces the translucent color zoning, incorporating soft gradients and semi-transparent areas where internal crystal opacity varies. The Height or Displacement map details the subtle surface relief created by crystal edges and natural mineral deposits, allowing for realistic parallax effects and enhanced silhouette definition in 3D renders. This texture is optimized at an 8K resolution, ensuring exceptional detail fidelity suitable for close-up renders and high-quality visualizations in Blender, Unreal Engine, and Unity environments.
For practical usage, when applying the texture in 3D projects, it is advisable to carefully tune the Roughness parameter to achieve the desired balance between glossy reflections and diffuse scattering, particularly if simulating polished versus rough fluorite surfaces. Additionally, adjusting the UV scale to maintain consistent crystal sizing is recommended to preserve the natural cubic pattern without distortion. Blending the Height map subtly with Normal mapping can further enhance the perceived depth and crystalline structure, adding realism to renders where lighting and camera angles emphasize surface details.
Import the texture maps into Blender with sRGB color space for albedo/base color and Non-Color for normal, roughness, metallic, AO, height, and ORM maps. Connect normal maps through a Normal Map node, then adjust UV scale with a Mapping node so the material repeats naturally on your model.
For the full step-by-step setup, see How to Use Seamless Textures in Blender. Browse related material examples in wood, concrete, and metal.
Yes. This texture is designed as a seamless tileable PBR material, so it can repeat across large surfaces without visible borders.
You can download PNG/WEBP versions and use 1K, 2K, 4K and 8K download options when available on the page.
Yes. The download options and engine-mapped ZIP workflow are designed for Blender, Unreal Engine, Unity Standard, URP and HDRP material pipelines.
Yes. The texture is available under the AITextured free commercial license. Review the license page for redistribution and AI-training restrictions.
Build, preview, and export seamless PBR materials. Generate full map sets from a single image, inspect them in a real-time WebGL viewer, and re-package maps for Unreal, Unity, and Blender—directly in your browser.
AI text-to-texture: type a prompt and get a seamless, tileable base image ready for PBR workflows (great starting point for materials).
Create a full PBR set (Normal, Roughness, AO, Metallic, etc.) from a single image. Seamless and tiling-friendly.
Instant WebGL viewer: inspect materials on a sphere, plane, and cube. Check tiling and lighting in real time.
Re-packages maps per engine: Unreal (BaseColor + ORM), Unity (Mask/MetallicSmoothness), Blender (separate channels).
PNG ↔ JPG ↔ SVG: fast convert, SVG rasterize, embed/trace options, quality & background controls.