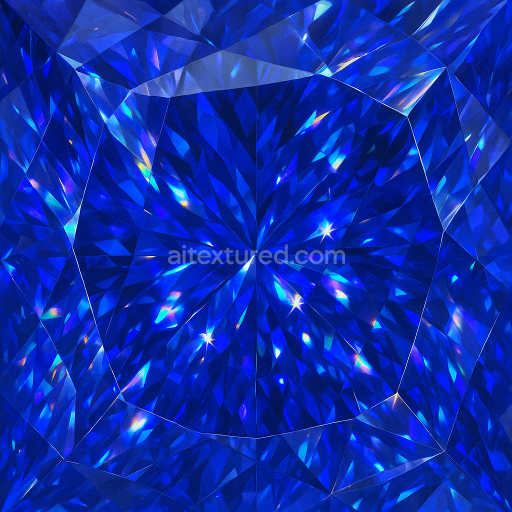
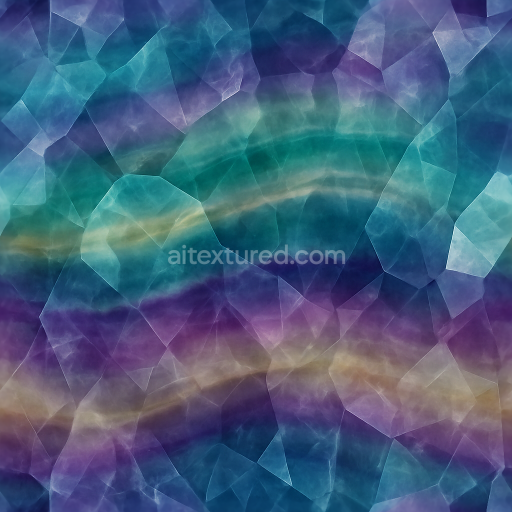
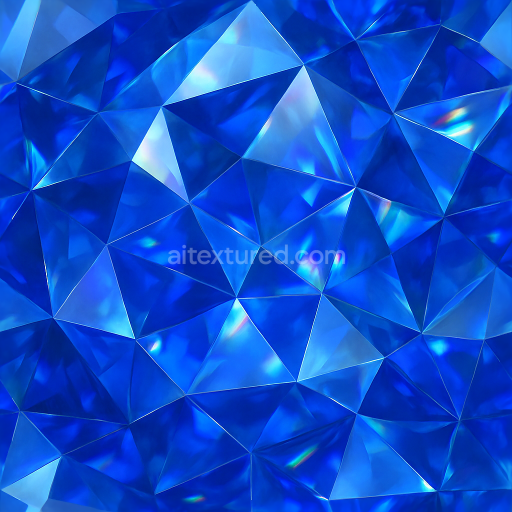
Tanzanite Faceted Gem With Prismatic Refraction And Gemstone Facets
Seamless texture (tileable) · PNG, WEBP, PBR ZIP. License: AITextured Free Commercial License (FCL) v1.1. Free personal and commercial use. Raw resale, standalone redistribution, mirroring/scraping, competing asset packs, and AI/ML training are not allowed without written permission. Attribution is not required, but appreciated..

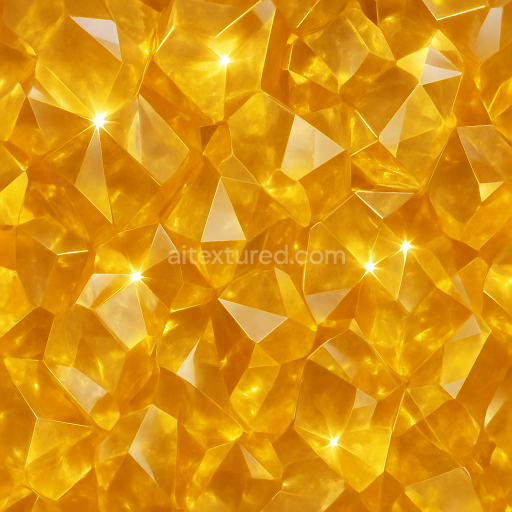
| ID | seamless-3d-texture-pbr-8k-zirconia-faceted-gem-with-color-zoning-and-adamantine-luster-effects |
|---|---|
| Category | Crystals |
| Formats | PNG, WEBP, PBR ZIP |
| Size | 1k (1024x1024px), 2k (2048x2048px), 4k (4096x4096px), 8k (8192x8192px) |
| Color | sRGB |
| Tileable | Yes |
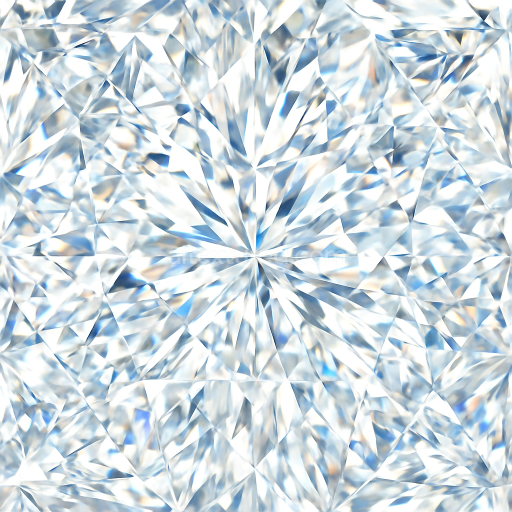
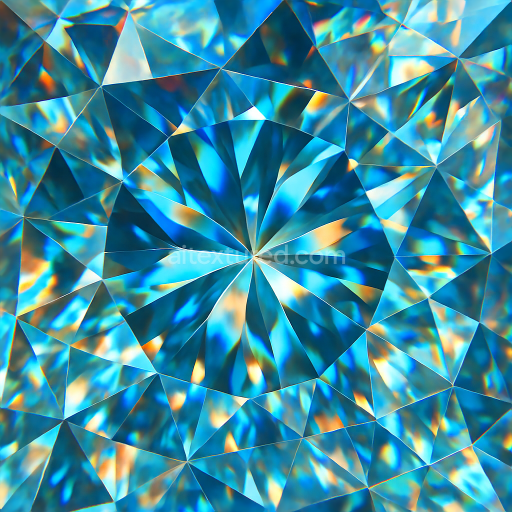
This seamless 3D PBR texture features a highly detailed zirconia faceted gem, meticulously crafted to capture the intricate geometry and optical properties of a polished synthetic gemstone. The material composition is characterized by a crystalline zirconia substrate known for its exceptional hardness and optical clarity. The gem’s faceted form follows precise geometric patterns, with multiple angular cuts arranged symmetrically to maximize light reflection and refraction. The texture reveals subtle color zoning within the crystal lattice, where gentle gradients and zones of varying hues simulate the natural dispersion of light and internal inclusions typical of high-quality cubic zirconia. The overall surface finish exhibits an adamantine luster—a brilliant, diamond-like shine—achieved through a smooth, highly polished exterior that emphasizes sharp sparkle highlights along each facet edge.
From a materials science perspective, the texture’s base color (albedo) channel presents nuanced color variations, with zones transitioning softly between near-colorless and faintly tinted areas, suggesting slight internal stresses or color-enhancing dopants within the zirconia structure. The normal map accurately encodes the gem’s faceted geometry, producing crisp angular transitions that enhance the three-dimensional illusion of depth and sharp edges. Roughness values remain low and consistent across the surface, ensuring a lustrous, mirror-like reflection characteristic of polished gemstones. The metallic channel is effectively neutral, reflecting the non-metallic nature of zirconia, while ambient occlusion subtly enhances crevices and facet intersections, adding realistic subtle shadowing. Height and displacement maps contribute to fine surface relief, emphasizing facet bevels and micro-facets that produce realistic prismatic refraction effects when rendered.
Rendered at an ultra-high 8K resolution, this texture preserves exceptional detail even under close inspection, making it ideal for photorealistic visualization in advanced 3D software such as Blender, Unreal Engine, and Unity. The seamless tiling capability ensures the texture can be applied repeatedly without visible seams, facilitating large-scale gemstone surfaces or repeated jewelry elements with consistent visual fidelity. The prismatic refraction and sparkle highlights simulate light behavior in real gems, enhancing realism in ray-traced or physically based rendering workflows.
For optimal results, it is advisable to carefully adjust the UV scale to match the intended gem size, ensuring facet patterns align realistically with the model’s geometry. Additionally, fine-tuning the roughness map can help balance the overall reflectivity to suit various lighting conditions, while blending height and normal maps allows for subtle control over the perceived depth and sharpness of facets, improving the gemstone’s three-dimensional appearance without compromising performance.
Import the texture maps into Blender with sRGB color space for albedo/base color and Non-Color for normal, roughness, metallic, AO, height, and ORM maps. Connect normal maps through a Normal Map node, then adjust UV scale with a Mapping node so the material repeats naturally on your model.
For the full step-by-step setup, see How to Use Seamless Textures in Blender. Browse related material examples in wood, concrete, and metal.
Yes. This texture is designed as a seamless tileable PBR material, so it can repeat across large surfaces without visible borders.
You can download PNG/WEBP versions and use 1K, 2K, 4K and 8K download options when available on the page.
Yes. The download options and engine-mapped ZIP workflow are designed for Blender, Unreal Engine, Unity Standard, URP and HDRP material pipelines.
Yes. The texture is available under the AITextured free commercial license. Review the license page for redistribution and AI-training restrictions.

Build, preview, and export seamless PBR materials. Generate full map sets from a single image, inspect them in a real-time WebGL viewer, and re-package maps for Unreal, Unity, and Blender—directly in your browser.
AI text-to-texture: type a prompt and get a seamless, tileable base image ready for PBR workflows (great starting point for materials).
Create a full PBR set (Normal, Roughness, AO, Metallic, etc.) from a single image. Seamless and tiling-friendly.
Instant WebGL viewer: inspect materials on a sphere, plane, and cube. Check tiling and lighting in real time.
Re-packages maps per engine: Unreal (BaseColor + ORM), Unity (Mask/MetallicSmoothness), Blender (separate channels).
PNG ↔ JPG ↔ SVG: fast convert, SVG rasterize, embed/trace options, quality & background controls.