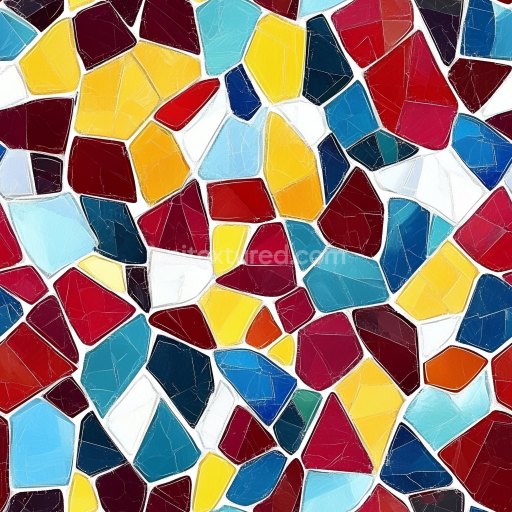
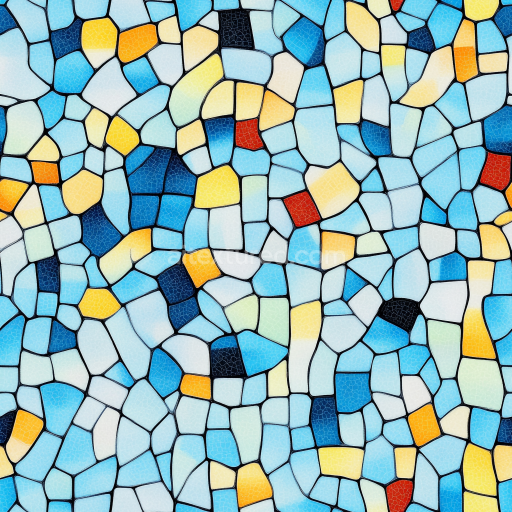
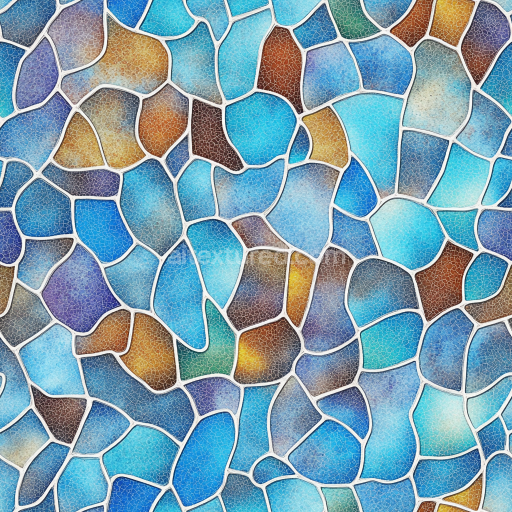
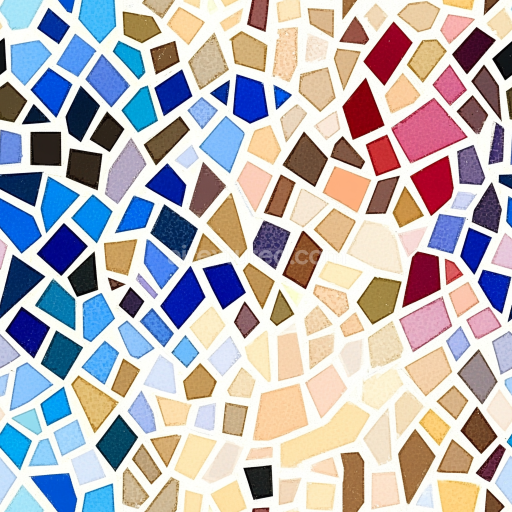
Colorful Ceramic Mosaic PBR Texture with Irregular Tiles and Glossy Finish
Seamless texture (tileable) · PNG, WEBP, PBR ZIP. License: AITextured Free Commercial License (FCL) v1.1. Free personal and commercial use. Raw resale, standalone redistribution, mirroring/scraping, competing asset packs, and AI/ML training are not allowed without written permission. Attribution is not required, but appreciated..

| ID | seamless-3d-texture-pbr-8k-glass-tiles-mosaic-featuring-smalti-glass-fragments-and-glossy-finish |
|---|---|
| Category | Mosaic |
| Formats | PNG, WEBP, PBR ZIP |
| Size | 1k (1024x1024px), 2k (2048x2048px), 4k (4096x4096px), 8k (8192x8192px) |
| Color | sRGB |
| Tileable | Yes |
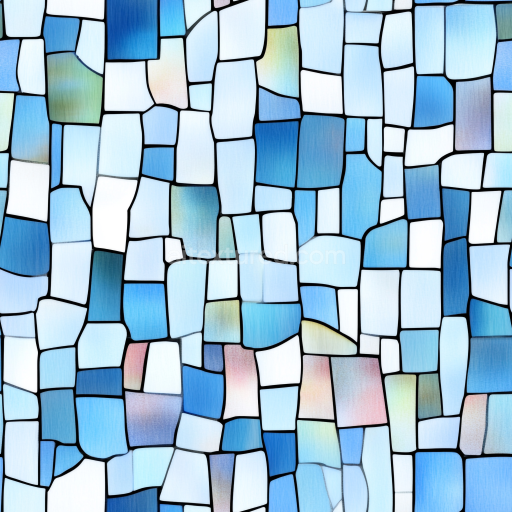
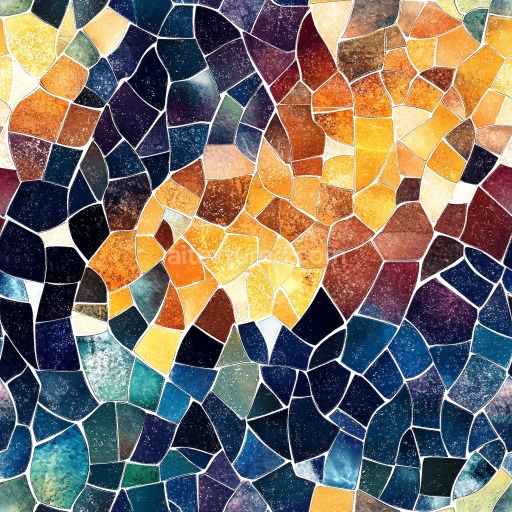
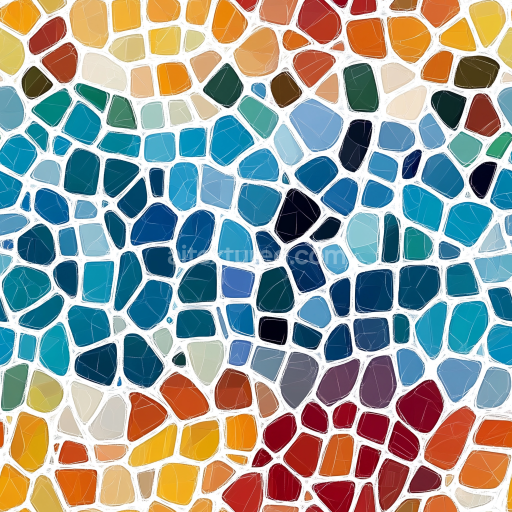
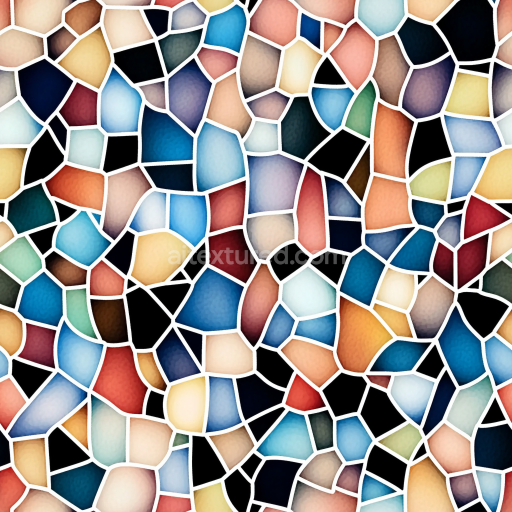
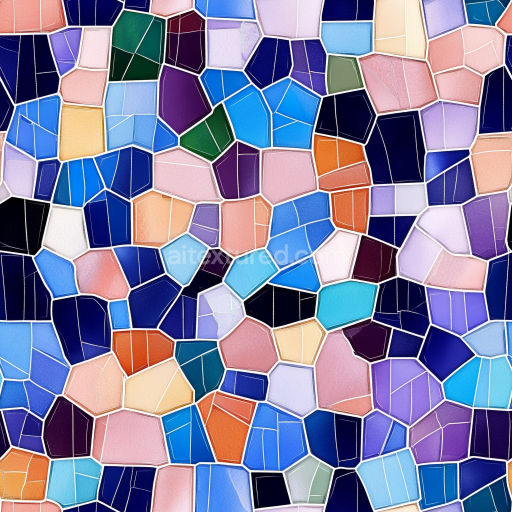
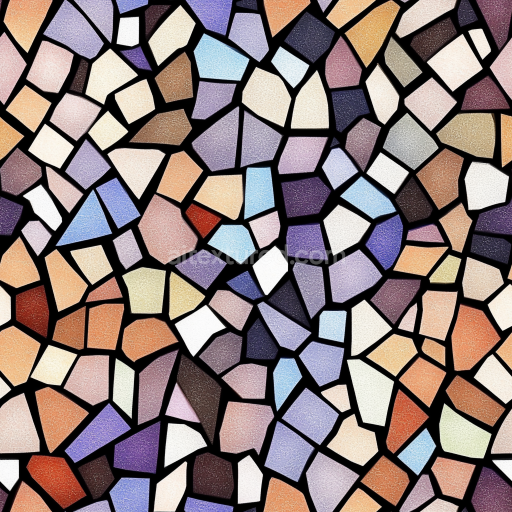
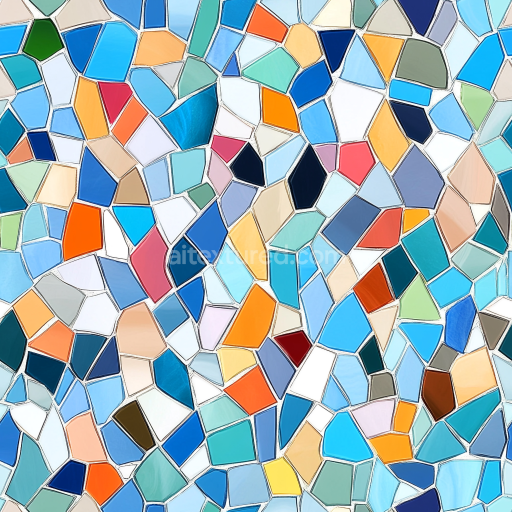
This seamless 3D texture showcases a meticulously crafted mosaic composed of small, irregularly shaped glass tiles made from smalti glass fragments. Smalti is a traditional opaque colored glass, known for its rich pigmentation and slightly varied translucency, which lends this mosaic an authentic and vibrant appearance. The individual tiles are set in a dense, low-porosity substrate that mimics a smooth cement or fine grout base, providing structural cohesion and subtle contrast to the glossy glass surfaces. The adhesive binder between the tiles is virtually invisible, allowing the vivid colors and subtle translucency of the glass fragments to dominate the visual impression. This combination of materials results in a distinctive geometric pattern where the tiles are arranged in a seemingly random yet harmonious layout, emphasizing the artisanal quality of the mosaic.
The surface finish is highly polished and glossy, enhancing the natural reflective properties of the glass smalti tiles. Variations in tile thickness and surface smoothness are replicated through detailed normal and height maps, capturing the subtle undulations and depth differences typical of handcrafted mosaics. The PBR channels are carefully balanced: the BaseColor (Albedo) channel conveys the intense, saturated colors of the smalti glass, ranging from deep blues and reds to bright yellows and greens. The Roughness map is finely tuned to reflect the polished glass surface, exhibiting low roughness values for sharp specular highlights, while the grout lines have slightly higher roughness to maintain material distinction. The Metallic channel remains close to zero, reflecting the non-metallic nature of glass, while Ambient Occlusion enhances the depth perception around tile edges and grout recesses. Height and Displacement maps contribute to the three-dimensionality by simulating tile relief and surface irregularities, essential for realistic rendering.
Rendered at an impressive 8K resolution, this texture supports photorealistic detail and sharpness, making it ideal for close-up visualizations in modern rendering engines such as Blender, Unreal Engine, and Unity. The high resolution ensures that the intricate color gradations and surface reflections of the smalti glass tiles retain clarity even on large surfaces or in VR applications. The seamless nature of the texture allows for infinite tiling without visible repetition, suitable for both architectural visualizations and digital art projects that require authentic mosaic patterns.
For practical use, it is recommended to carefully adjust the UV scale in your 3D software to maintain the natural size ratio of the glass tiles, avoiding distortion that could break the illusion of handcrafted mosaic work. Additionally, fine-tuning the roughness map can help adapt the glossiness to different lighting environments or artistic styles, while blending height and normal maps can enhance the perception of depth and surface complexity, especially when using parallax or displacement effects. This approach ensures maximum versatility and realism when integrating the texture into diverse material setups or scene conditions.
Import the texture maps into Blender with sRGB color space for albedo/base color and Non-Color for normal, roughness, metallic, AO, height, and ORM maps. Connect normal maps through a Normal Map node, then adjust UV scale with a Mapping node so the material repeats naturally on your model.
For the full step-by-step setup, see How to Use Seamless Textures in Blender. Browse related material examples in wood, concrete, and metal.
Yes. This texture is designed as a seamless tileable PBR material, so it can repeat across large surfaces without visible borders.
You can download PNG/WEBP versions and use 1K, 2K, 4K and 8K download options when available on the page.
Yes. The download options and engine-mapped ZIP workflow are designed for Blender, Unreal Engine, Unity Standard, URP and HDRP material pipelines.
Yes. The texture is available under the AITextured free commercial license. Review the license page for redistribution and AI-training restrictions.
Build, preview, and export seamless PBR materials. Generate full map sets from a single image, inspect them in a real-time WebGL viewer, and re-package maps for Unreal, Unity, and Blender—directly in your browser.
AI text-to-texture: type a prompt and get a seamless, tileable base image ready for PBR workflows (great starting point for materials).
Create a full PBR set (Normal, Roughness, AO, Metallic, etc.) from a single image. Seamless and tiling-friendly.
Instant WebGL viewer: inspect materials on a sphere, plane, and cube. Check tiling and lighting in real time.
Re-packages maps per engine: Unreal (BaseColor + ORM), Unity (Mask/MetallicSmoothness), Blender (separate channels).
PNG ↔ JPG ↔ SVG: fast convert, SVG rasterize, embed/trace options, quality & background controls.