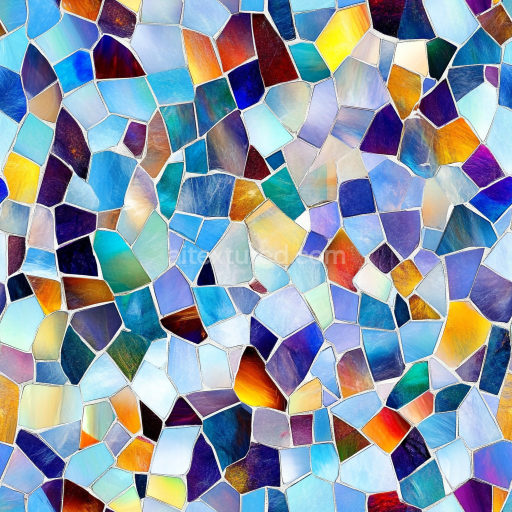
Arabesque Tiles Mosaic With Ornamental Tiles And Moroccan Style Influence
Seamless texture (tileable) · PNG, WEBP, PBR ZIP. License: AITextured Free Commercial License (FCL) v1.1. Free personal and commercial use. Raw resale, standalone redistribution, mirroring/scraping, competing asset packs, and AI/ML training are not allowed without written permission. Attribution is not required, but appreciated..

| ID | seamless-3d-texture-pbr-8k-granite-chips-mosaic-with-neutral-hues-and-rough-texture-finish |
|---|---|
| Category | Mosaic |
| Formats | PNG, WEBP, PBR ZIP |
| Size | 1k (1024x1024px), 2k (2048x2048px), 4k (4096x4096px), 8k (8192x8192px) |
| Color | sRGB |
| Tileable | Yes |
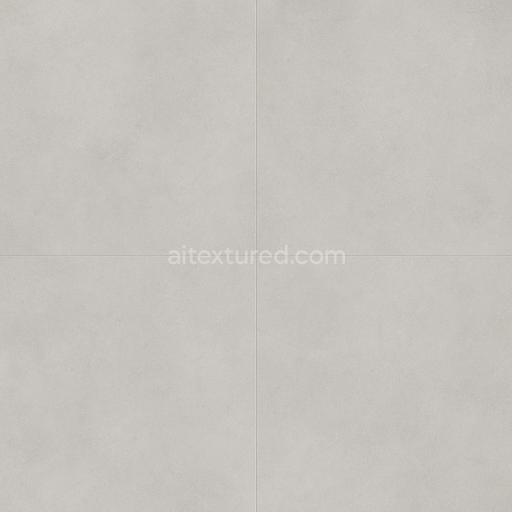
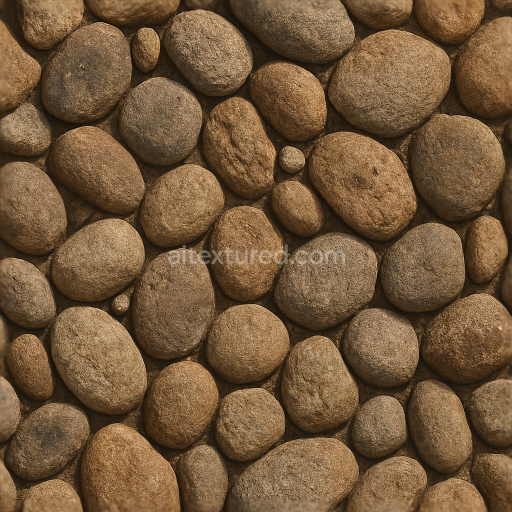
This seamless 3D PBR texture represents a granite chips mosaic composed of irregularly shaped natural stone fragments embedded in a cementitious substrate. The base material mimics a mineral-rich granite aggregate, featuring a diverse range of neutral hues — from soft grays and beiges to subtle taupes — that reflect the inherent color variations found in natural stones. These granite chips, with their rough and unpolished surfaces, create a tactile matte finish, emphasizing the coarse texture typical of masonry mosaics. The chips are arranged in a tightly packed, yet organically irregular pattern, with visible tile grout filling the interstices, contributing to the realistic surface relief of the mosaic form.
The composition simulates a traditional stone mosaic where granite fragments serve as the aggregate, bound by a mortar-like matrix that provides structural cohesion and slight porosity. This porosity is subtly expressed through micro-variations in the height and roughness maps, conveying the weathered and rugged nature of the surface. The grout lines are modeled with a contrasting but complementary tone and exhibit a slightly smoother texture than the granite chips, allowing the individual stone elements to visually stand out. The overall surface finish is rough and matte rather than polished, enhancing the material's natural authenticity. Pigment variations in the base color channel capture the nuanced grain and mineral inclusions characteristic of granite, while the normal and height maps emphasize the angular edges and surface unevenness of the chips.
From a technical perspective, this texture is provided at an 8K resolution, ensuring high fidelity and detailed surface information suitable for close-up renders in Blender, Unreal Engine, and Unity. The BaseColor (Albedo) map delivers true-to-life color variations under neutral lighting conditions, while the Normal and Height maps offer pronounced relief and depth that respond realistically to dynamic lighting. The Roughness map supports the matte finish by defining the micro-surface scattering and light diffusion, with no metallic elements present, hence the Metallic channel remains black. Ambient Occlusion enhances the perception of depth within grout lines and crevices between chips, reinforcing the rugged mosaic structure.
For optimal results when applying this texture, it is advisable to adjust the UV scale according to the mosaic tile size to maintain the natural irregularity of the granite chips without repetition artifacts. Additionally, fine-tuning the roughness map can help balance between overly dull and artificially shiny surfaces, depending on the lighting environment. Combining the height map with subtle normal map blending can further enhance surface realism by simulating both macro and micro surface details, ideal for architectural visualizations, game environments, or digital artwork requiring authentic natural stone mosaics with tactile depth.
Import the texture maps into Blender with sRGB color space for albedo/base color and Non-Color for normal, roughness, metallic, AO, height, and ORM maps. Connect normal maps through a Normal Map node, then adjust UV scale with a Mapping node so the material repeats naturally on your model.
For the full step-by-step setup, see How to Use Seamless Textures in Blender. Browse related material examples in wood, concrete, and metal.
Yes. This texture is designed as a seamless tileable PBR material, so it can repeat across large surfaces without visible borders.
You can download PNG/WEBP versions and use 1K, 2K, 4K and 8K download options when available on the page.
Yes. The download options and engine-mapped ZIP workflow are designed for Blender, Unreal Engine, Unity Standard, URP and HDRP material pipelines.
Yes. The texture is available under the AITextured free commercial license. Review the license page for redistribution and AI-training restrictions.

Build, preview, and export seamless PBR materials. Generate full map sets from a single image, inspect them in a real-time WebGL viewer, and re-package maps for Unreal, Unity, and Blender—directly in your browser.
AI text-to-texture: type a prompt and get a seamless, tileable base image ready for PBR workflows (great starting point for materials).
Create a full PBR set (Normal, Roughness, AO, Metallic, etc.) from a single image. Seamless and tiling-friendly.
Instant WebGL viewer: inspect materials on a sphere, plane, and cube. Check tiling and lighting in real time.
Re-packages maps per engine: Unreal (BaseColor + ORM), Unity (Mask/MetallicSmoothness), Blender (separate channels).
PNG ↔ JPG ↔ SVG: fast convert, SVG rasterize, embed/trace options, quality & background controls.