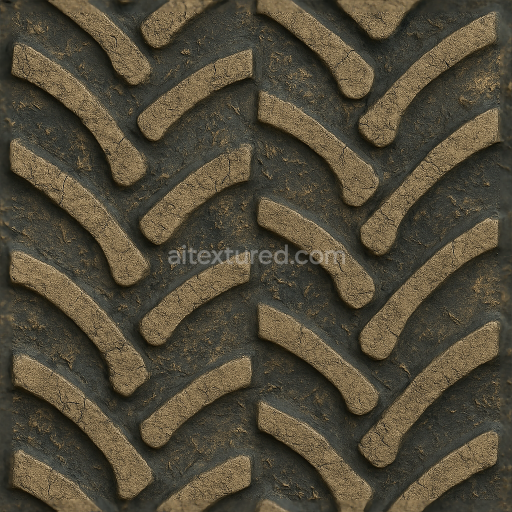
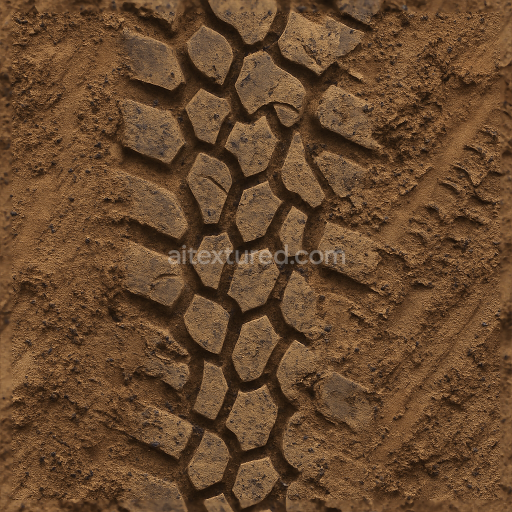
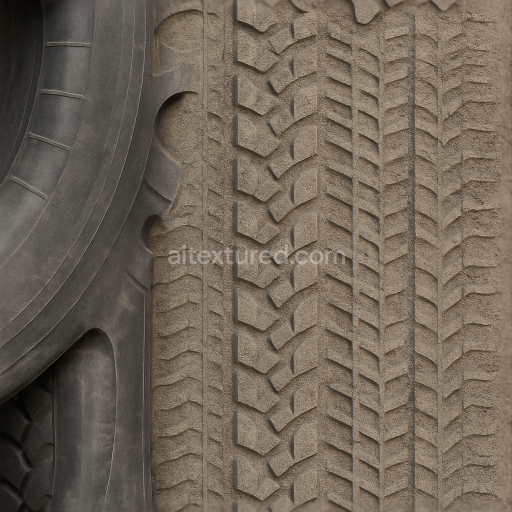
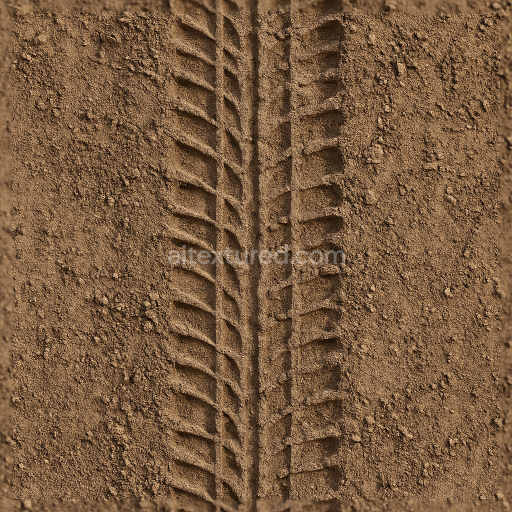
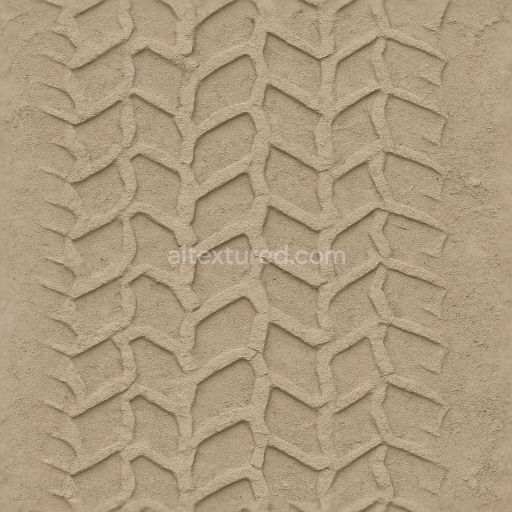
Tractor Tire With Cross Tread And Deep Tread Pattern For Agricultural Vehicle Tire Realism
Seamless texture (tileable) · PNG, WEBP, PBR ZIP. License: AITextured Free Commercial License (FCL) v1.1. Free personal and commercial use. Raw resale, standalone redistribution, mirroring/scraping, competing asset packs, and AI/ML training are not allowed without written permission. Attribution is not required, but appreciated..

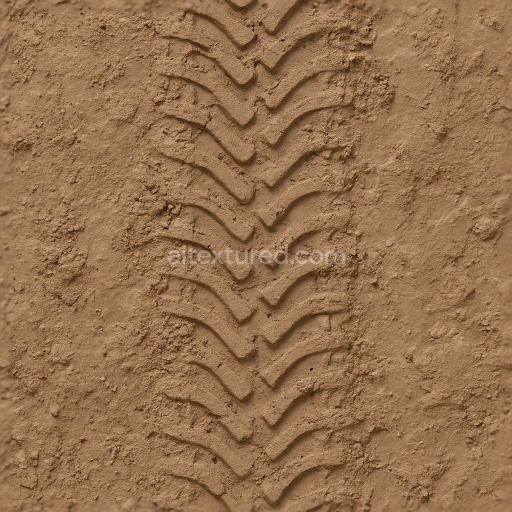
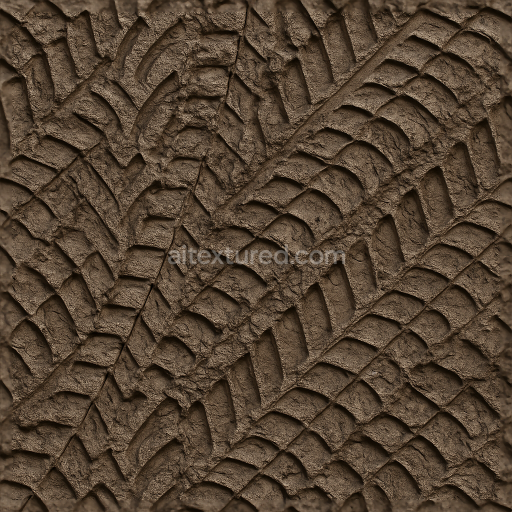
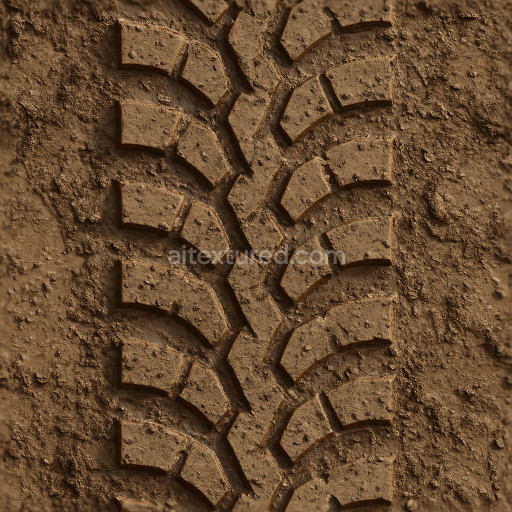
| ID | seamless-3d-texture-pbr-8k-mud-tire-with-deep-tread-and-mud-splatter-for-authentic-wet-mud-offroad-vehicle-tire-surfaces |
|---|---|
| Category | Tire prints |
| Formats | PNG, WEBP, PBR ZIP |
| Size | 1k (1024x1024px), 2k (2048x2048px), 4k (4096x4096px), 8k (8192x8192px) |
| Color | sRGB |
| Tileable | Yes |
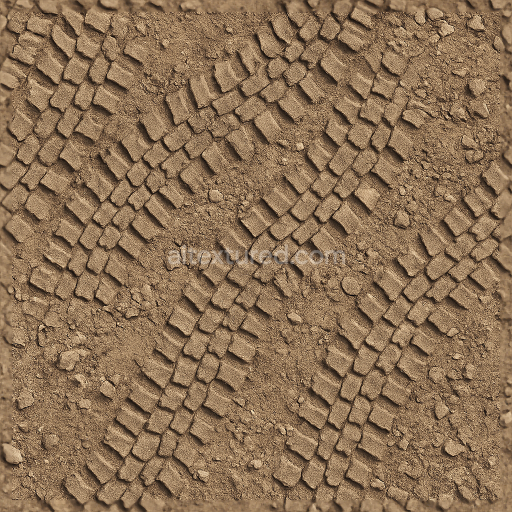
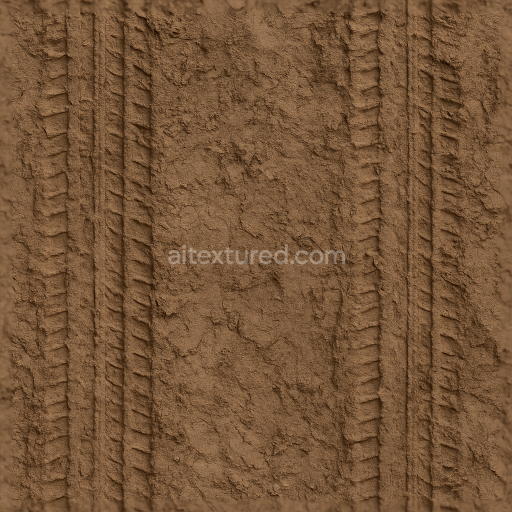
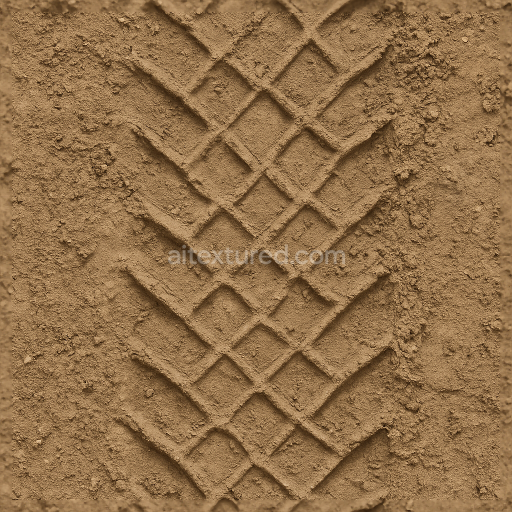
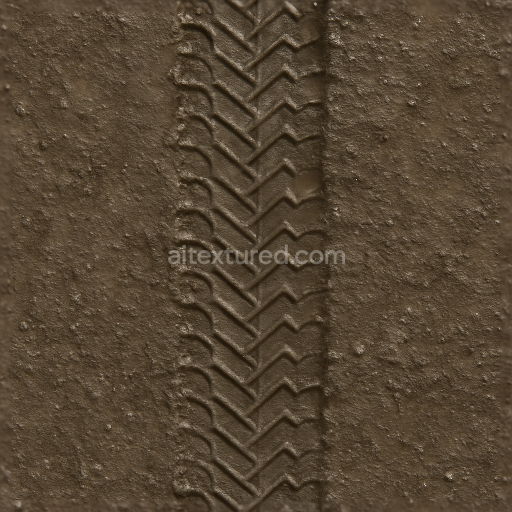
This seamless 3D PBR texture presents a highly detailed mud tire surface characterized by its deep tread pattern and realistic mud splatter effects. The geometric form is dominated by an aggressive angular tread design typical of offroad vehicle tires featuring interlocking blocks and wide grooves that channel mud away from the contact patch. The base material simulates a dense rubber substrate combining synthetic elastomers with reinforcing fibers embedded within to enhance durability and flexibility. This rubber is modeled to exhibit slight surface porosity and subtle weathering reflecting the tire’s exposure to wet abrasive environments. The mud elements appear both embedded deep within the grooves and scattered across the tire’s raised tread blocks representing fresh mud deposits with varying thickness and adherence.
Compositionally the tire’s rubber is conceived as a composite of hydrocarbons with carbon black pigment providing the dark base color visible in the BaseColor (Albedo) channel. The mud splatter includes fine aggregates of clay and organic matter introducing color variation from dark brown to muted grayish tones. The Normal map captures the intricate details of the tread’s sharp edges and the irregular mud deposits enhancing the tactile quality of the surface. Roughness values vary across the texture with the rubber exhibiting a matte finish and moderate roughness to simulate natural wear while the mud areas show a slightly glossier wet appearance. The Metallic channel is effectively zero as neither rubber nor mud possesses metallic properties while Ambient Occlusion enhances the shadowing in the deep grooves and under mud clumps adding depth to the overall form. Height/Displacement maps emphasize the pronounced tread relief and the volumetric buildup of mud contributing to realistic parallax effects.
Rendered in 8K resolution this texture provides exceptional detail suitable for close-up views in modern 3D engines such as Blender Unreal Engine and Unity. The high pixel density ensures that the intricate interplay of rubber grain mud texture and tread geometry remains crisp avoiding blurring or pixelation when scaled. The seamless tiling capability allows for extended surface coverage on tires of various sizes without visible repetition preserving immersion in both real-time and offline rendering workflows.
For optimal use it is recommended to adjust the UV scale to match the specific tire model’s proportions ensuring the tread blocks align realistically with the geometry. When setting roughness blending between the rubber and mud splatter regions can enhance the wet effect with lower roughness values applied to mud to simulate moisture. Incorporating height or parallax mapping alongside the normal map will further accentuate the depth of the tread and mud accumulation providing convincing offroad tire visuals under dynamic lighting conditions.
Import the texture maps into Blender with sRGB color space for albedo/base color and Non-Color for normal, roughness, metallic, AO, height, and ORM maps. Connect normal maps through a Normal Map node, then adjust UV scale with a Mapping node so the material repeats naturally on your model.
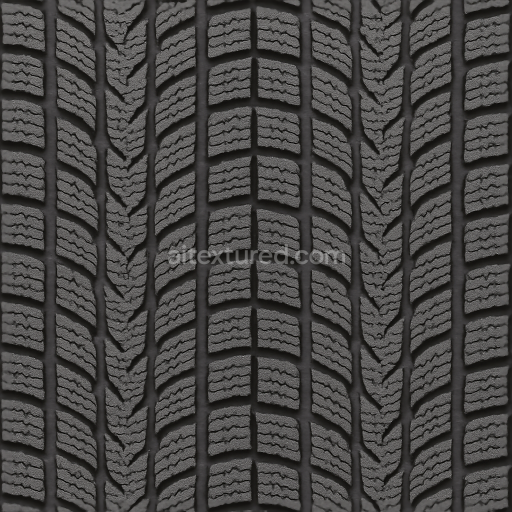
For the full step-by-step setup, see How to Use Seamless Textures in Blender. Browse related material examples in wood, concrete, and metal.
Yes. This texture is designed as a seamless tileable PBR material, so it can repeat across large surfaces without visible borders.
You can download PNG/WEBP versions and use 1K, 2K, 4K and 8K download options when available on the page.
Yes. The download options and engine-mapped ZIP workflow are designed for Blender, Unreal Engine, Unity Standard, URP and HDRP material pipelines.
Yes. The texture is available under the AITextured free commercial license. Review the license page for redistribution and AI-training restrictions.
Build, preview, and export seamless PBR materials. Generate full map sets from a single image, inspect them in a real-time WebGL viewer, and re-package maps for Unreal, Unity, and Blender—directly in your browser.
AI text-to-texture: type a prompt and get a seamless, tileable base image ready for PBR workflows (great starting point for materials).
Create a full PBR set (Normal, Roughness, AO, Metallic, etc.) from a single image. Seamless and tiling-friendly.
Instant WebGL viewer: inspect materials on a sphere, plane, and cube. Check tiling and lighting in real time.
Re-packages maps per engine: Unreal (BaseColor + ORM), Unity (Mask/MetallicSmoothness), Blender (separate channels).
PNG ↔ JPG ↔ SVG: fast convert, SVG rasterize, embed/trace options, quality & background controls.