
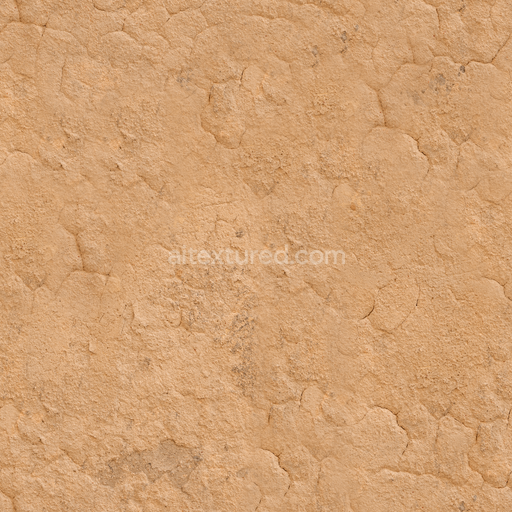
Wallpaper With Modern Minimalist Linen Weave Washed Linen
Seamless texture (tileable) · PNG, WEBP, PBR ZIP. License: AITextured Free Commercial License (FCL) v1.1. Free personal and commercial use. Raw resale, standalone redistribution, mirroring/scraping, competing asset packs, and AI/ML training are not allowed without written permission. Attribution is not required, but appreciated..

| ID | seamless-3d-texture-pbr-8k-wallpaper-with-vintage-brocade-damask-embossed-matte-finish |
|---|---|
| Category | Wallpaper |
| Formats | PNG, WEBP, PBR ZIP |
| Size | 1k (1024x1024px), 2k (2048x2048px), 4k (4096x4096px), 8k (8192x8192px) |
| Color | sRGB |
| Tileable | Yes |
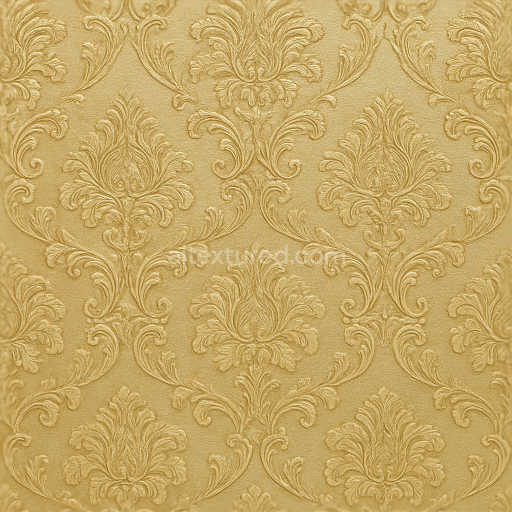
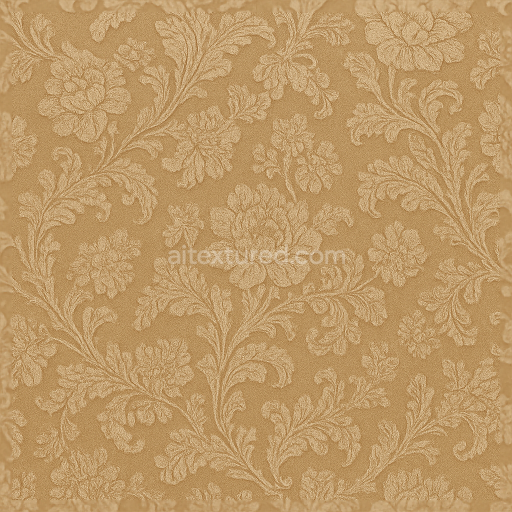
This seamless 3D texture features an intricate vintage brocade damask pattern meticulously designed to replicate the complex woven textile weave characteristic of historic fabric wall coverings. The base material simulates a high-quality jacquard cloth substrate composed of tightly interlaced natural fibers such as silk and cotton blends. The embossing effect is achieved through an elevated geometric relief that mimics the raised damask motifs creating a tactile sense of depth and dimensionality. The pattern’s repetitive tone-on-tone arrangement allows for a continuous flawless tiling essential for large-scale applications in architectural visualization and digital environments.
The texture’s composition reflects a multi-layered structure: the substrate is represented by a fine fabric weave with subtle irregularities to enhance realism while the embossed damask motifs simulate a combination of natural fiber bundles and binding threads. The PBR workflow incorporates this complexity by mapping the BaseColor (Albedo) channel with muted vintage-inspired pigments that emphasize soft beige and warm ivory tones. The Normal map captures the intricate raised patterns and delicate fabric creases contributing to accurate light interaction. Roughness is finely tuned to reflect the matte finish of the textile diffusing highlights and preventing shiny spots while Ambient Occlusion enhances the shadows within the embossed recesses adding depth and realism. The Height/Displacement map enables true surface relief suitable for parallax or tessellation effects enhancing the embossing’s three-dimensional feel. The Metallic channel remains at zero consistent with the non-metallic fabric material.
The wallpaper texture is rendered at an ultra-high 8K resolution ensuring exceptional detail even on close-up views in 3D scenes. It is optimized for use in Blender Unreal Engine and Unity allowing seamless integration into various rendering pipelines and workflows. The texture’s balanced roughness and normal maps are crafted to respond naturally under different lighting conditions from soft ambient illumination to directional spotlights preserving the vintage aesthetic without compromising performance.
For practical application it is recommended to adjust the UV scale carefully to maintain the proportionality of the damask motifs relative to the physical space being textured as scaling too large or too small can distort the fabric’s natural appearance. Additionally blending the Height map subtly with the Normal map can create a more nuanced embossed effect avoiding overly sharp reliefs that may appear artificial. Fine-tuning roughness values can also help achieve the desired matte softness or slightly enhance surface texture depending on scene lighting and camera distance.
Import the texture maps into Blender with sRGB color space for albedo/base color and Non-Color for normal, roughness, metallic, AO, height, and ORM maps. Connect normal maps through a Normal Map node, then adjust UV scale with a Mapping node so the material repeats naturally on your model.
For the full step-by-step setup, see How to Use Seamless Textures in Blender. Browse related material examples in wood, concrete, and metal.
Yes. This texture is designed as a seamless tileable PBR material, so it can repeat across large surfaces without visible borders.
You can download PNG/WEBP versions and use 1K, 2K, 4K and 8K download options when available on the page.
Yes. The download options and engine-mapped ZIP workflow are designed for Blender, Unreal Engine, Unity Standard, URP and HDRP material pipelines.
Yes. The texture is available under the AITextured free commercial license. Review the license page for redistribution and AI-training restrictions.


Generate, preview, and export seamless PBR materials for Blender, Unity, and Unreal Engine—directly in your browser.
AI text-to-texture: type a prompt and get a seamless, tileable base image ready for PBR workflows (great starting point for materials).
Create a full PBR set (Normal, Roughness, AO, Metallic, etc.) from a single image. Seamless and tiling-friendly.
Instant WebGL viewer: inspect materials on a sphere, plane, and cube. Check tiling and lighting in real time.
Re-packages maps per engine: Unreal (BaseColor + ORM), Unity (Mask/MetallicSmoothness), Blender (separate channels).
PNG ↔ JPG ↔ SVG: fast convert, SVG rasterize, embed/trace options, quality & background controls.