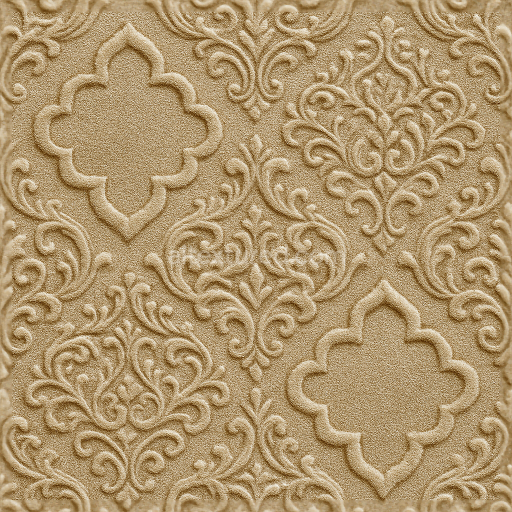
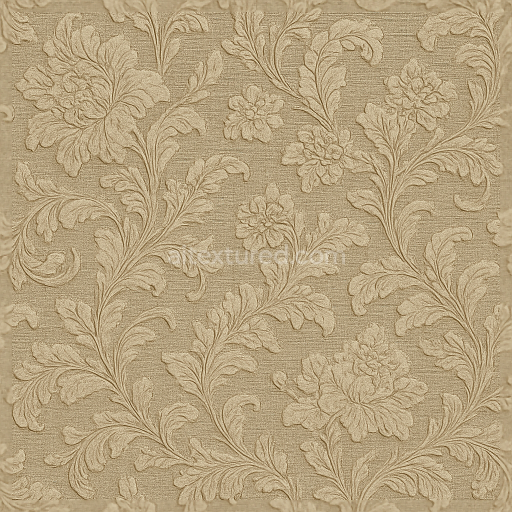
Quatrefoil Arabesque Wallpaper With Raised Velvet Weave Finish
Seamless texture (tileable) · PNG, WEBP, PBR ZIP. License: AITextured Free Commercial License (FCL) v1.1. Free personal and commercial use. Raw resale, standalone redistribution, mirroring/scraping, competing asset packs, and AI/ML training are not allowed without written permission. Attribution is not required, but appreciated..

| ID | seamless-3d-texture-pbr-8k-modern-minimalist-wallpaper-with-matte-cotton-woven-fabric-pattern |
|---|---|
| Category | Wallpaper |
| Formats | PNG, WEBP, PBR ZIP |
| Size | 1k (1024x1024px), 2k (2048x2048px), 4k (4096x4096px), 8k (8192x8192px) |
| Color | sRGB |
| Tileable | Yes |
This seamless 3D texture features a modern minimalist wallpaper design inspired by matte cotton woven fabric rendered in ultra-high 8K resolution for exceptional detail and clarity. The base material simulates a fine cotton textile characterized by tightly interlaced fibers forming a subtle grid-like woven pattern. The substrate represents a soft flexible fabric foundation with natural fiber aggregates visible through the texture’s micro-geometry. The matte finish reflects a low gloss achieved through diffuse scattering properties that minimize specular highlights reinforcing the tactile softness typical of cotton. Coloration is muted and natural relying on a palette of off-white and gentle beige tones that mimic unbleached linen or raw cotton applied via BaseColor (Albedo) maps.
From a material composition standpoint the wallpaper texture incorporates a simulated binder akin to cotton sizing agents which hold the fibers firmly while maintaining slight porosity to capture subtle light penetration and shadowing effects. The Normal and Height maps emphasize the woven fabric’s dimensionality with fine ridges and depressions replicating the interwoven threads. Roughness maps are calibrated to express the matte surface avoiding any metallic shine thus the Metallic channel remains close to zero throughout. Ambient Occlusion enhances the depth perception between individual fibers and weave intersections adding realism in shadowed crevices. The Height/Displacement maps allow for controlled surface relief which can be finely tuned to simulate either a soft embossed effect or a more pronounced textile texture.
Designed with PBR workflows in mind this texture is fully compatible with Blender Unreal Engine and Unity ensuring seamless integration across these platforms. Its 8K resolution provides ample detail for close-up renders and large wall coverage without noticeable pixelation. The seamless pattern facilitates tileable application preventing visible seams on expansive surfaces and enabling smooth continuous wall finishes. Users can adjust the UV scale to balance pattern repetition and fabric detail according to room size and viewing distance. Additionally roughness levels can be subtly modified to simulate varying degrees of fabric wear or finishing treatments while blending Height and Normal maps helps achieve optimal parallax and tactile depth effects in real-time engines.
This wallpaper texture is ideal for interior visualization projects that require a natural understated textile appearance. Its minimalist woven cotton form introduces soft structural elements that complement contemporary aesthetics without overpowering other design components. When applying this texture consider fine-tuning the roughness map to match environmental lighting conditions and experiment with UV scaling to maintain the integrity of the fabric’s weave pattern at different wall dimensions ensuring a realistic and immersive material presentation.
Import the texture maps into Blender with sRGB color space for albedo/base color and Non-Color for normal, roughness, metallic, AO, height, and ORM maps. Connect normal maps through a Normal Map node, then adjust UV scale with a Mapping node so the material repeats naturally on your model.
For the full step-by-step setup, see How to Use Seamless Textures in Blender. Browse related material examples in wood, concrete, and metal.
Yes. This texture is designed as a seamless tileable PBR material, so it can repeat across large surfaces without visible borders.
You can download PNG/WEBP versions and use 1K, 2K, 4K and 8K download options when available on the page.
Yes. The download options and engine-mapped ZIP workflow are designed for Blender, Unreal Engine, Unity Standard, URP and HDRP material pipelines.
Yes. The texture is available under the AITextured free commercial license. Review the license page for redistribution and AI-training restrictions.


Generate, preview, and export seamless PBR materials for Blender, Unity, and Unreal Engine—directly in your browser.
AI text-to-texture: type a prompt and get a seamless, tileable base image ready for PBR workflows (great starting point for materials).
Create a full PBR set (Normal, Roughness, AO, Metallic, etc.) from a single image. Seamless and tiling-friendly.
Instant WebGL viewer: inspect materials on a sphere, plane, and cube. Check tiling and lighting in real time.
Re-packages maps per engine: Unreal (BaseColor + ORM), Unity (Mask/MetallicSmoothness), Blender (separate channels).
PNG ↔ JPG ↔ SVG: fast convert, SVG rasterize, embed/trace options, quality & background controls.